


naughtyG
Well-Known Member
Following to Gary's (Buster) thread on how to remove the gas tank,
http://www.vmaxforum.net/showthread.php?t=9885
I thought it would be useful to see how to put it all back in for those who weren't too sure!
So here goes, in pictures:
Having resprayed (rattle can) my tank, I started by fitting the fuel gauge sender unit:
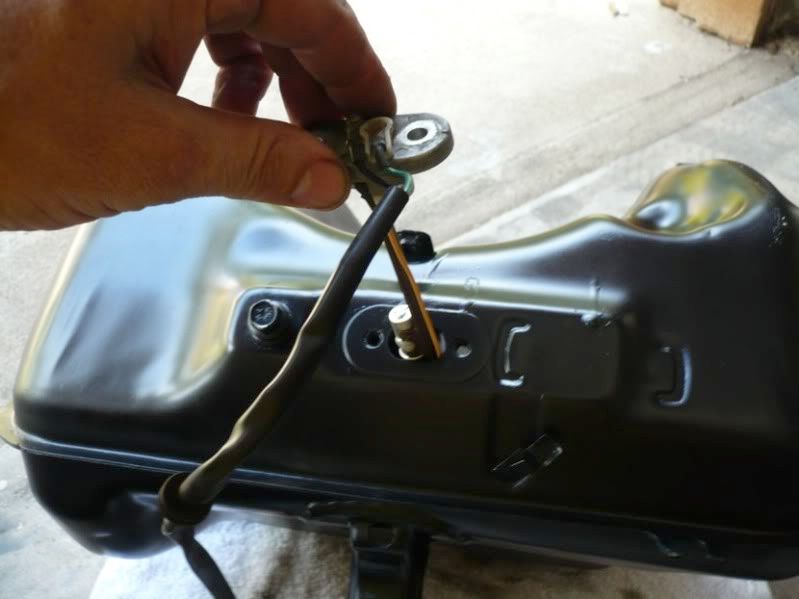
Tighten both bolts (green arrows) and route the wires through the tab and attach the rubber grommet (pink arrows)
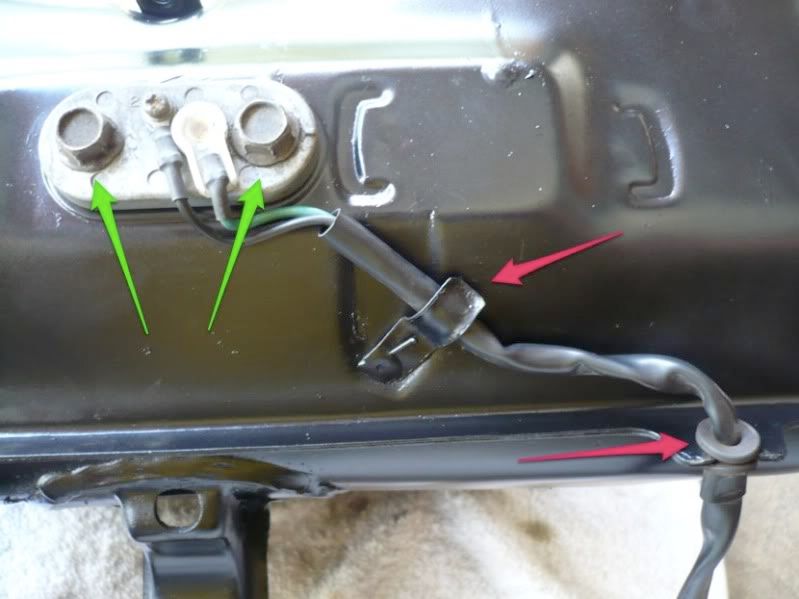
Make sure the drain bolt is tight!

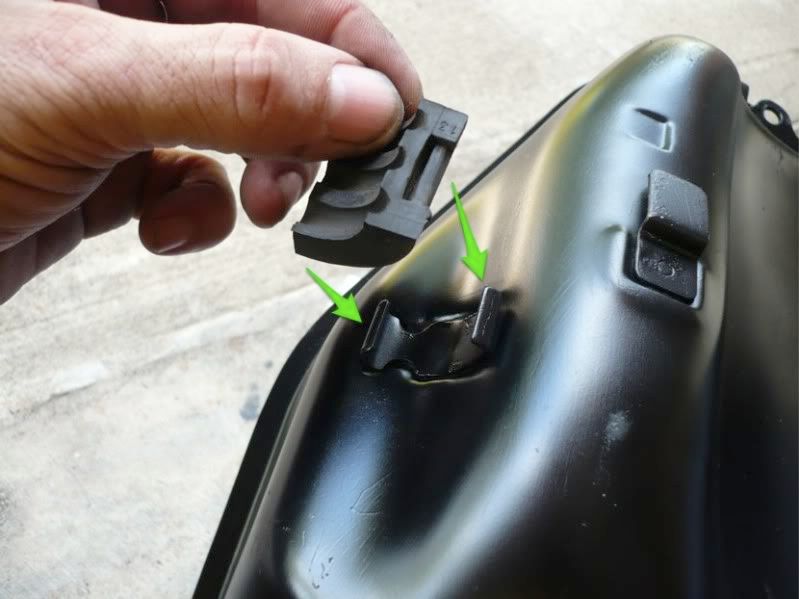
Attach the main grommet at the front of the tank:
There it is in place:
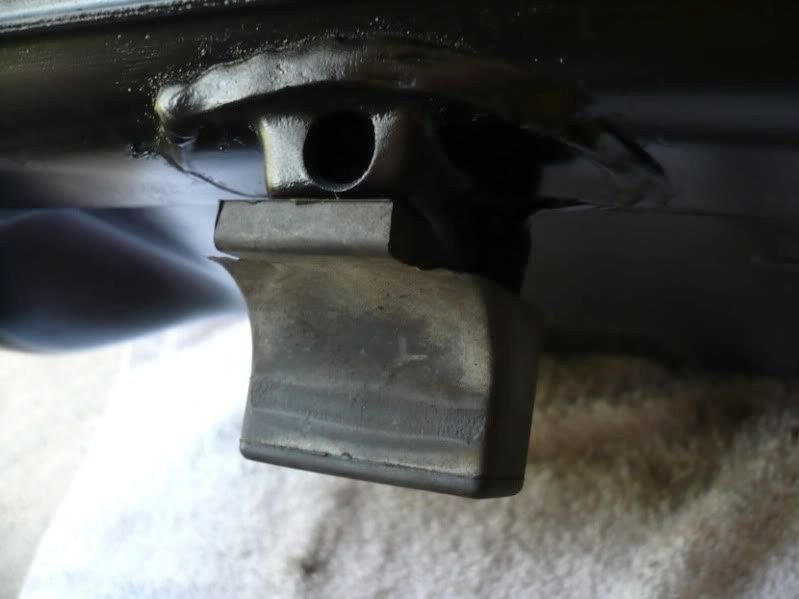
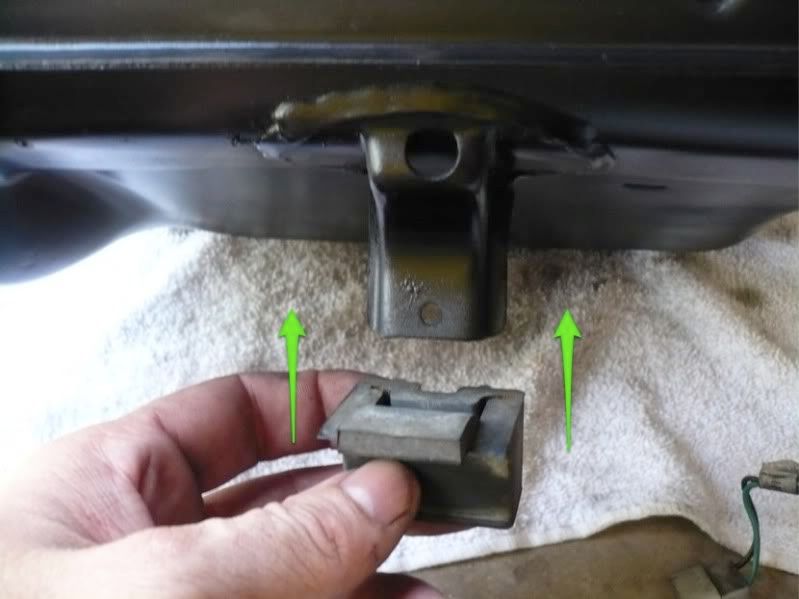
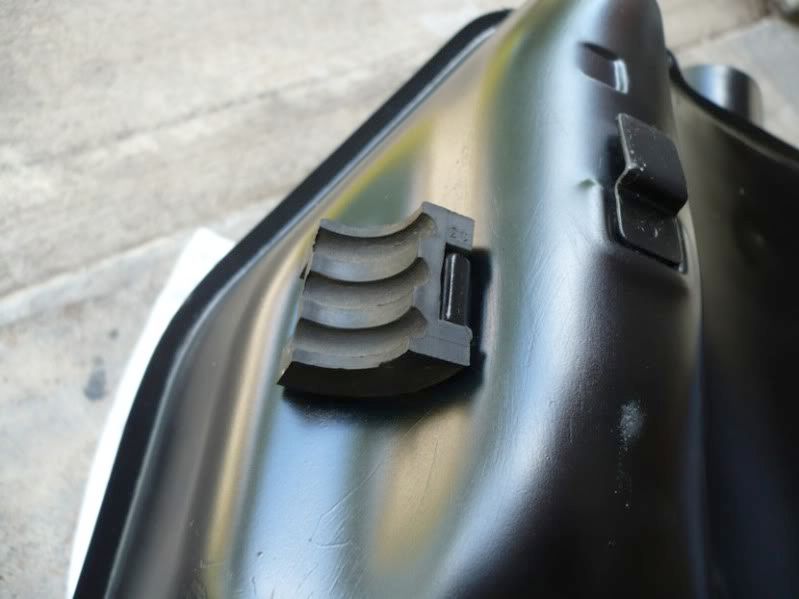
Attach both side grommets or the tank will rattle..
Left in place...
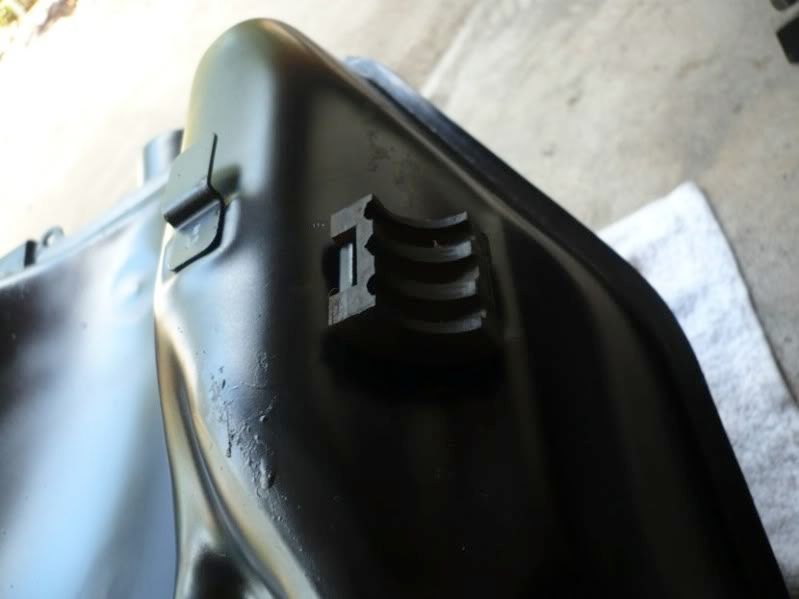
...and the right:
Time to attach the inner fender to the tank:
There is is in place, tighten that bottom screw (I know, should've got another SS allen head):
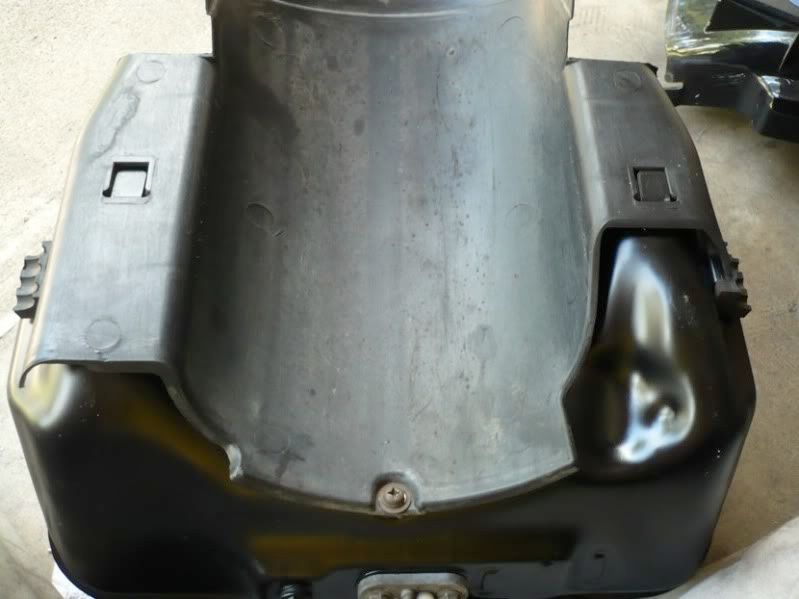
Top of the tank:

Make sure the breeder tube hole is open (especially after respray):
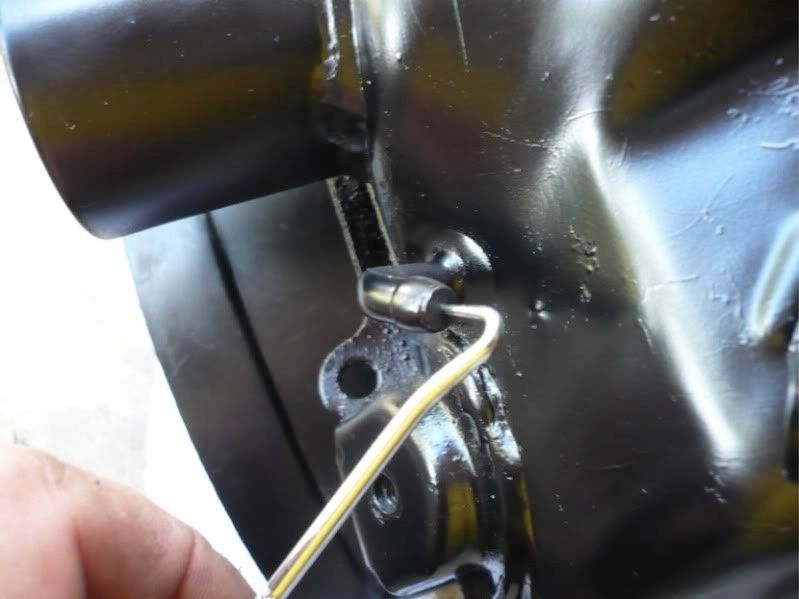
Attach the main fuel line and secure its clip:
at this point it would be best to install the fuel filter if you're using the OEM item - it's very tight and a PITA to get in/out once the tank is in! I have one of those glass ones and it's a bit slimmer so left it for now, just installed its rubber holder:
Time to install the tank. Notice that I did move my rear wheel - tank won't go in or out otherwise:
All cleaned up and ready for the tank:
Let's slide that tank in there....

...and here it is in place. Make sure that arrowed rubber is snug on the frame on the other side!
Here's that rubber on the other side (arrowed), also make sure the fuel gauge sender wiring is routed properly:
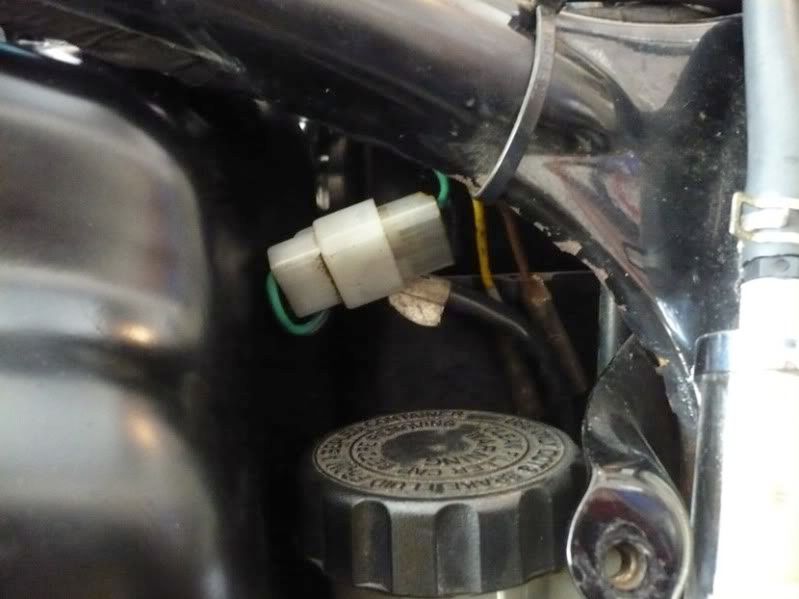
Plug in the fuel gauge sender, and tuck the connection away.
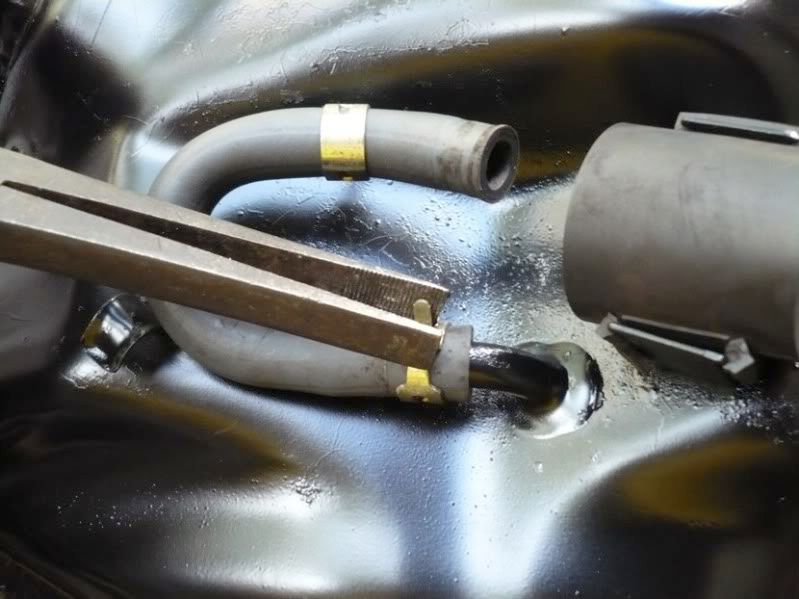
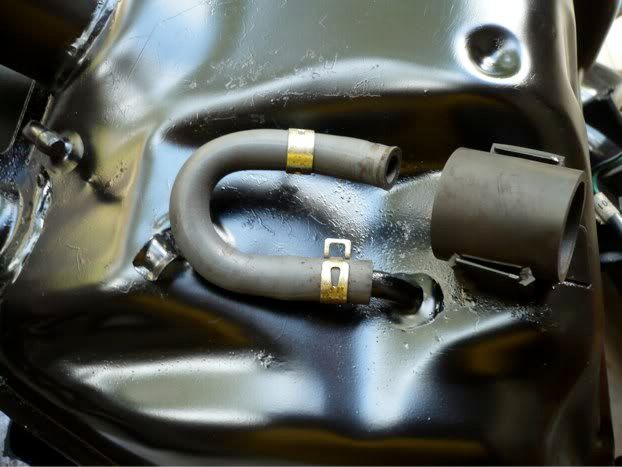
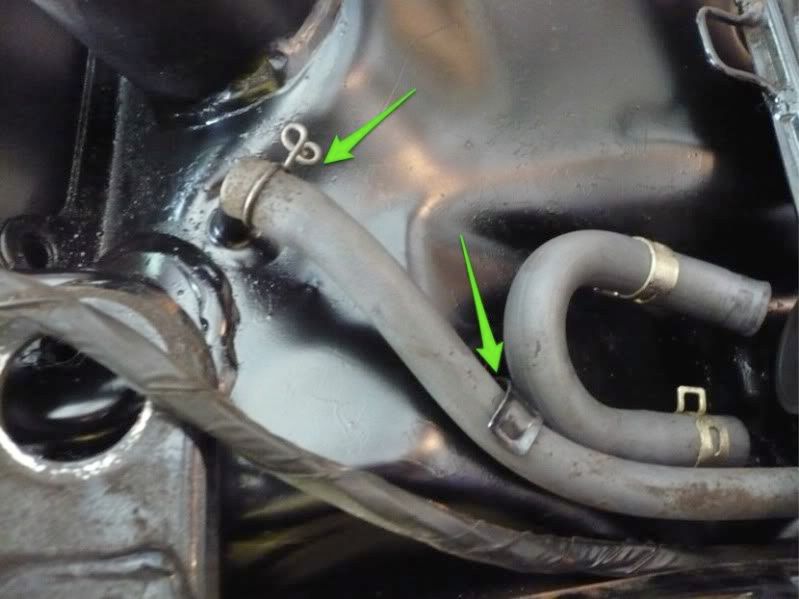
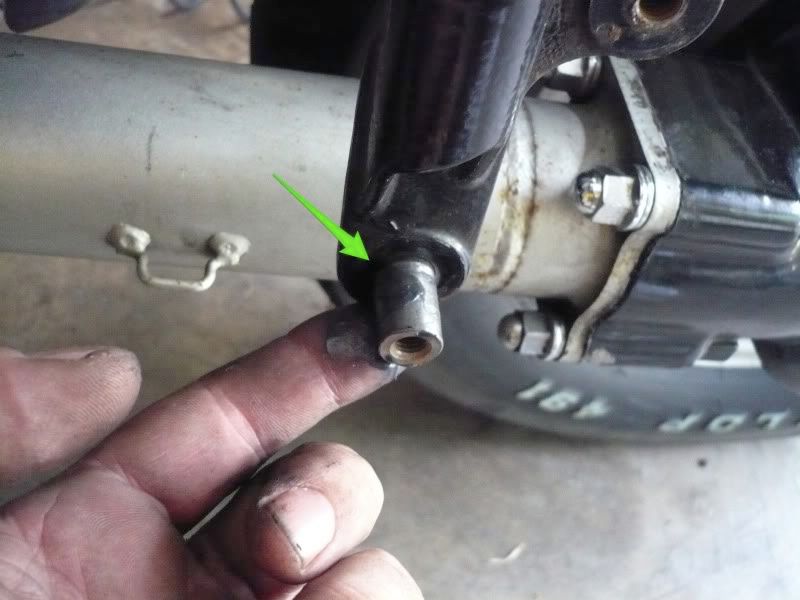
Time to reconnect the tank breeder hose. Make sure the clip is secure, and the hose is held by the metal tab (arrowed):
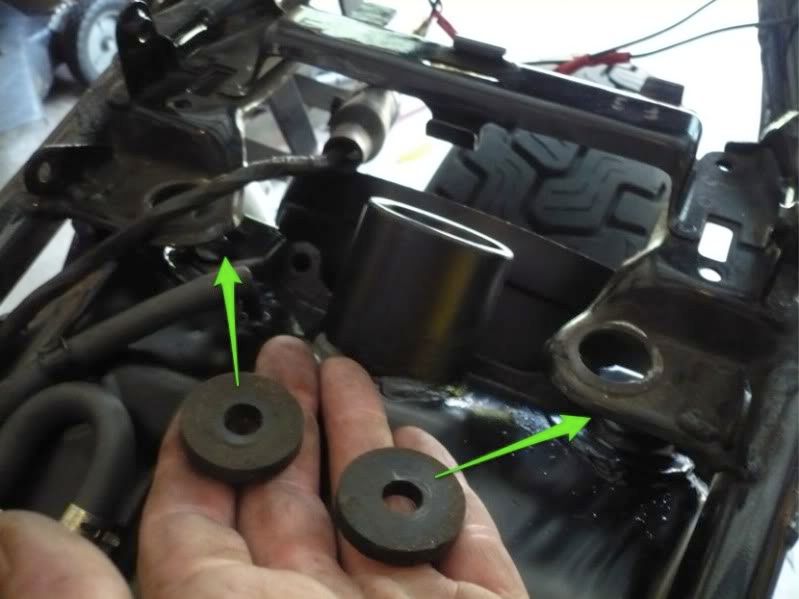
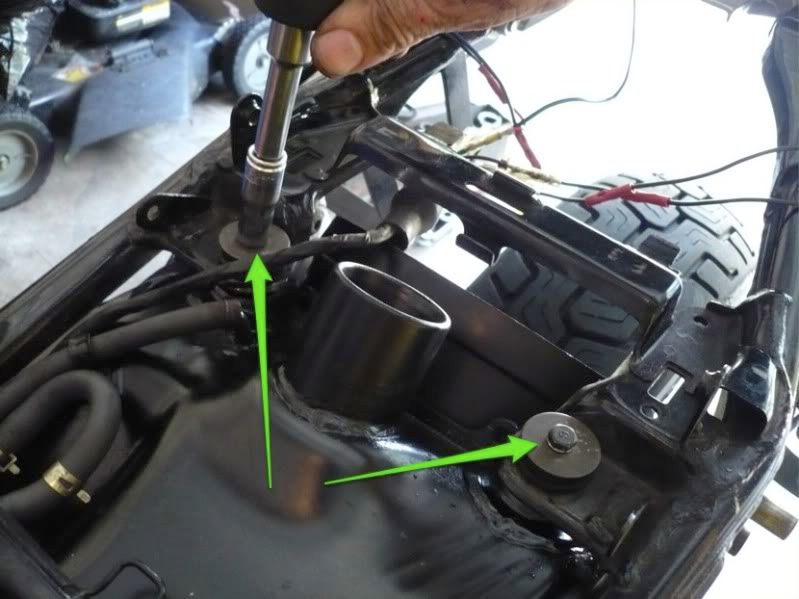
Place arrowed rubber washers on tank and under the frame:
Insert the bolts/rubber/spacer as shown...
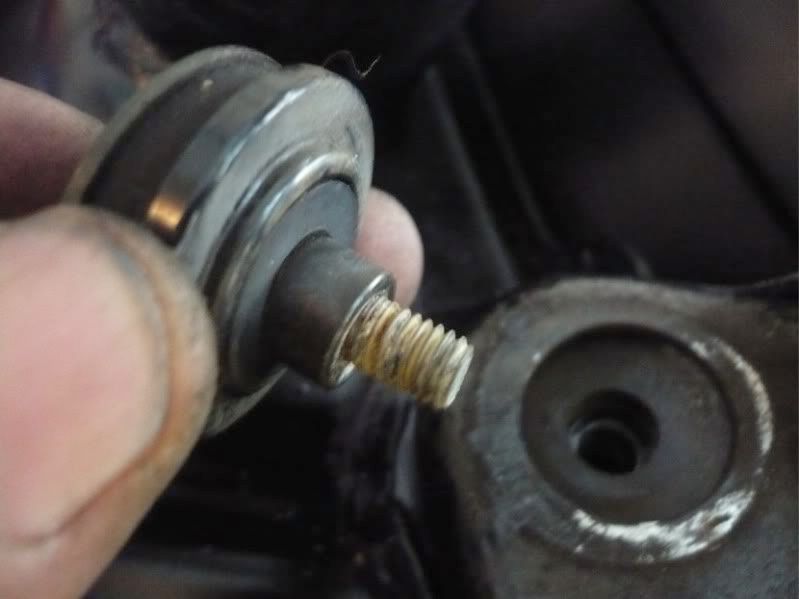
...and tighten both:
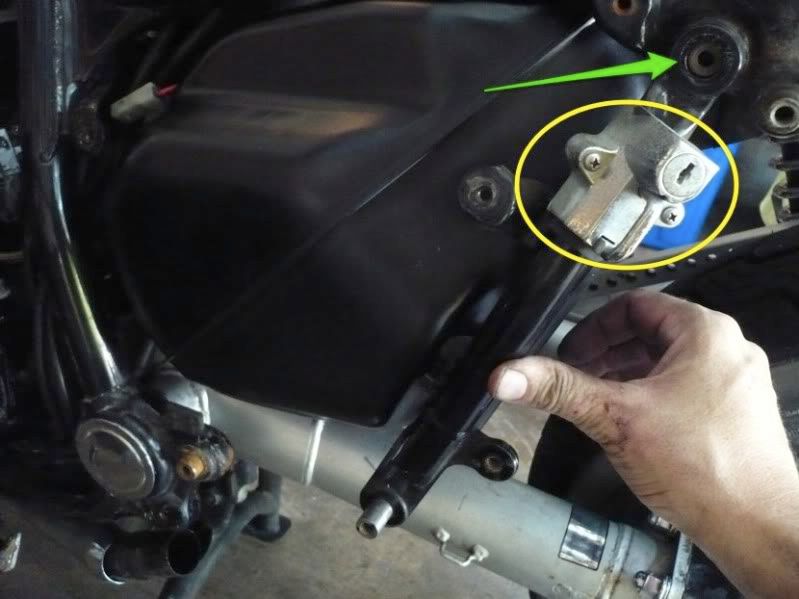
Refit the subframe tube onto arrowed dowel (circled helmet holder is aftermarket I believe - you may not have that):
I noticed the front post holding the Rectifier/Regulator and left pillion peg assembly was rusty:
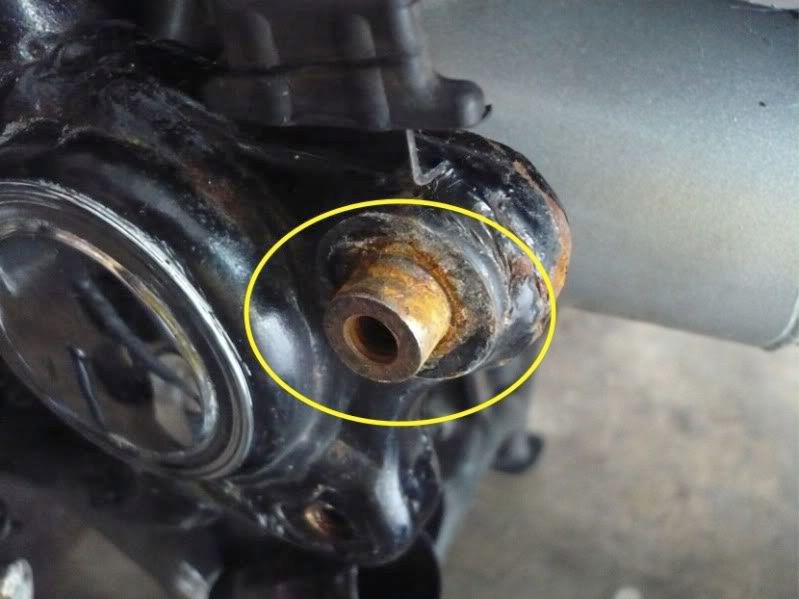
So I cleaned it up and put a little grease on it...
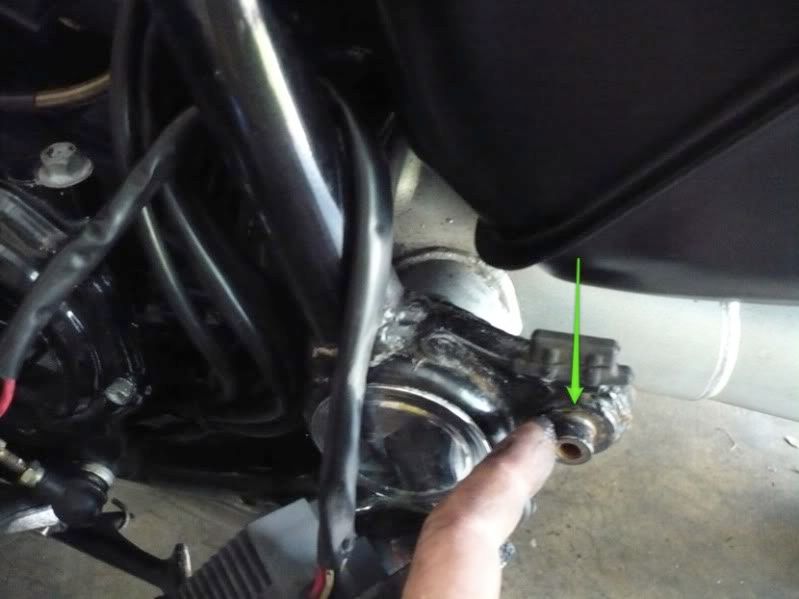
...as well as on the rear one (bottom of sub-frame) to facilitate future disassembly:
Let's feed the R/R wiring between the frame and the tank:
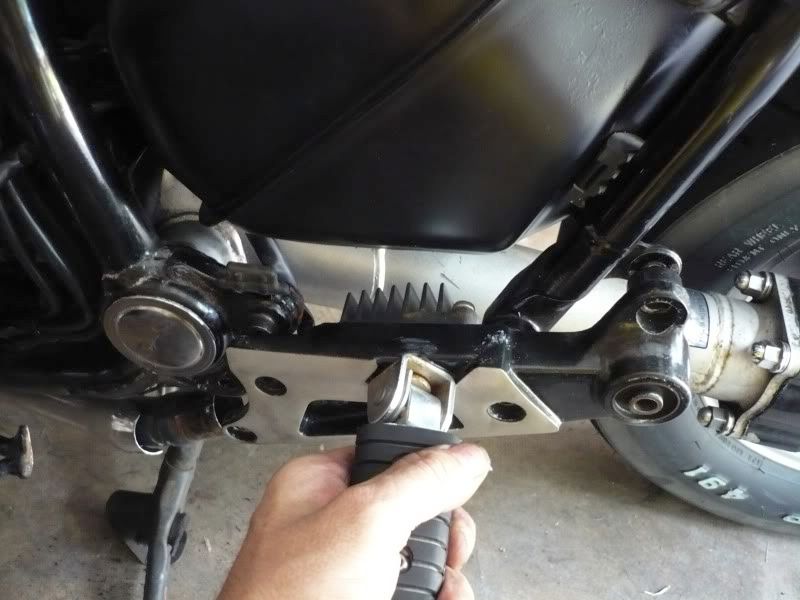
Then offer the R/R and peg assembly back:
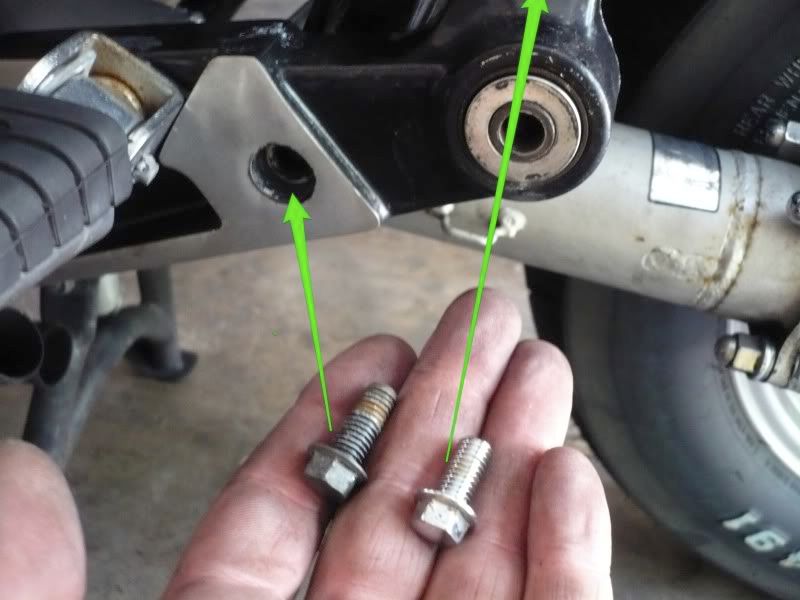
Two bolts at the front (notice long and short)...
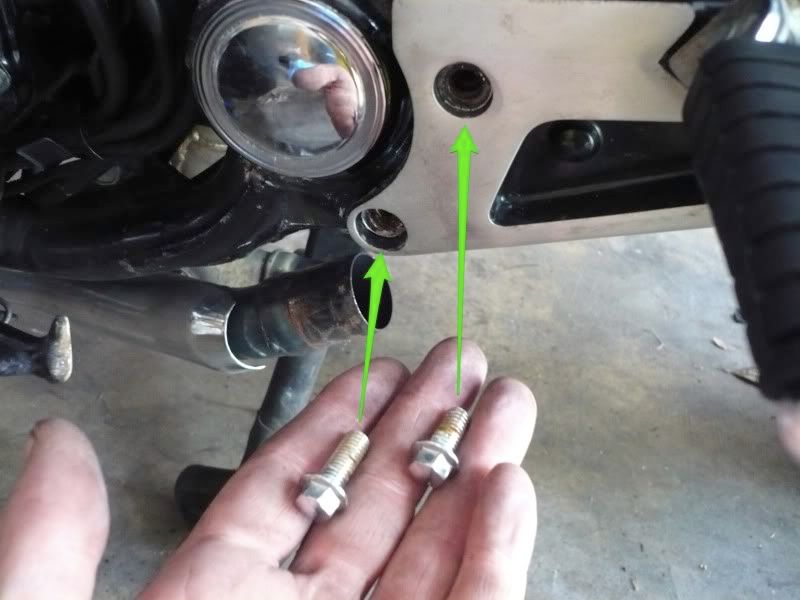
...and two at the back (again notice different lengths:
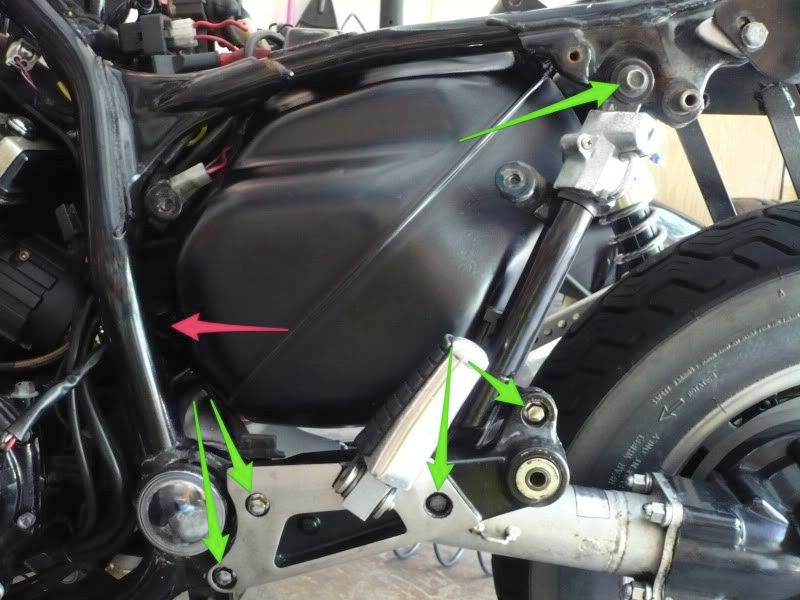
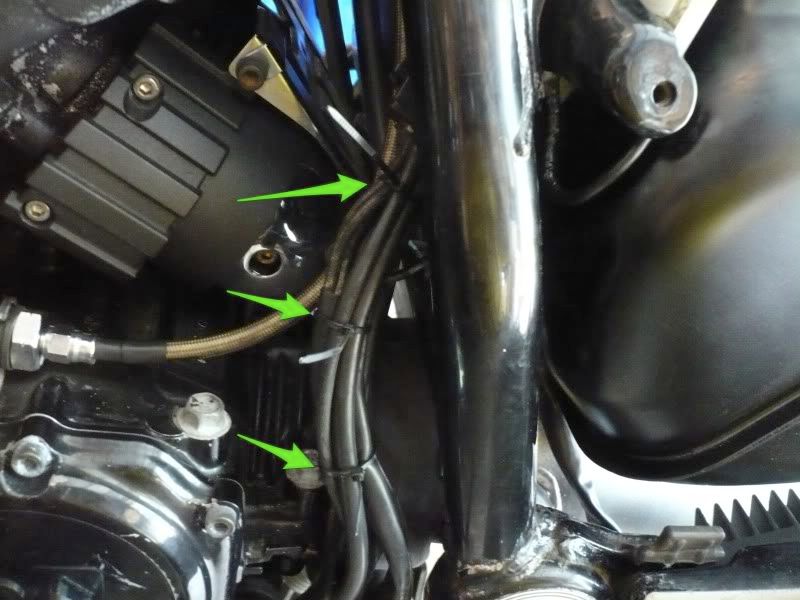
Tighten all five (green) arrowed bolts, and notice R/R wiring route:
My R/R ground (black) lead has a large gauge wire soldered onto it:
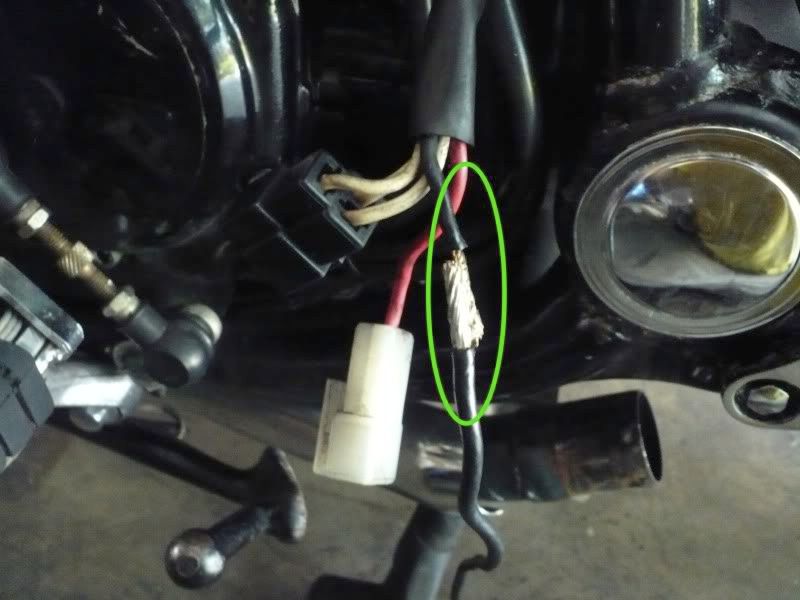
I took this opportunity to re-insulate it:
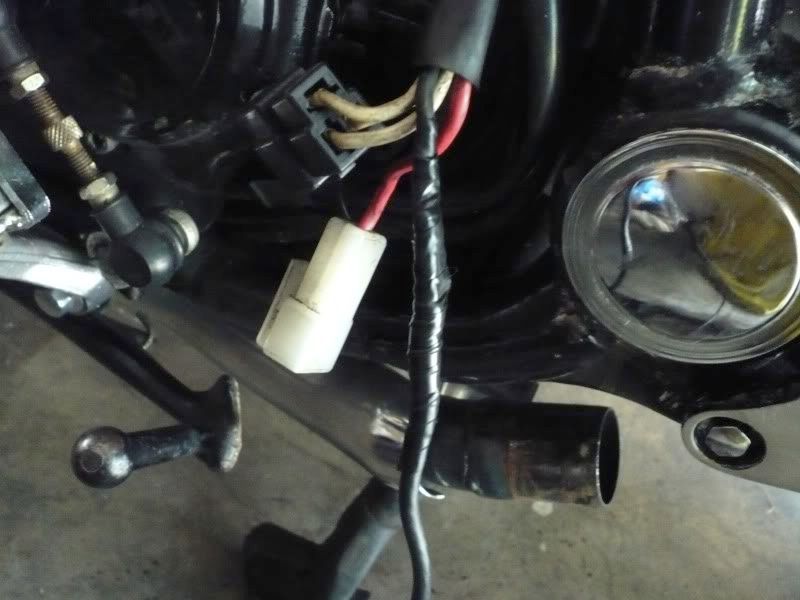
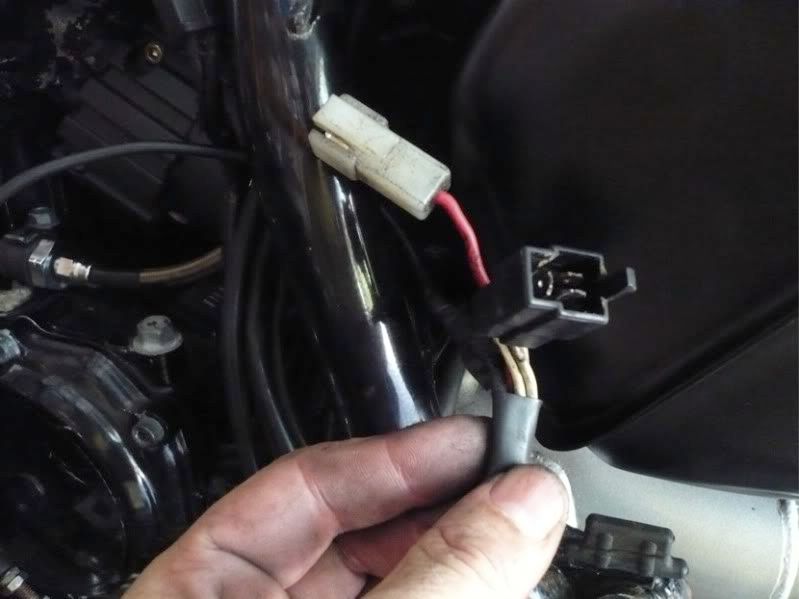
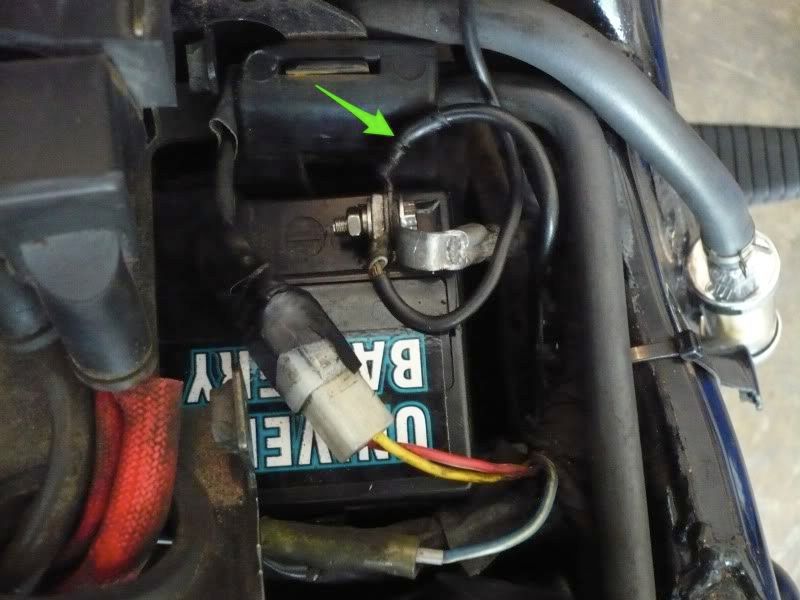
I then fed it all the way back to the battery (-) connector, and then reconnected the R/R wiring (arrowed):

Here's my R/R ground wire on the battery (-). Also notice I am using a Panasonic Gel battery so my terminals are different from the OEM Yuasa:
Time for a few cable ties before tucking the wiring away..
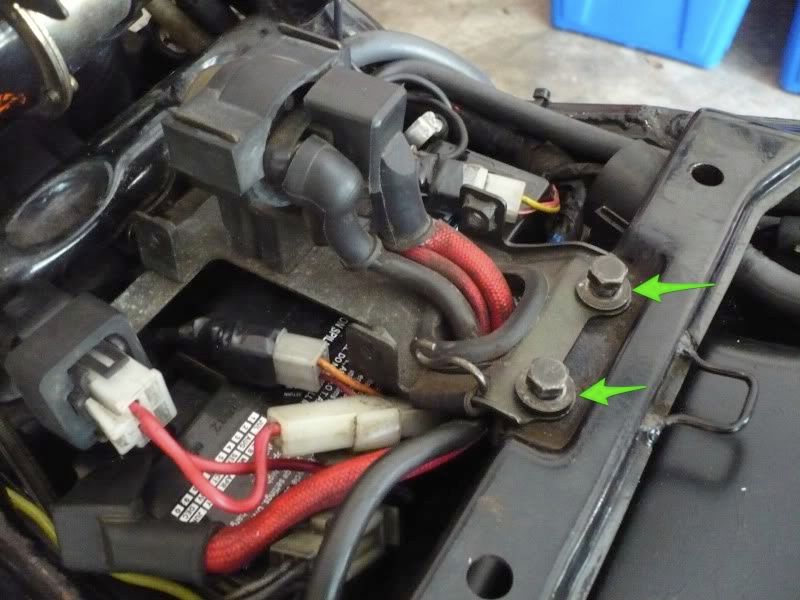
..and then I refitted my coils holder, which I'd removed to allow routing of the R/R ground wire. Notice there are no coils - I am running COPs:
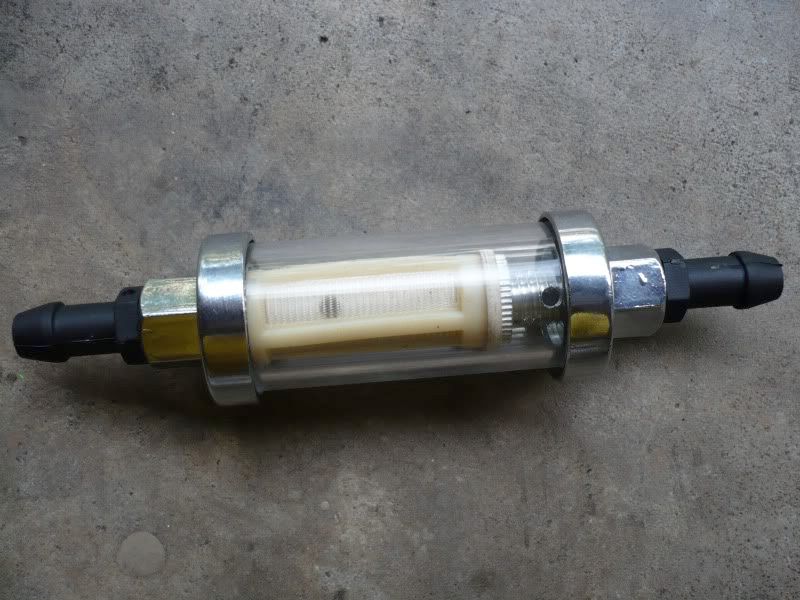
Here's my clear (glass) fuel filter with renewable element, which I'm going to swap back to OEM, because I think the holes in the element are too big:
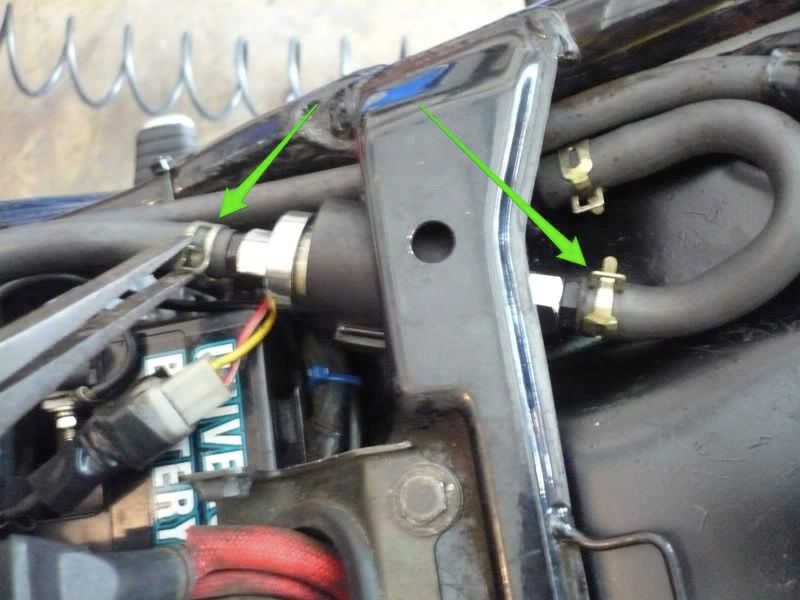
Fit the fuel filter, making sure its arrow showing fuel flow points the right way, and ensure the (arrowed) clips are secure:
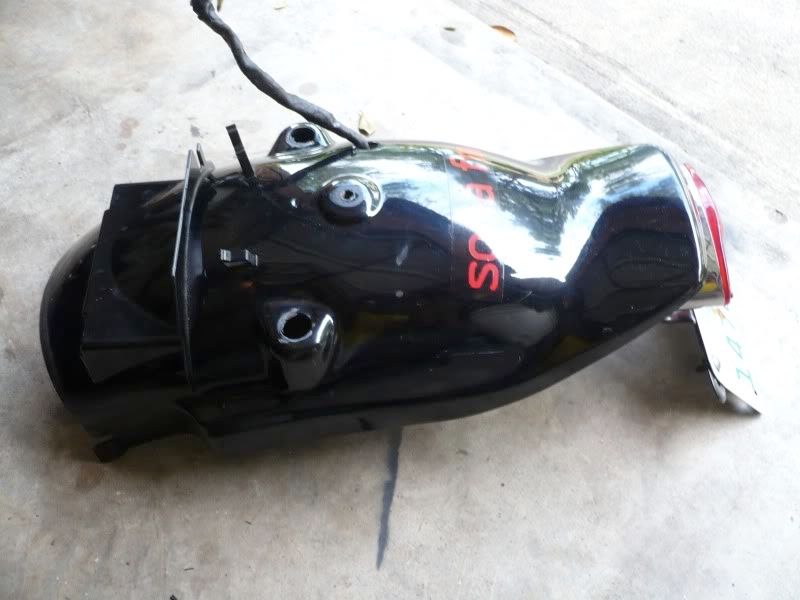
Time to refit the rear fender. Mine may look slightly different as it is the shorter (aftermarket) version with custom sticker and tail light:
On the frame there should be two rubber grommets, mine were perished:
So I used electrical tape to cover the metal and stop the fender rattling:
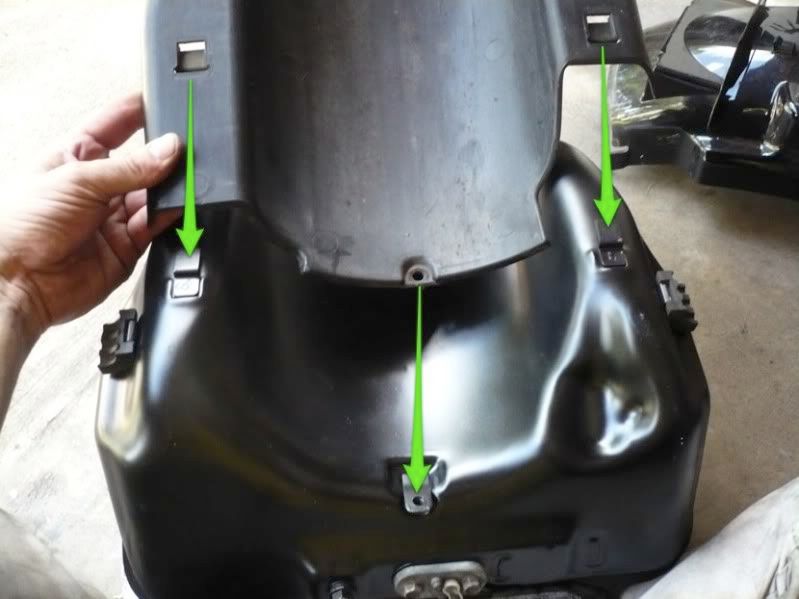
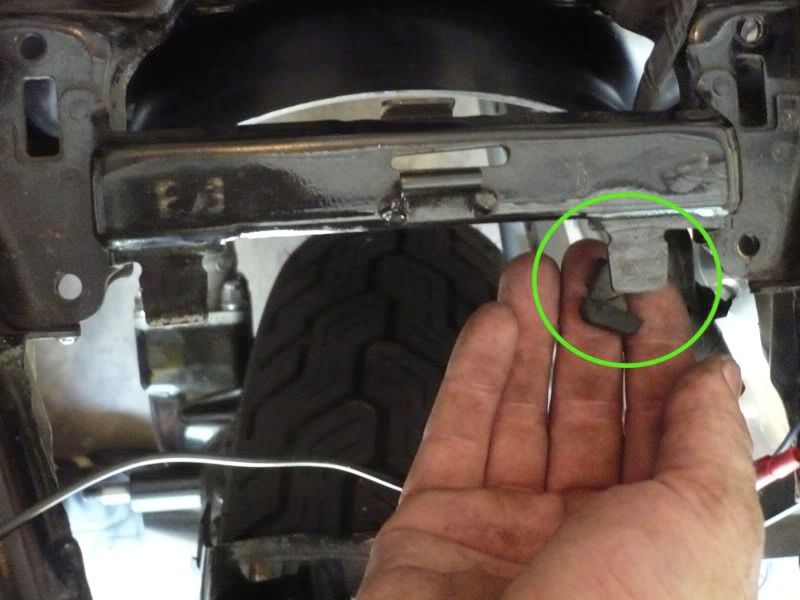
The fender has two holes and two tabs (all arrowed) that hold it in place at the front:
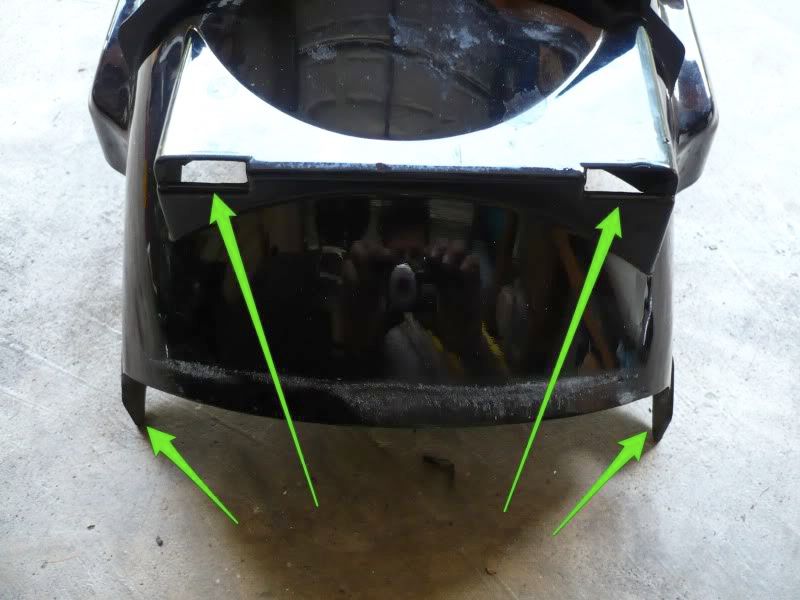
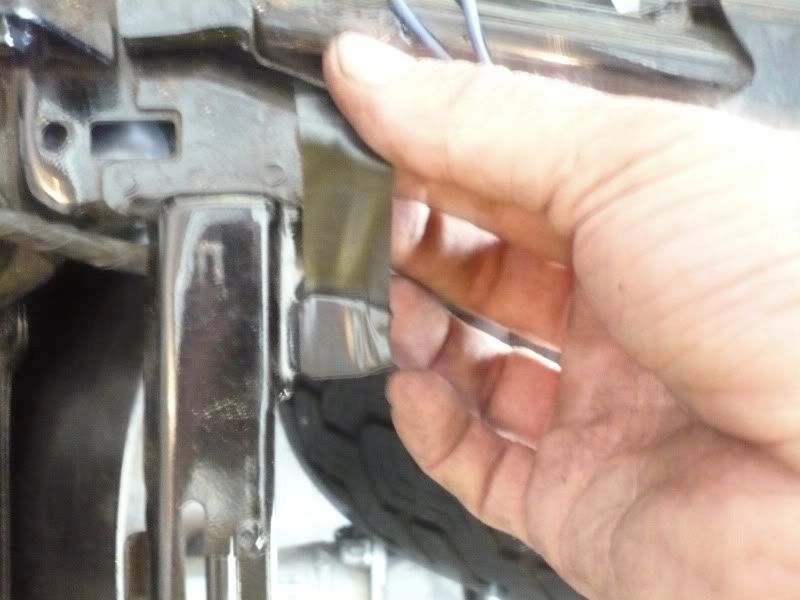
Here it is in place, showing the frame tabs (where the rubber grommets should be) in the fender slots:

Holding the fender in place, insert the three retaining bolts from underneath, and secure with the nuts above (arrowed):
Reconnect the tail light's wiring:
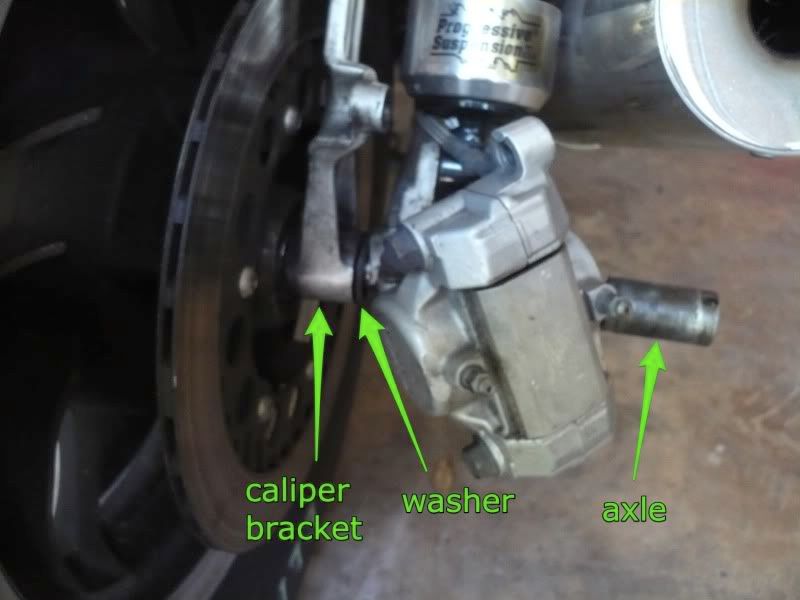
Time to slot the rear wheel back onto the drive shaft..
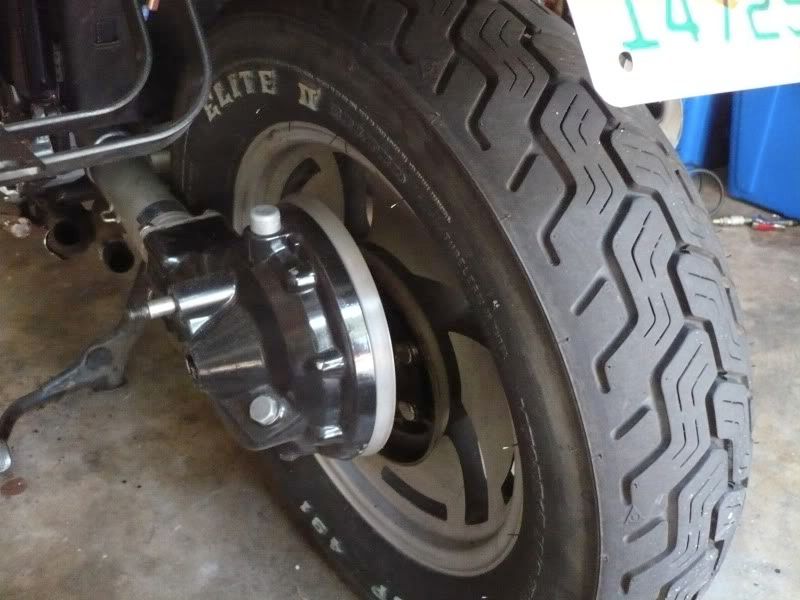
..then insert the wheel axle through the swingarm, washer, caliper bracket and then wheel:
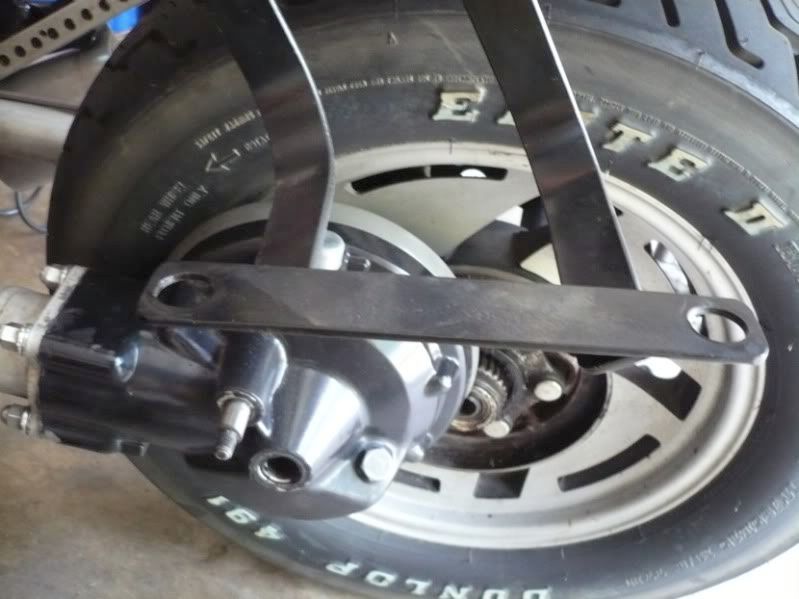
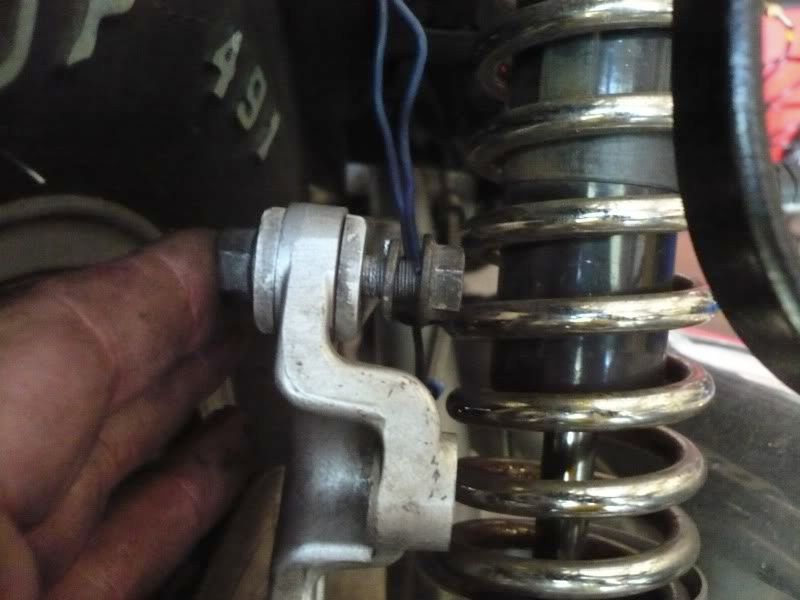
Re-attach the torque arm to the caliper bracket...
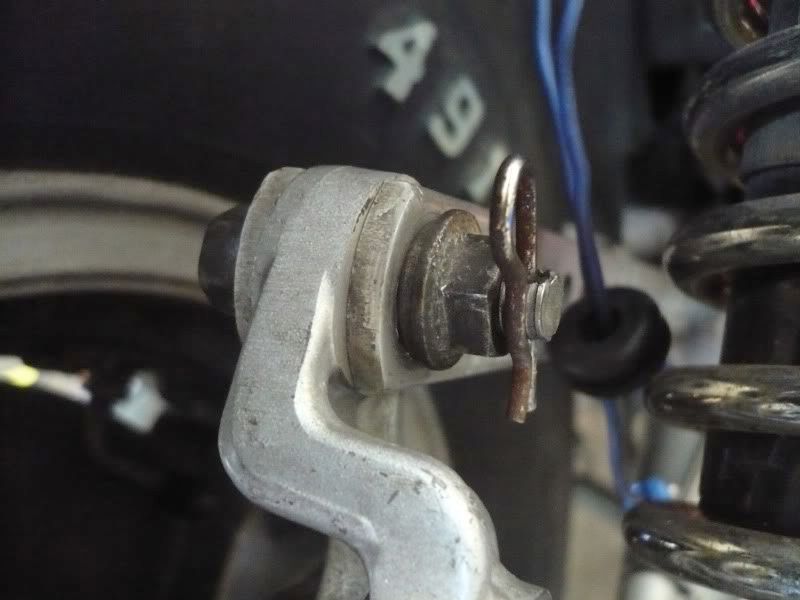
...and tighten and insert the locking pin:
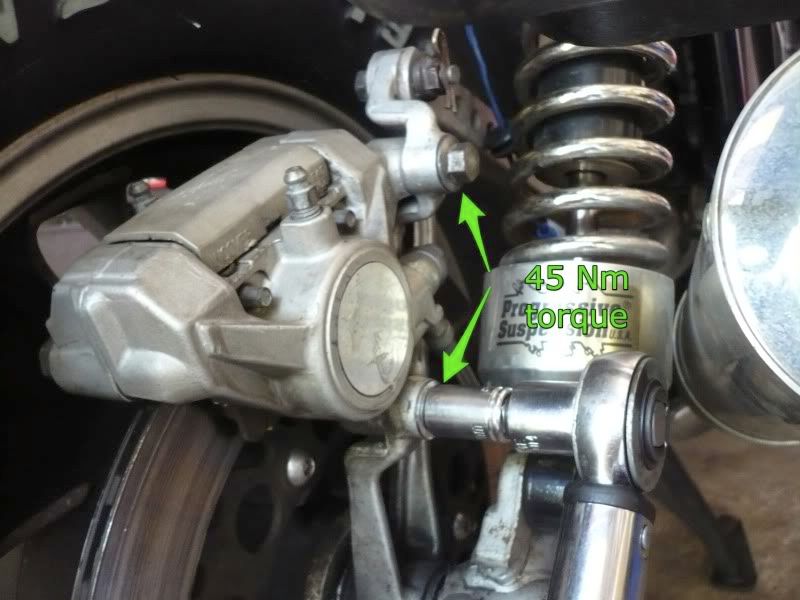
Slide the rear brake caliper over the rotor, and insert caliper bolts..
... then torque to spec:
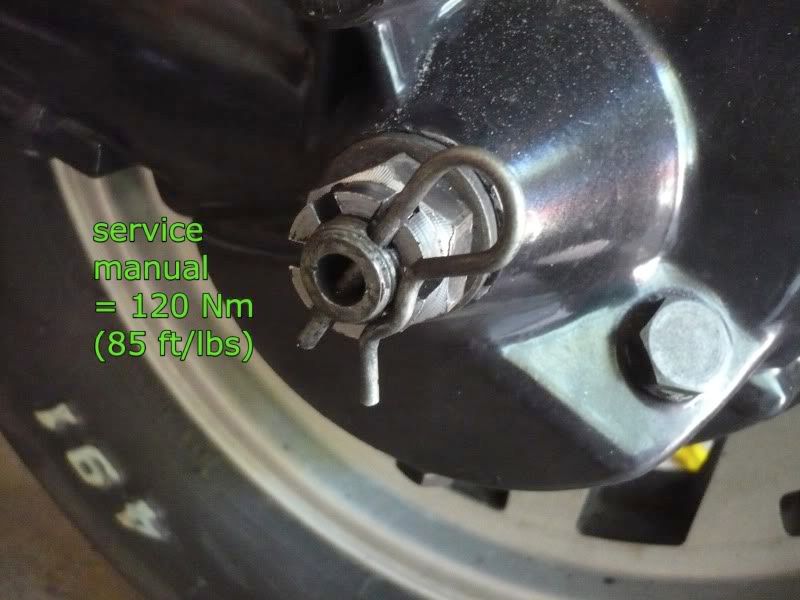
Refit rear wheel axle nut and washer...
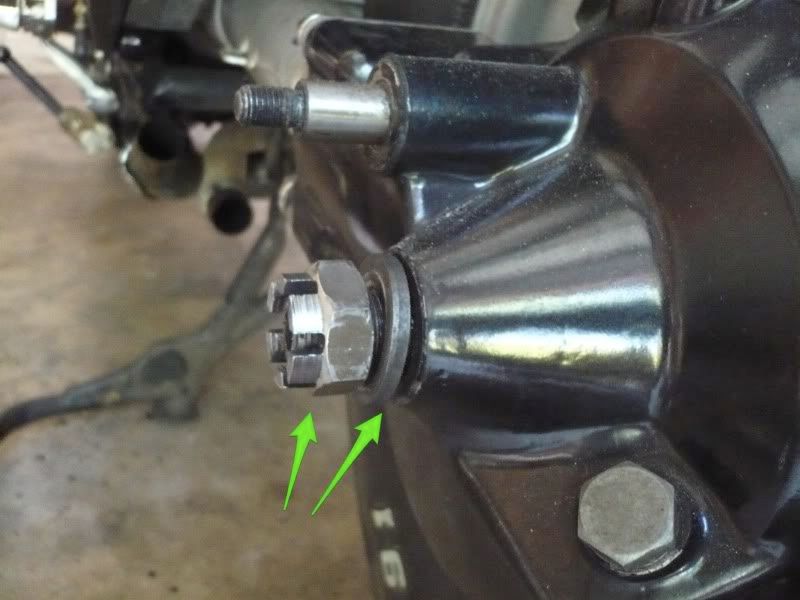
..and torque according to preference, making sure holes line up so you can insert the securing pin. I used 80 Nm this time..
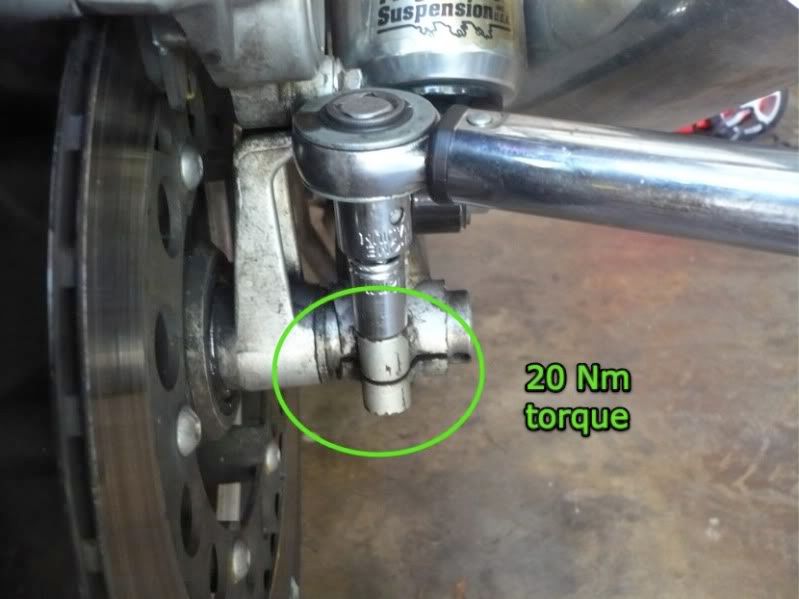
Then secure the pinch bolt on the right hand side and torque to spec:
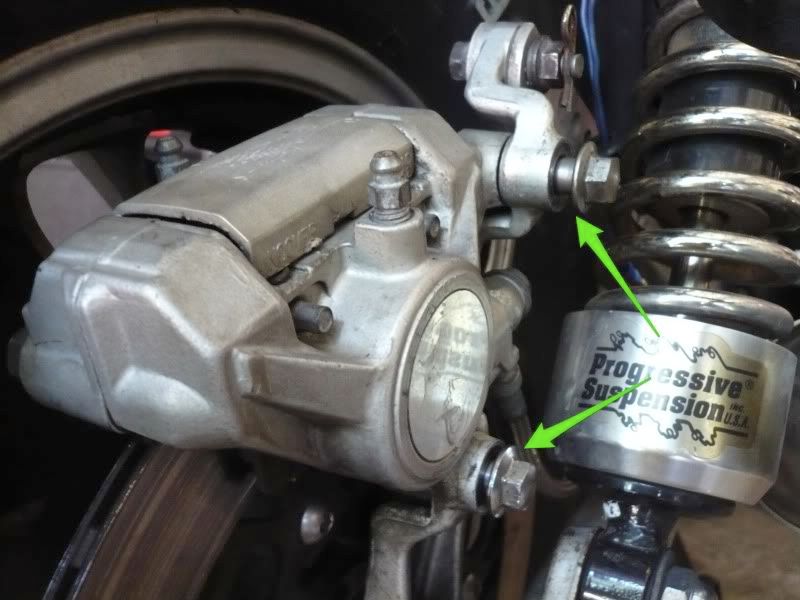
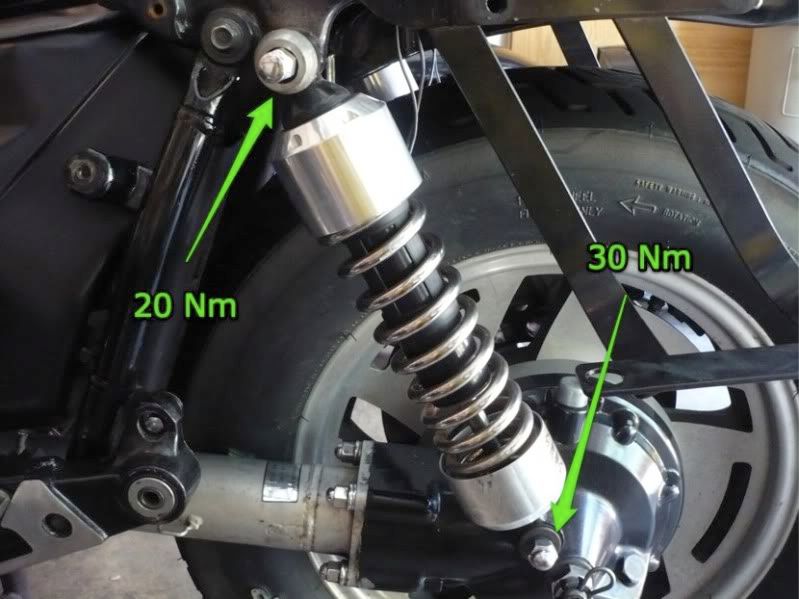
Refit the shock absorber (Progressive 440 shown) and torque to spec:
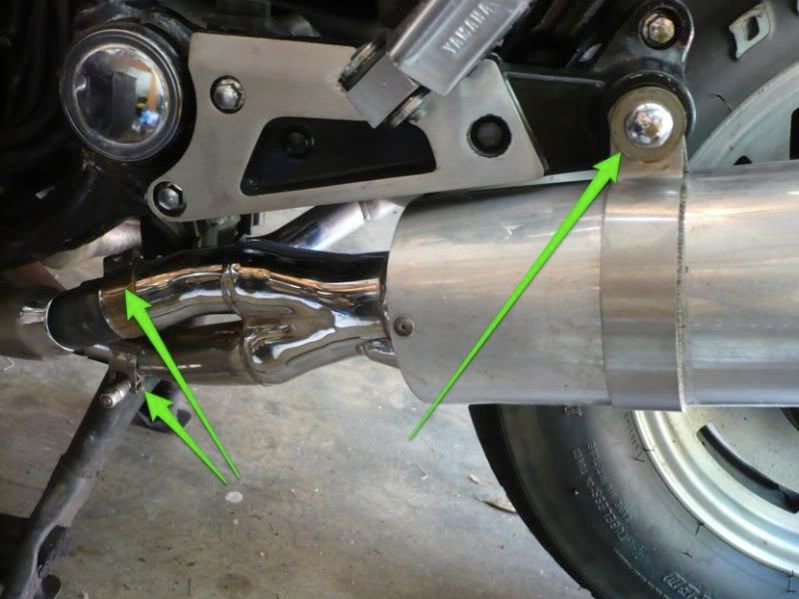
Refit your exhaust - for me it's was dead easy as I'm using Jardines slip-ons - it may be a little more work if yours are the OEM items..
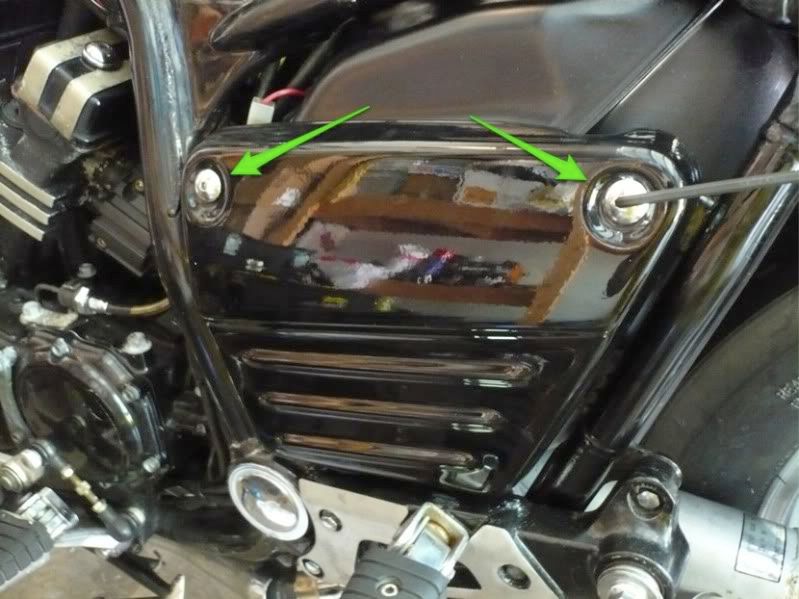
and finally refit the side cover:
All that's left is to refit your seat, faux-tank cover etc, and the job is done! :clapping: unk:
unk:
http://www.vmaxforum.net/showthread.php?t=9885
I thought it would be useful to see how to put it all back in for those who weren't too sure!
So here goes, in pictures:
Having resprayed (rattle can) my tank, I started by fitting the fuel gauge sender unit:
Tighten both bolts (green arrows) and route the wires through the tab and attach the rubber grommet (pink arrows)
Make sure the drain bolt is tight!
Attach the main grommet at the front of the tank:
There it is in place:
Attach both side grommets or the tank will rattle..
Left in place...
...and the right:
Time to attach the inner fender to the tank:
There is is in place, tighten that bottom screw (I know, should've got another SS allen head):
Top of the tank:
Make sure the breeder tube hole is open (especially after respray):
Attach the main fuel line and secure its clip:
at this point it would be best to install the fuel filter if you're using the OEM item - it's very tight and a PITA to get in/out once the tank is in! I have one of those glass ones and it's a bit slimmer so left it for now, just installed its rubber holder:
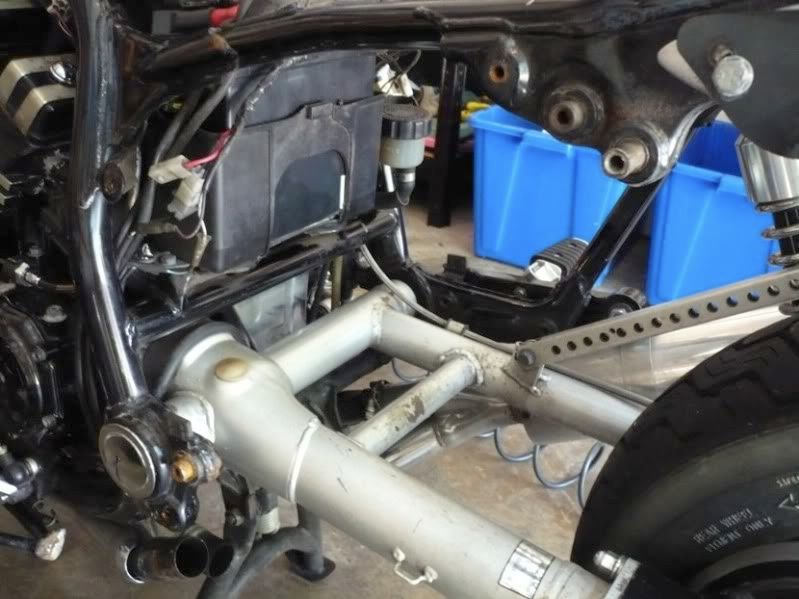
Time to install the tank. Notice that I did move my rear wheel - tank won't go in or out otherwise:
All cleaned up and ready for the tank:
Let's slide that tank in there....
...and here it is in place. Make sure that arrowed rubber is snug on the frame on the other side!
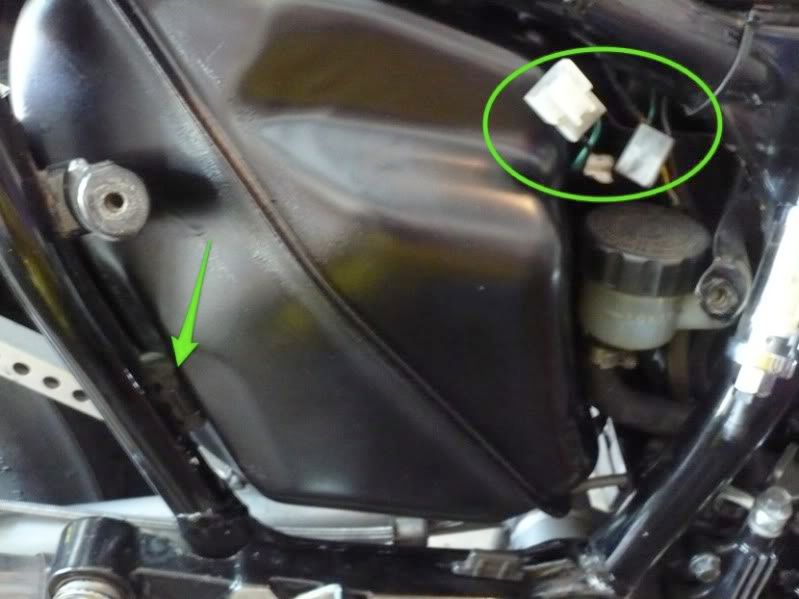
Here's that rubber on the other side (arrowed), also make sure the fuel gauge sender wiring is routed properly:
Plug in the fuel gauge sender, and tuck the connection away.
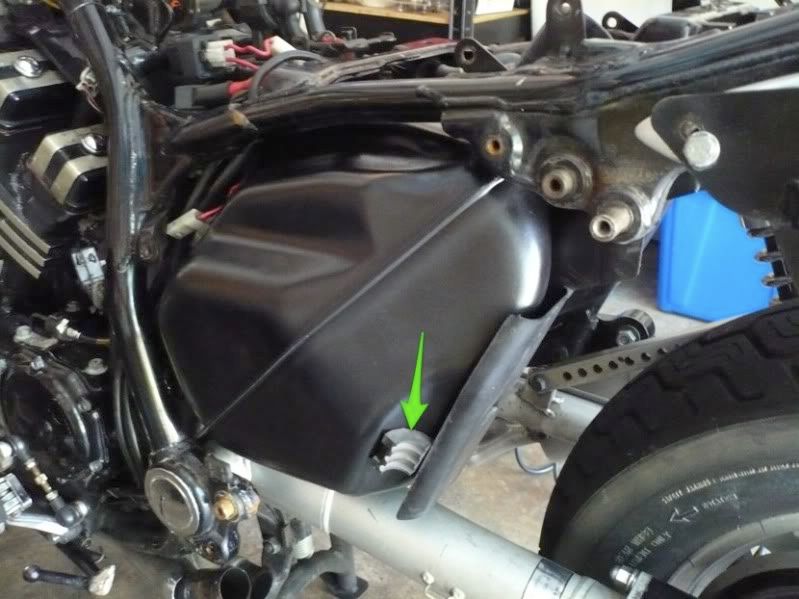
Time to reconnect the tank breeder hose. Make sure the clip is secure, and the hose is held by the metal tab (arrowed):
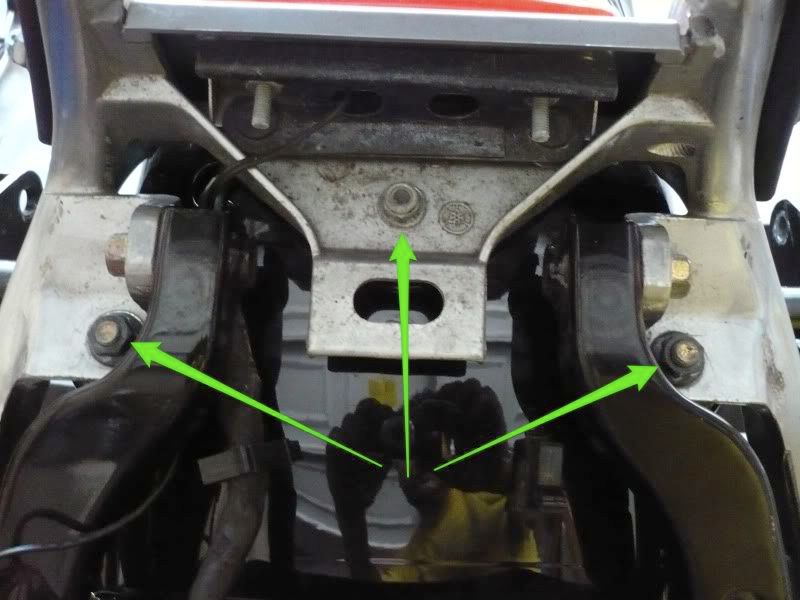
Place arrowed rubber washers on tank and under the frame:
Insert the bolts/rubber/spacer as shown...
...and tighten both:
Refit the subframe tube onto arrowed dowel (circled helmet holder is aftermarket I believe - you may not have that):
I noticed the front post holding the Rectifier/Regulator and left pillion peg assembly was rusty:
So I cleaned it up and put a little grease on it...
...as well as on the rear one (bottom of sub-frame) to facilitate future disassembly:
Let's feed the R/R wiring between the frame and the tank:
Then offer the R/R and peg assembly back:
Two bolts at the front (notice long and short)...
...and two at the back (again notice different lengths:
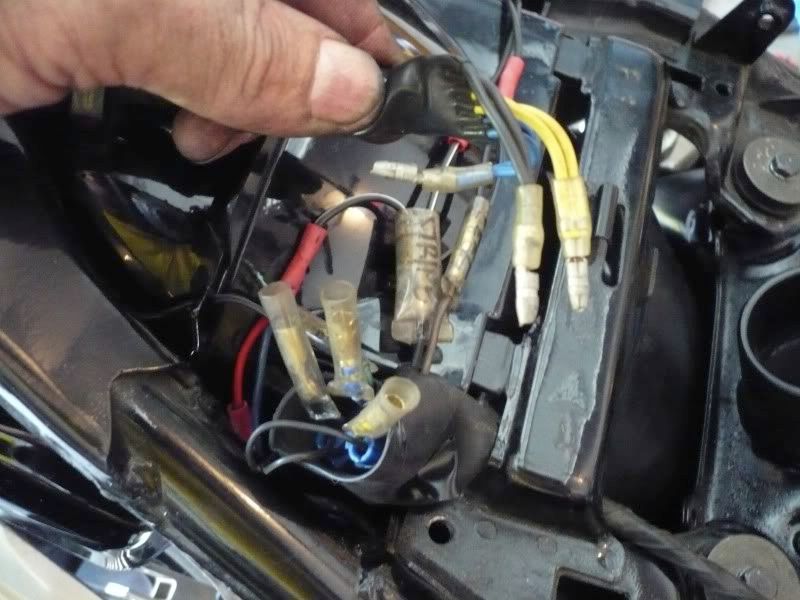
Tighten all five (green) arrowed bolts, and notice R/R wiring route:
My R/R ground (black) lead has a large gauge wire soldered onto it:
I took this opportunity to re-insulate it:
I then fed it all the way back to the battery (-) connector, and then reconnected the R/R wiring (arrowed):
Here's my R/R ground wire on the battery (-). Also notice I am using a Panasonic Gel battery so my terminals are different from the OEM Yuasa:
Time for a few cable ties before tucking the wiring away..
..and then I refitted my coils holder, which I'd removed to allow routing of the R/R ground wire. Notice there are no coils - I am running COPs:
Here's my clear (glass) fuel filter with renewable element, which I'm going to swap back to OEM, because I think the holes in the element are too big:
Fit the fuel filter, making sure its arrow showing fuel flow points the right way, and ensure the (arrowed) clips are secure:
Time to refit the rear fender. Mine may look slightly different as it is the shorter (aftermarket) version with custom sticker and tail light:
On the frame there should be two rubber grommets, mine were perished:
So I used electrical tape to cover the metal and stop the fender rattling:
The fender has two holes and two tabs (all arrowed) that hold it in place at the front:
Here it is in place, showing the frame tabs (where the rubber grommets should be) in the fender slots:
Holding the fender in place, insert the three retaining bolts from underneath, and secure with the nuts above (arrowed):
Reconnect the tail light's wiring:
Time to slot the rear wheel back onto the drive shaft..
..then insert the wheel axle through the swingarm, washer, caliper bracket and then wheel:
Re-attach the torque arm to the caliper bracket...
...and tighten and insert the locking pin:
Slide the rear brake caliper over the rotor, and insert caliper bolts..
... then torque to spec:
Refit rear wheel axle nut and washer...
..and torque according to preference, making sure holes line up so you can insert the securing pin. I used 80 Nm this time..
Then secure the pinch bolt on the right hand side and torque to spec:
Refit the shock absorber (Progressive 440 shown) and torque to spec:
Refit your exhaust - for me it's was dead easy as I'm using Jardines slip-ons - it may be a little more work if yours are the OEM items..
and finally refit the side cover:
All that's left is to refit your seat, faux-tank cover etc, and the job is done! :clapping:
unk: