ZackDaniels
Well-Known Member
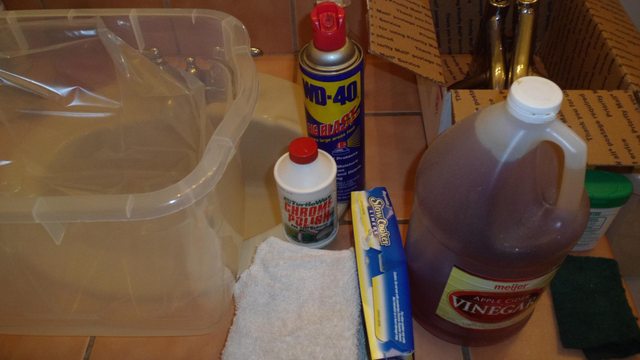
The Tools
-----------------------
Vinegar for surface rust. - Contains acid that makes short work of light rust. It can eat the metal and any coatings as well if left for extended periods of time. I suggest 1-2 hours max, but it's up to you. Lots of people have left their rusty tools and stuff in vinegar baths overnight with no ill effects. This is a nice step 1 because it also handles thoroughly cleaning the part(s).
Wire brushes, steel wool, wire wheel drill bits. AKA: Stuff for scrubbing. - Rust is tough. There's no easy way out of any of the deeper and more severe rust without scrubbing. You can accomplish everything in this guide with just a wire brush and steel wool pads, but the drill bits and wire wheels save serious time and elbow grease. Work smarter, not harder! :biglaugh:
Water - Vinegar bath = acid bath. You want to thoroughly rinse all that acid off your metal once you're happy with the results. If you don't get it off it will continue going to work on the rust and metal. Until you are anything but happy with the results.
WD-40 or Oven - We can't leave all that water on there... it will create more rust. Fun fact, WD in WD-40 stands for Water Displacement. For the 1001 purposes we use this stuff for, it's intended purpose was always quickly and thoroughly removing water from electrical components. Works great getting water off and out of metal just as well.
Cotton towels - Wipe off the WD-40/water, etc. Apply polish, remove polish. No cleaning job is complete without towels.
Polish - Rust is all gone, time to make things shiny.
-----------------------
The Job
-----------------------
Step 1: Surface rust. Easily solved with a vinegar bath and sitting on my *** for about 2 hours.
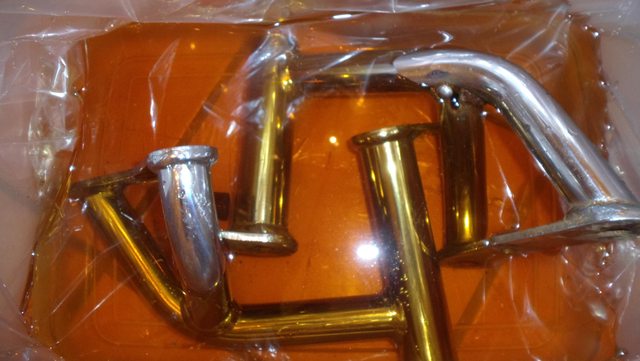
Result: Pretty good. The really deep rust and a lot of the stuff around the welds is still very much there though.
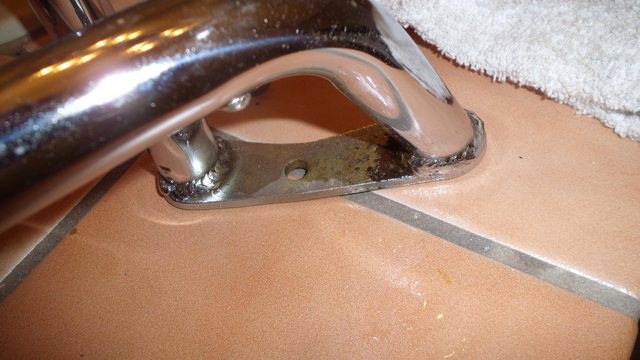
I'll take care of that with some steel wool pads and a grinding wheel on my cordless drill in a bit. First thing though is to wash all the acid off the metal so it doesn't continue going to work long after it's bath.
Step 2: Rinse off and thoroughly dry. WD-40 is great for this, but I opted for an oven set to 200 degrees.
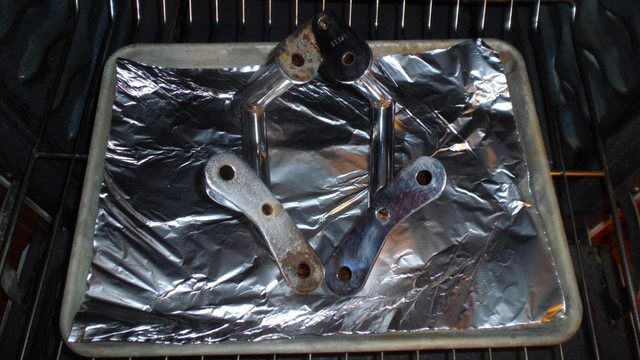
Bake for 10 minutes or until golden brown and delicious.
Step 3: Scrub at all that deeper rust with steel wool pads, metal brushes, and grinding wheel attached to low rpm cordless drill.
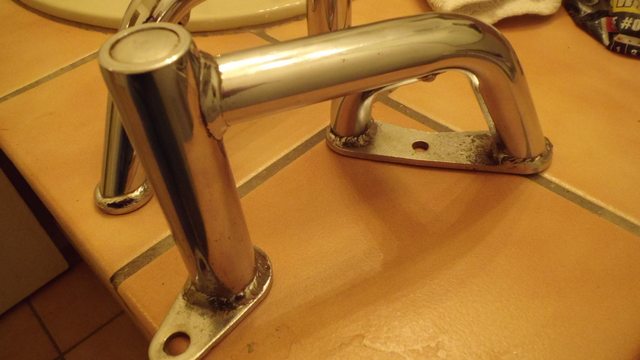
Not bad. Still have a lot of stuff in the narrow crevices that I'm having a hard time getting at, and a lot of really tiny little specs of rust/pits/etc.
Step 4: Tiny and fast rpm wire brush attached to a dremel
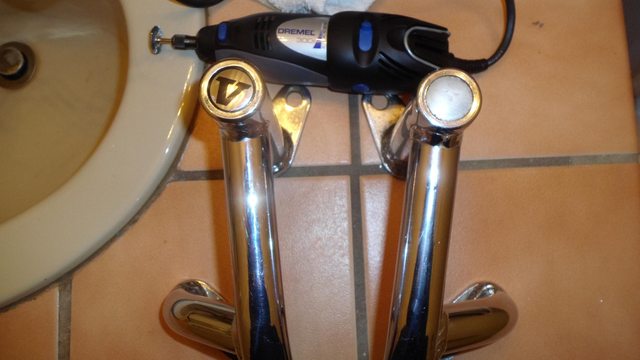
Result:
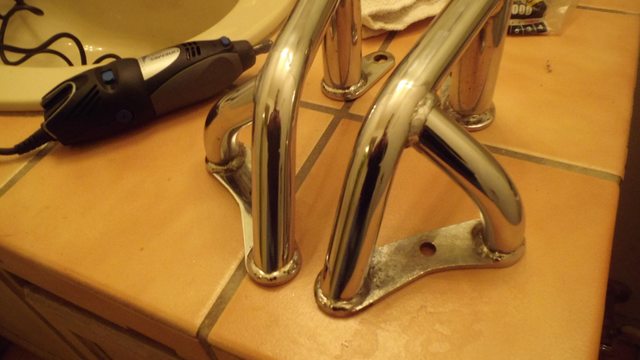
Ehhhh I could mess with it a little more, but I think that's about as good as they're going to get. There's only so much you can do when there's pitting like that.
Step 5: Polish to shine
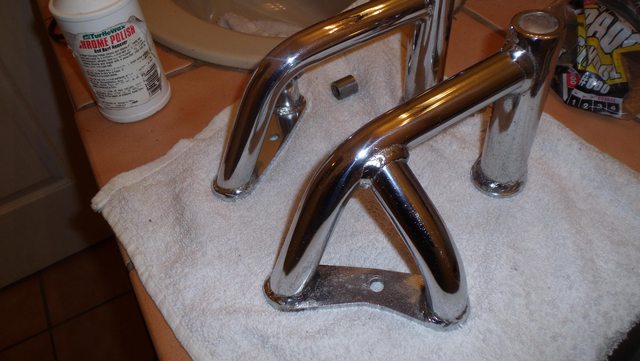
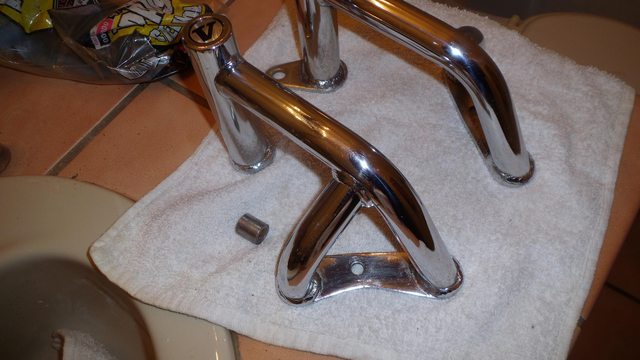
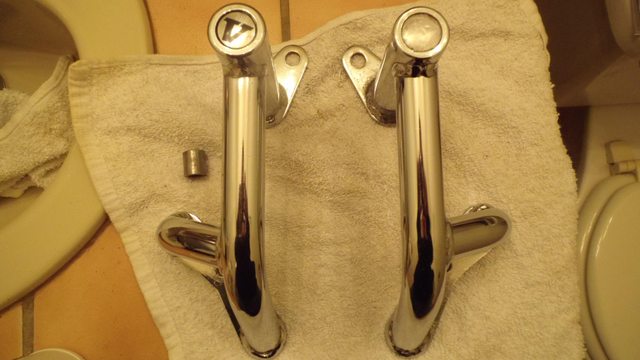
That spacer looks a little rough yet, but what the hell I'll toss it in there until I can come up with a new one. Found a metric bolt that will work to replace the rusty crap this shipped with. The rest of the bolts can be re-used from what's on the bike already.
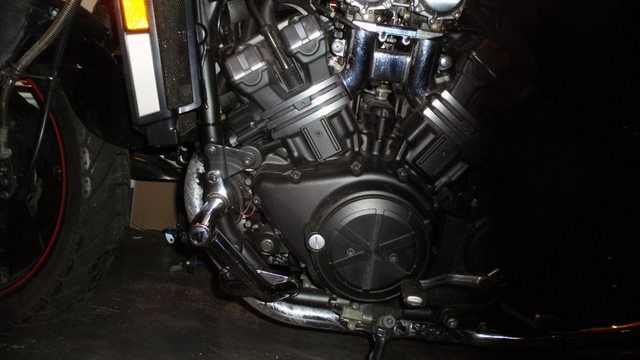
Step 6: Install
-------
All images in this guide are hosted externally and are high resolution. Click any of them for a bigger view of the pic and see the little details of the progress. Since it's externally hosted I'm not sure how long they'll be around, so all images are also attached below. They're smaller less detailed images though to comply with forum attachment rules.
-------

-----------------------
Vinegar for surface rust. - Contains acid that makes short work of light rust. It can eat the metal and any coatings as well if left for extended periods of time. I suggest 1-2 hours max, but it's up to you. Lots of people have left their rusty tools and stuff in vinegar baths overnight with no ill effects. This is a nice step 1 because it also handles thoroughly cleaning the part(s).
Wire brushes, steel wool, wire wheel drill bits. AKA: Stuff for scrubbing. - Rust is tough. There's no easy way out of any of the deeper and more severe rust without scrubbing. You can accomplish everything in this guide with just a wire brush and steel wool pads, but the drill bits and wire wheels save serious time and elbow grease. Work smarter, not harder! :biglaugh:
Water - Vinegar bath = acid bath. You want to thoroughly rinse all that acid off your metal once you're happy with the results. If you don't get it off it will continue going to work on the rust and metal. Until you are anything but happy with the results.
WD-40 or Oven - We can't leave all that water on there... it will create more rust. Fun fact, WD in WD-40 stands for Water Displacement. For the 1001 purposes we use this stuff for, it's intended purpose was always quickly and thoroughly removing water from electrical components. Works great getting water off and out of metal just as well.
Cotton towels - Wipe off the WD-40/water, etc. Apply polish, remove polish. No cleaning job is complete without towels.
Polish - Rust is all gone, time to make things shiny.
-----------------------
The Job
-----------------------
Step 1: Surface rust. Easily solved with a vinegar bath and sitting on my *** for about 2 hours.

Result: Pretty good. The really deep rust and a lot of the stuff around the welds is still very much there though.

I'll take care of that with some steel wool pads and a grinding wheel on my cordless drill in a bit. First thing though is to wash all the acid off the metal so it doesn't continue going to work long after it's bath.
Step 2: Rinse off and thoroughly dry. WD-40 is great for this, but I opted for an oven set to 200 degrees.

Bake for 10 minutes or until golden brown and delicious.
Step 3: Scrub at all that deeper rust with steel wool pads, metal brushes, and grinding wheel attached to low rpm cordless drill.

Not bad. Still have a lot of stuff in the narrow crevices that I'm having a hard time getting at, and a lot of really tiny little specs of rust/pits/etc.
Step 4: Tiny and fast rpm wire brush attached to a dremel

Result:

Ehhhh I could mess with it a little more, but I think that's about as good as they're going to get. There's only so much you can do when there's pitting like that.
Step 5: Polish to shine


That spacer looks a little rough yet, but what the hell I'll toss it in there until I can come up with a new one. Found a metric bolt that will work to replace the rusty crap this shipped with. The rest of the bolts can be re-used from what's on the bike already.
Step 6: Install

-------
All images in this guide are hosted externally and are high resolution. Click any of them for a bigger view of the pic and see the little details of the progress. Since it's externally hosted I'm not sure how long they'll be around, so all images are also attached below. They're smaller less detailed images though to comply with forum attachment rules.
-------


![Bovemanx Motorcycle Phone Mount Holder, [150mph Wind Anti-Shake][7.2inch Big Phone Friendly] Bike Phone Holder, Motorcycle Handlebar Cell Phone Clamp, Compatible with iPhone 16 Pro Max Smartphones](https://m.media-amazon.com/images/I/51F+1sontPL._SL500_.jpg)


