naughtyG
Well-Known Member
Ok so finally (I know I've been putting this back waaaay too long!) here's a full 'how to' for doing your valves clearances, with the engine IN the bike.
I agree that it would be a helluva lot easier to do this with the engine out, but it's not that easy for everyone to remove their motor. Plus that SOAB weighs a ton, so on your own you'll struggle, whereas doing the valves in situ is no problem at all.
So 'ere we go. I assume anyone reading this already knows how to:
- remove the faux-tank cover
- remove both scoops
- probably best to remove seat and disconnect battery
- remove the airbox complete (no need to open it - just take off the breather hoses, loosen the rubber clamps above the carbs, and pull the whole thing off)
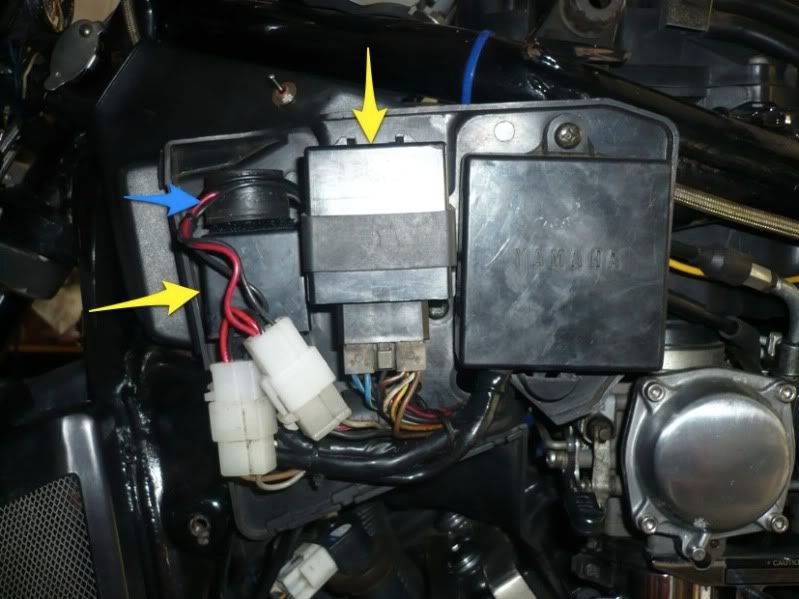
To start with, let's remove the component on the left-hand electrical panel. The fuel pump relay and flasher relay are arrowed in yellow, blue arrow points to my T-boost unit (never bloody worked I should trash that thing):
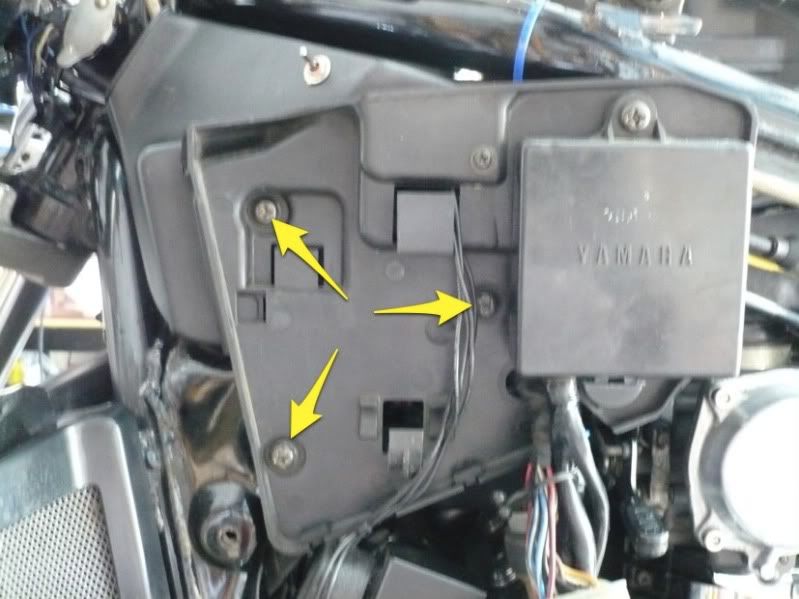
Next we'll remove that panel altogether and set it aside, by taking out the 3 arrowed screws:
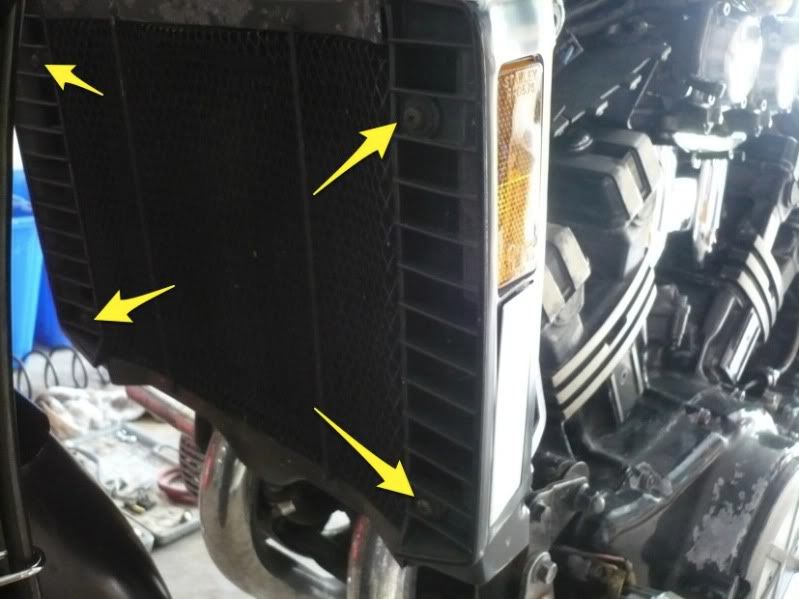
Then let's get the radiator side covers off. Screws arrowed:
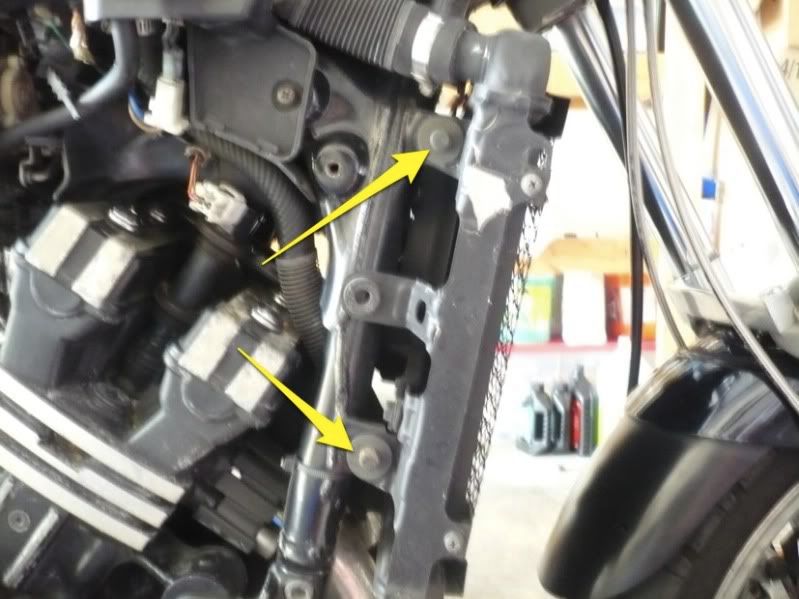
We'll also take off the radiator mounting bolts, so we can lean it forward out of the way later. On the left..
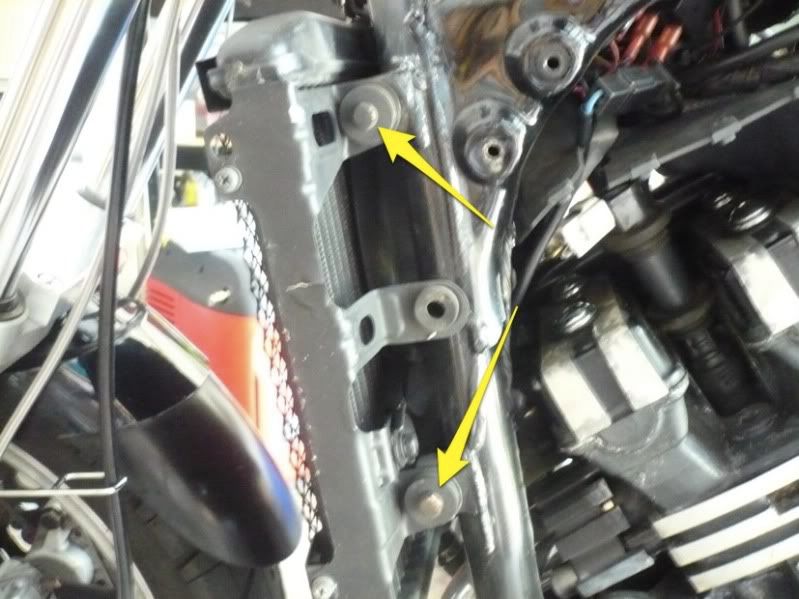
and on the right:
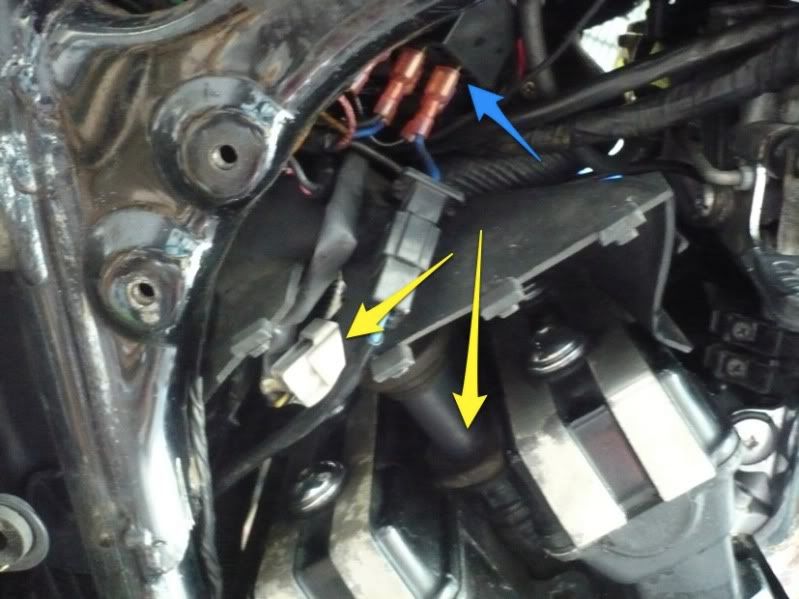
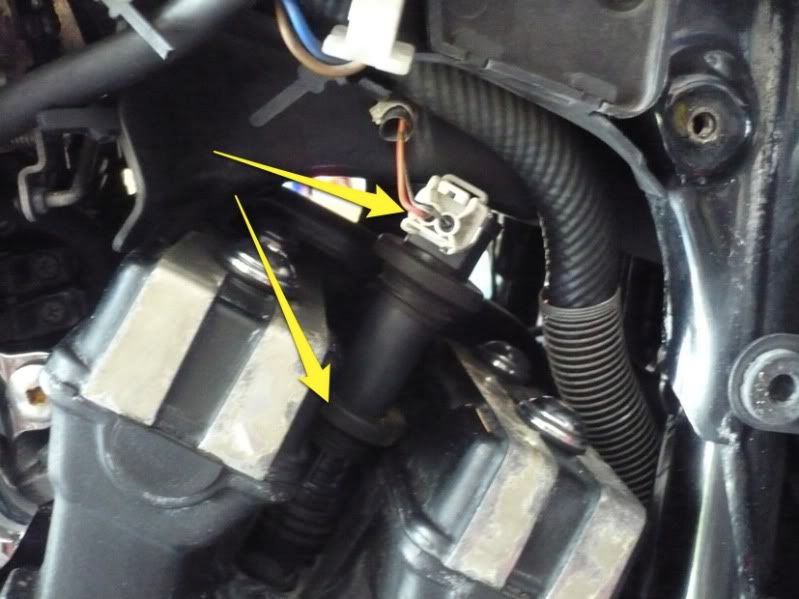
Let's unplug all four spark plug leads. I'm running COPs (Coils Over Plugs) on my bike so that's what you get in the photos. I've arrowed the COP connectors and the COPs themselves in yellow. The blue arrow in the first picture shows a relay I'm using to switch power to my horns - you may not have this on your setup:
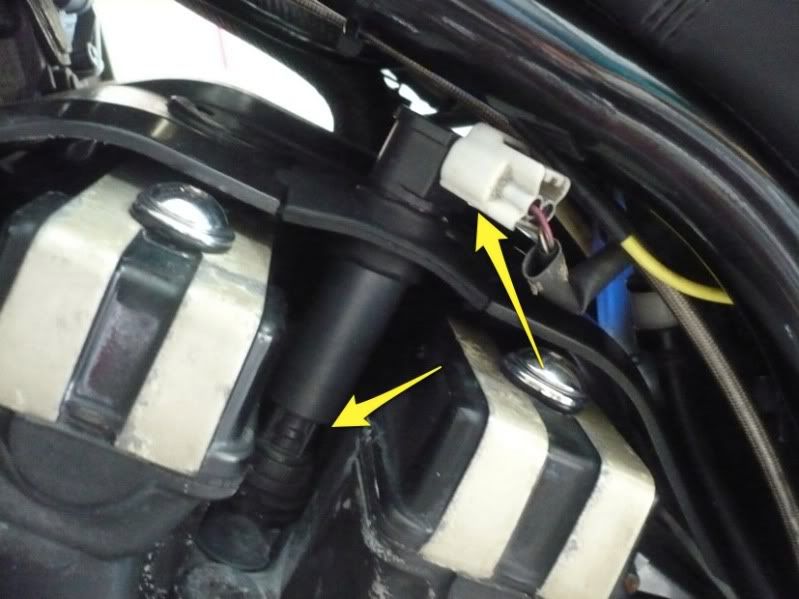
The red arrow in this pic shows the rubber shield I cut up a bit and reused to keep my COPs tight with the heat shield on the rear:
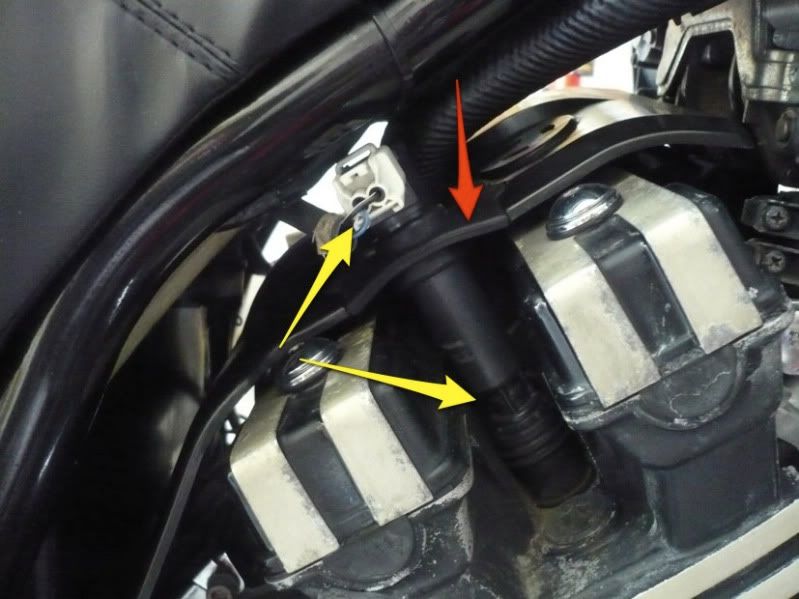
Then we're going to remove the rear cylinders' heat shield:
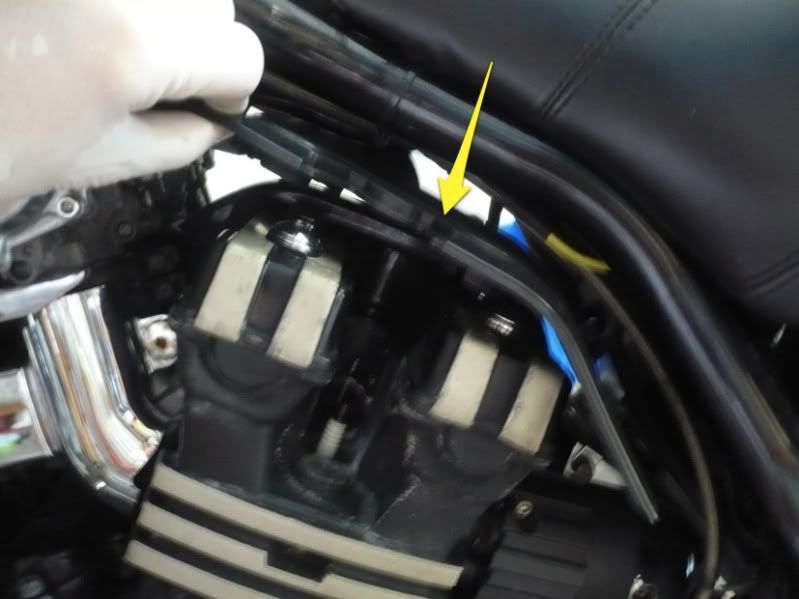
Here is is sliding out - easy:
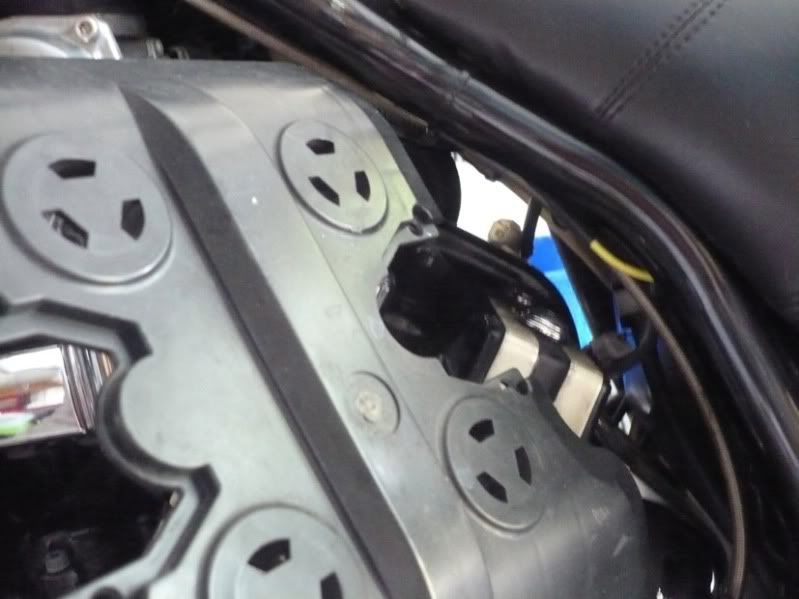
Nice space above the rear cylinders - just enough to take the valve cover off:
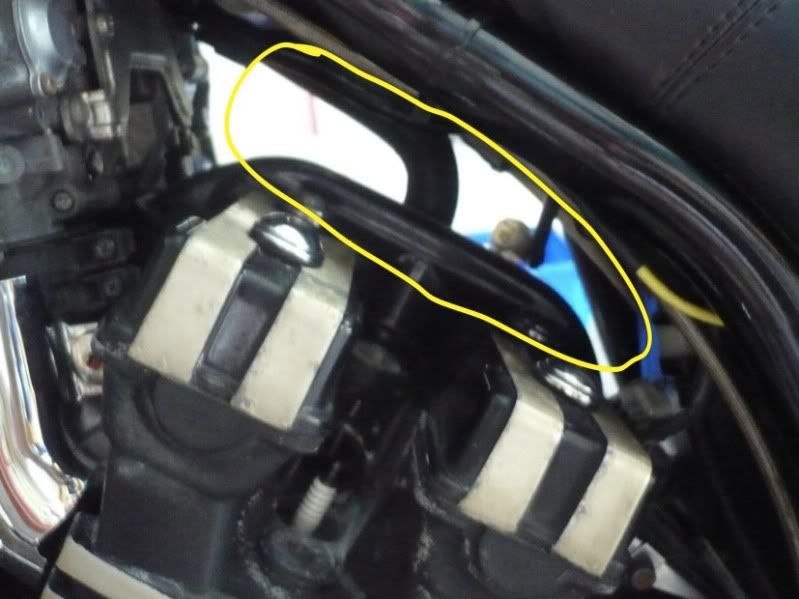
Coming back to the front, let's remove the rubber heat shield. On the left-hand side, you should have untucked its tabs already when removing the relays panel earlier on. On the right, let undo the two tabs on the right of the picture and the tie on the left:
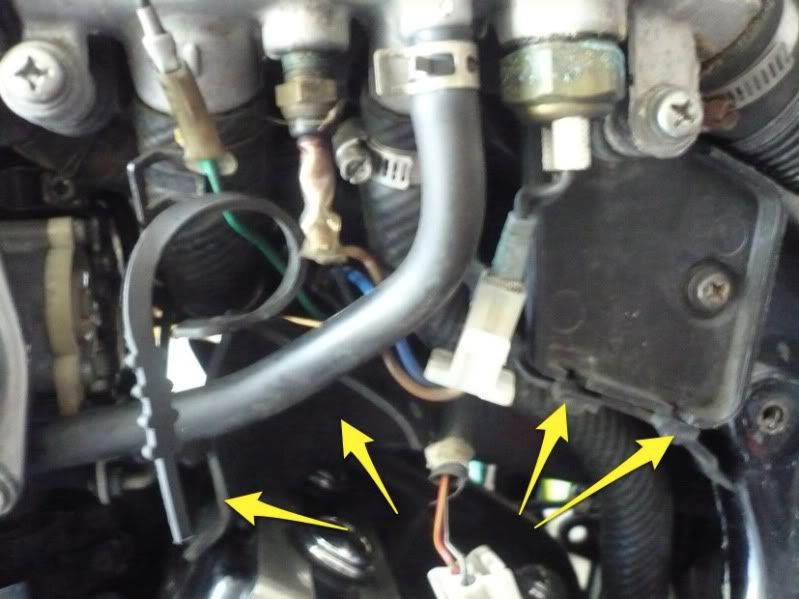
Then at the front behind the radiator, there are four metal tabs holding the rubber shield. I've arrowed the top two. You may need thin pliers of a flat screwdriver to bend the tabs out a wee bit:
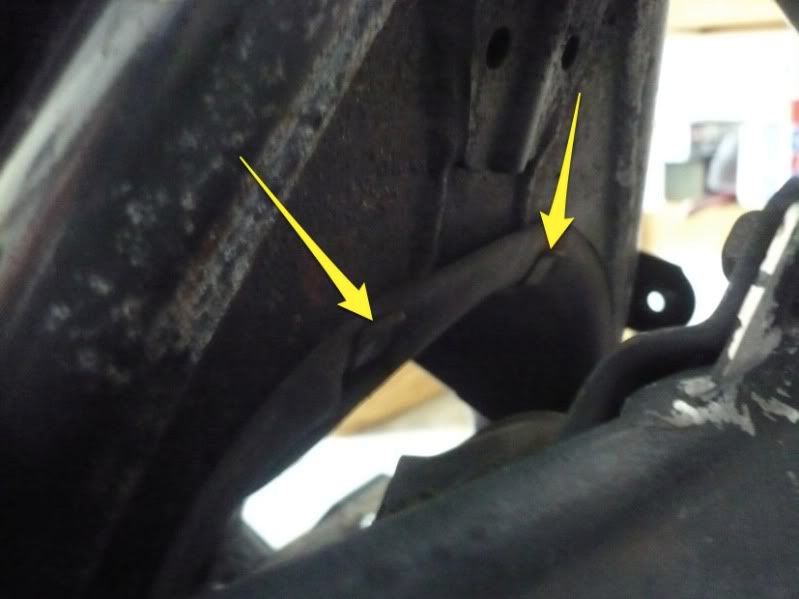
That heat shield should pull straight out.
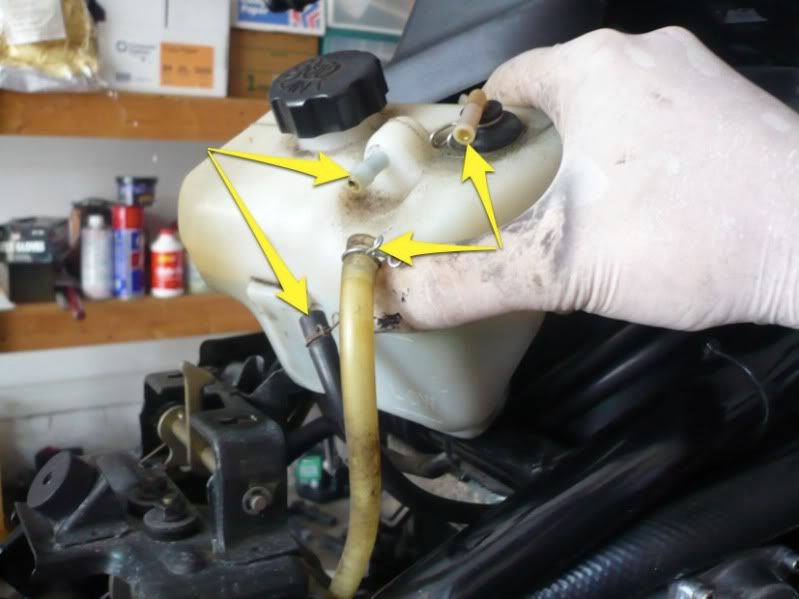
Next, we'll remove the coolant overflow tank by pulling it straight up, and disconnecting its two hoses (arrowed):
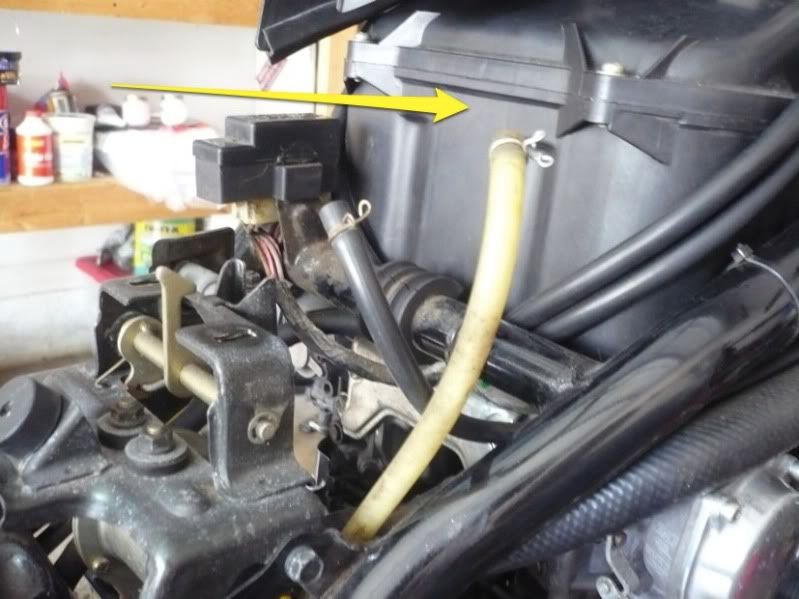
If your airbox (arrowed) is still in place, take it off now.
Next we're gonna drain the coolant. I wasn't going to do that originally, but later found it necessary, so let's start by locating the drain valve (yellow arrow) under the radiator at the front. I put a clear hose on its nipple (green arrow) but that was a waste of time as nothing comes out of there. Skip this and..
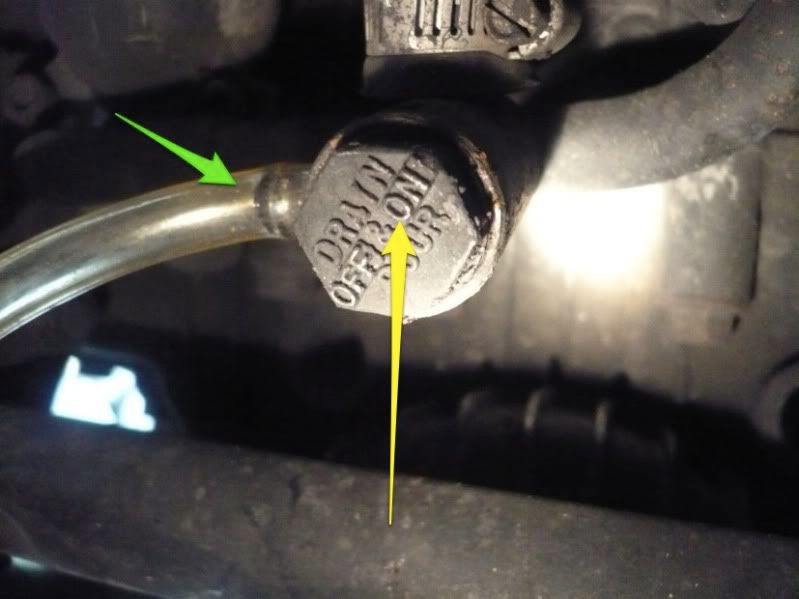
..turn the valve to drain mode by aligning the word (drain) ON to the mark (arowed):
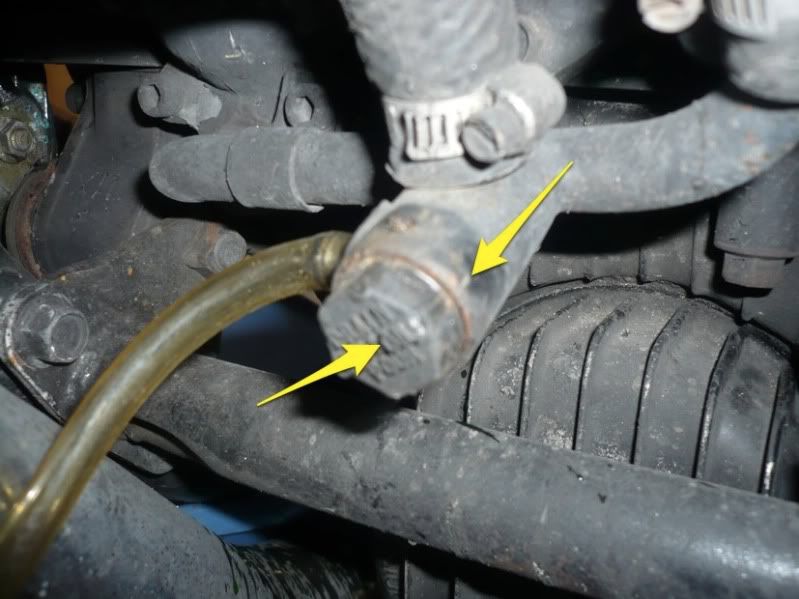
Then let's locate the coolant drain plug on the right of the engine:
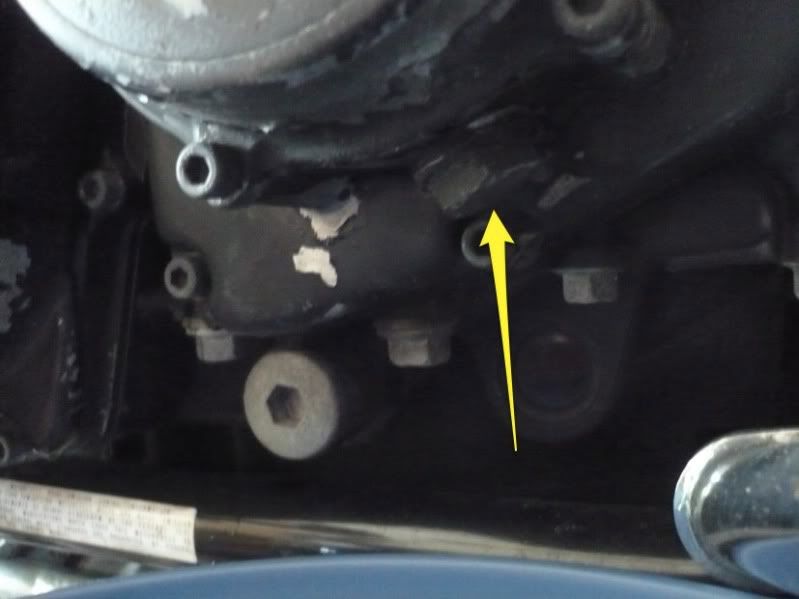
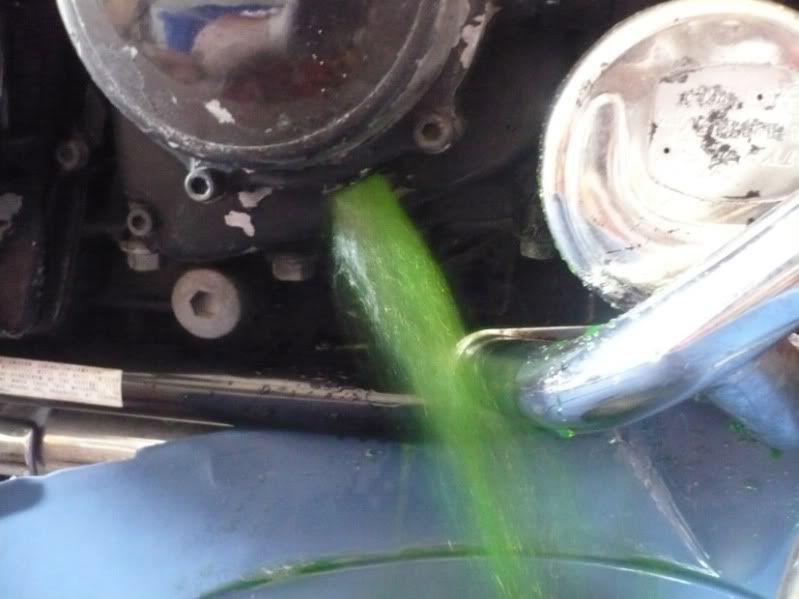
..and remove it, having placed a suitable container underneath to catch it. Once the plug is removed, also remove the coolant filler cap on top of the thermostat housing behind the right scoop. Coolant will now gush out:
We're now ready to attack the rear valve cover. Let's remove its 4 Allen bolts on the right side..
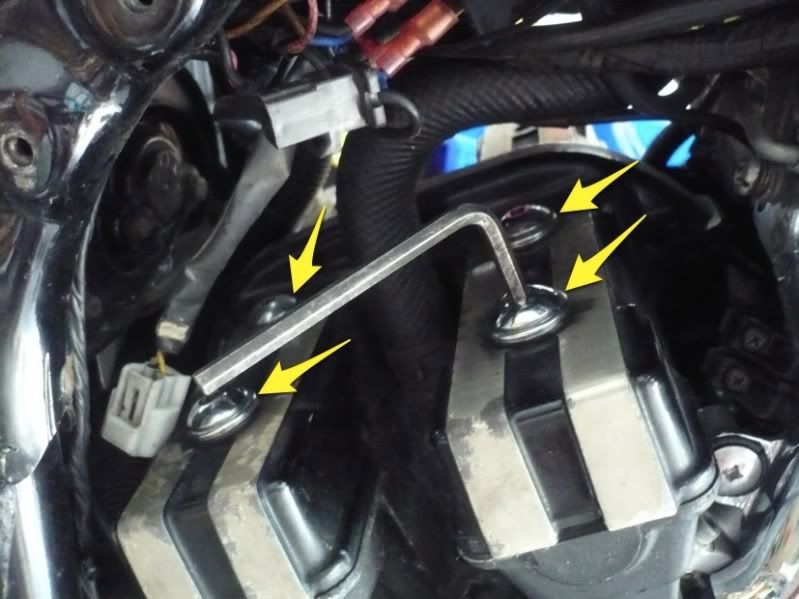
..and on the left:
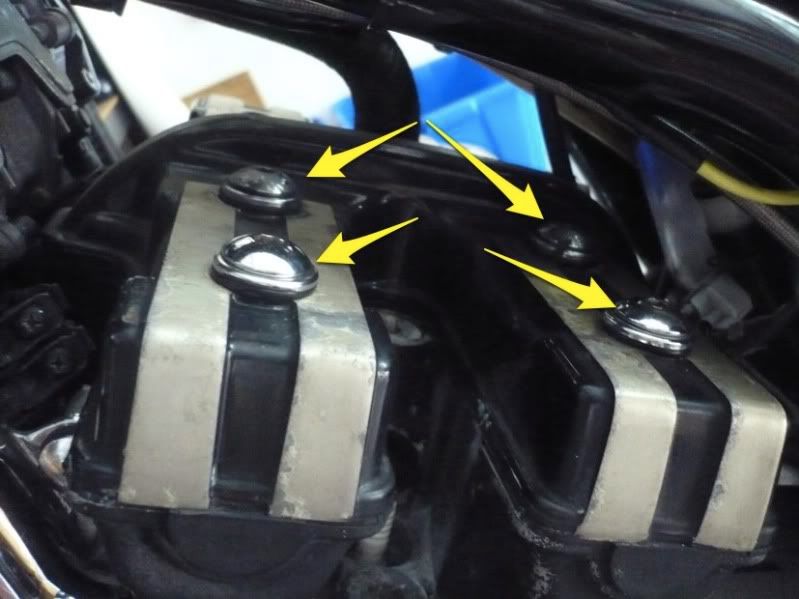
Then let's pull it up:
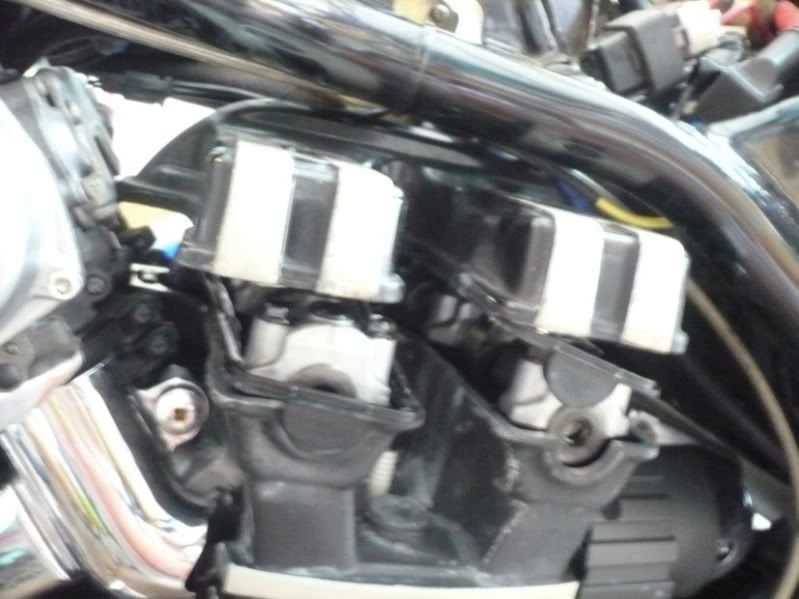
And take it out from the left because this coolant hose (arrowed) stops us on the right:
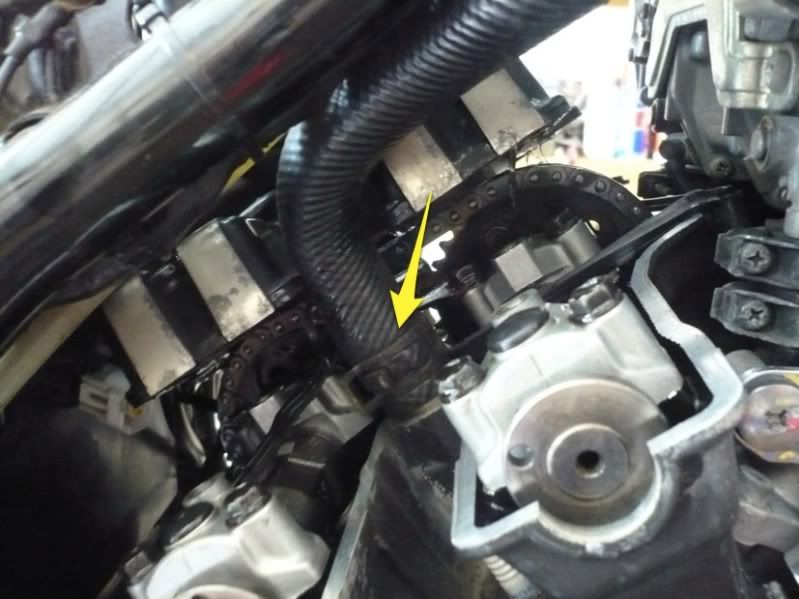
There's just enough space - it'll pull out:
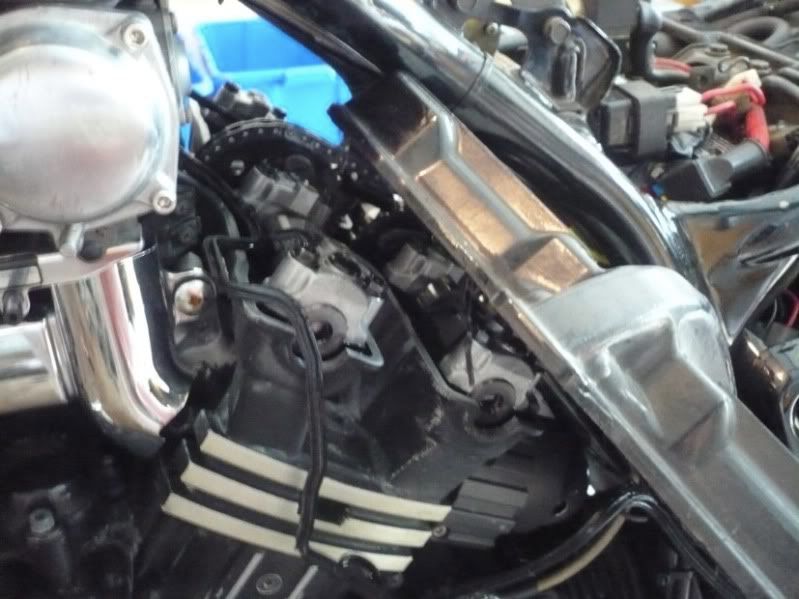
The front cover doesn't look so fun. Notice how much busier it is in there?
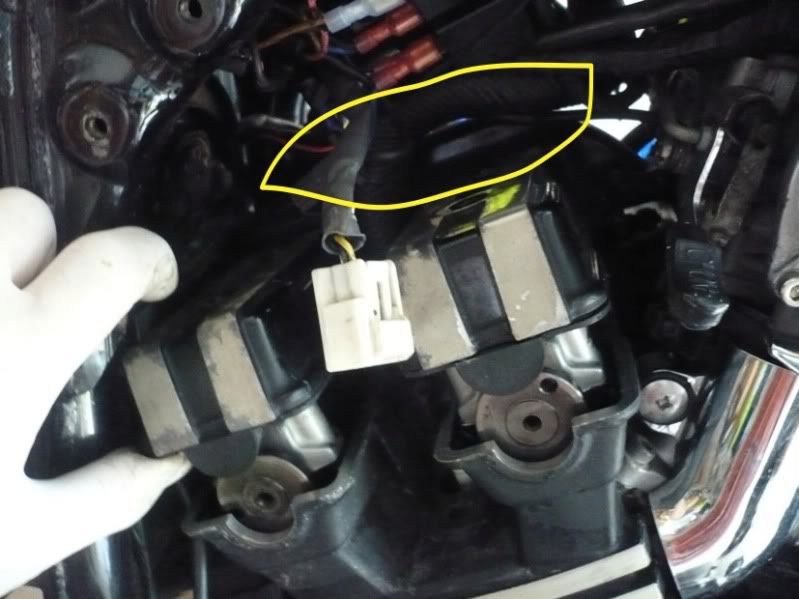
This is what made me drain the coolant. I couldn't see how I could pull the cover from the right, and on the left was this hose. So I squeeze that arrowed clip with long thin pliers..
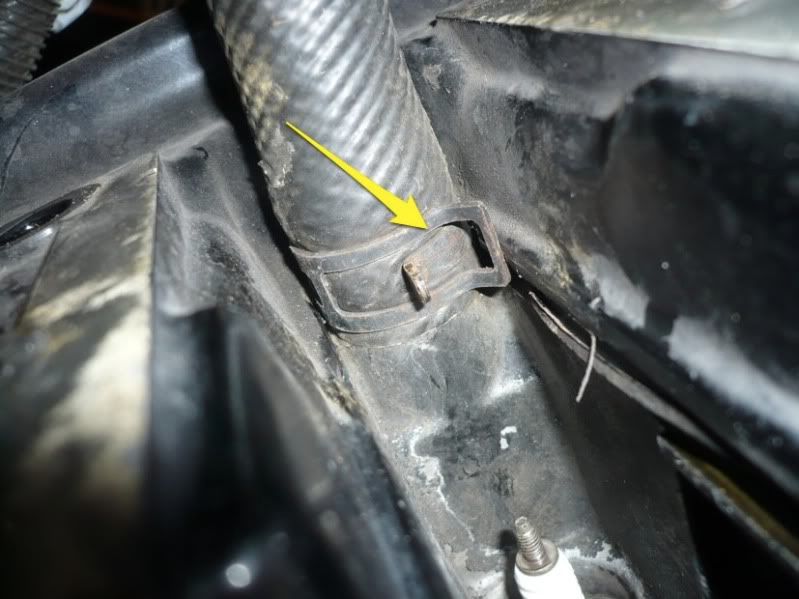
..and removed it (with the help of a flat blade screwdriver):
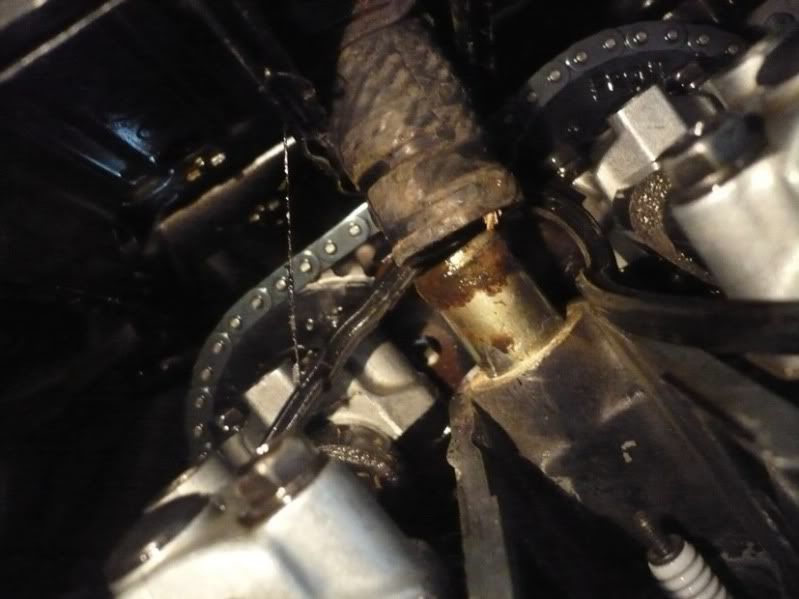
But then I realized I could STILL not pull the cover off. The Yamaha Service Manual fails miserably to tell you this, but above the cover, the metal elbow attached to the Vboost servo stops the cover..
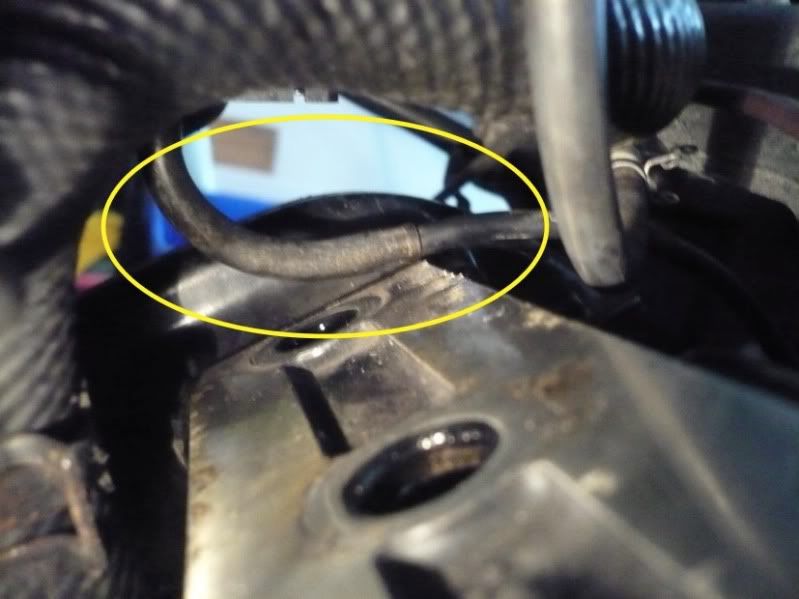
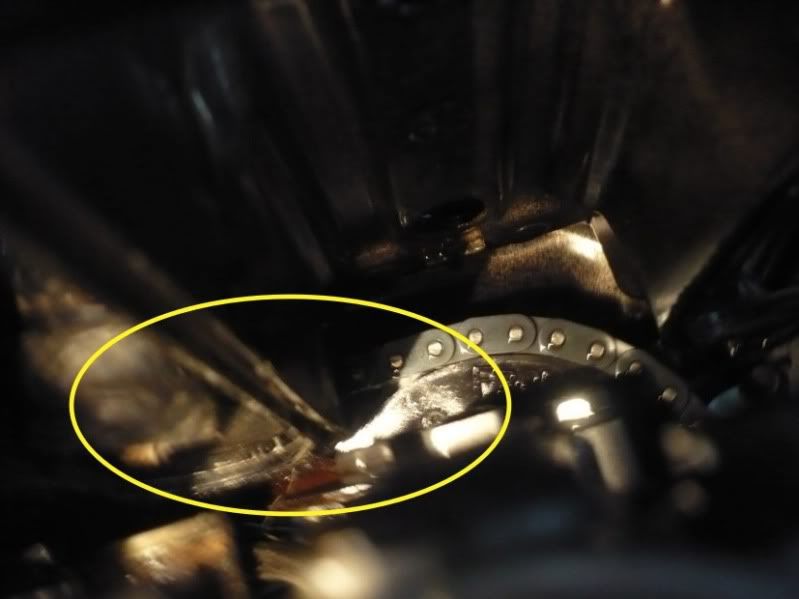
..from going high enough to clear the cam sprockets underneath:
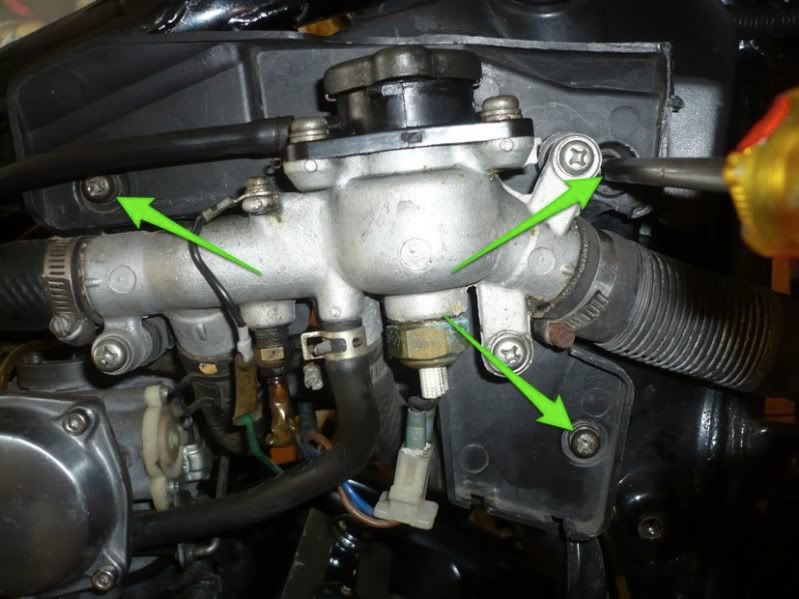
So here's the solution (and the reason the airbox had to go). On the right side, remove the 3 screws (arrowed) holding the panel with the thermostat etc:
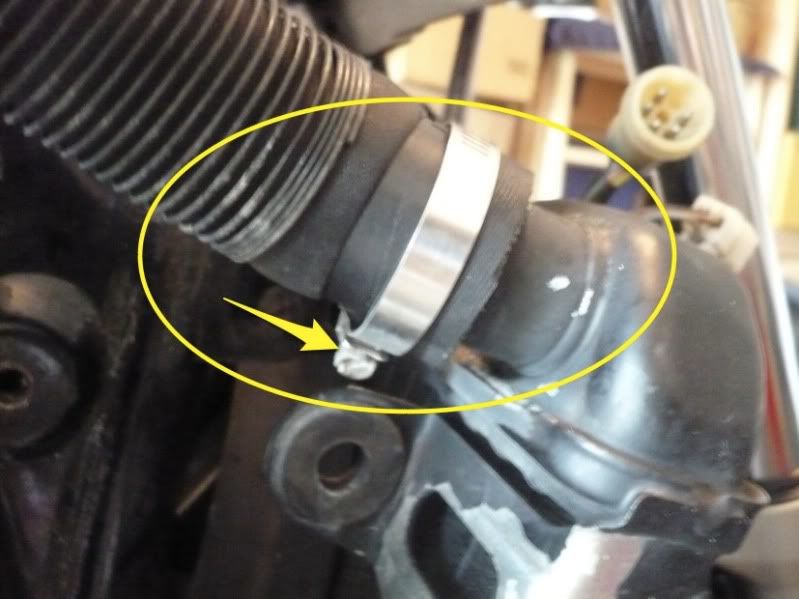
Also pull off the main radiator coolant hose..
..as this will allow you to set aside this whole panel:
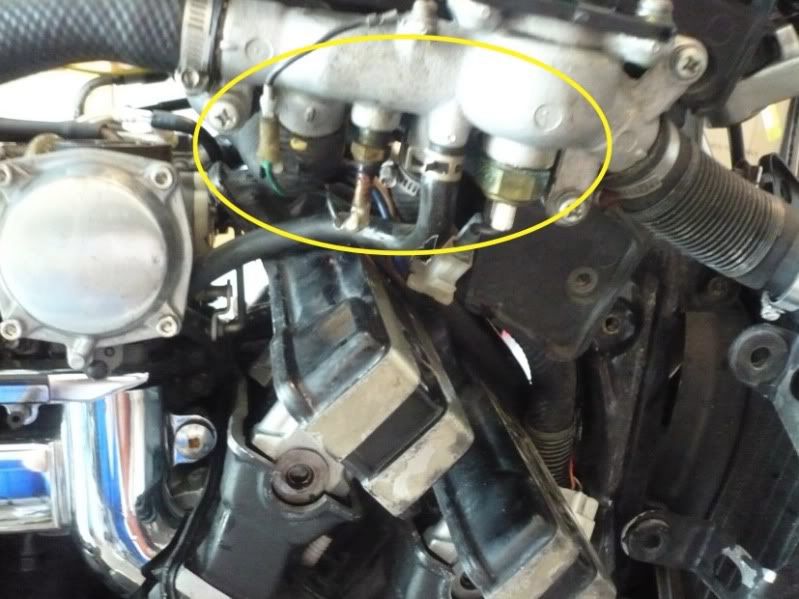
Now we can access the two Philips screws (arrowed) that hold the Vboost servo. The red arrow shows the right side of the TCI for reference.
Make SURE to use the right Philips screwdriver (#2) or bit, or you WILL strip those screws. They're in tight.
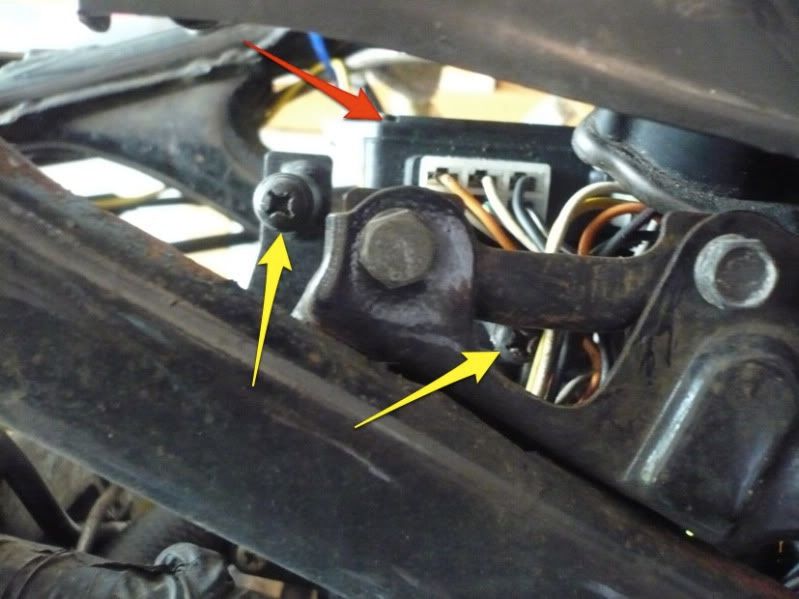
Once the screws are off, it's easy to set the Vboost servo aside, and now you have plenty enough room to remove the front valves cover.
We're almost done with removing **** - we now have access to all our valve shims. Here's the front..
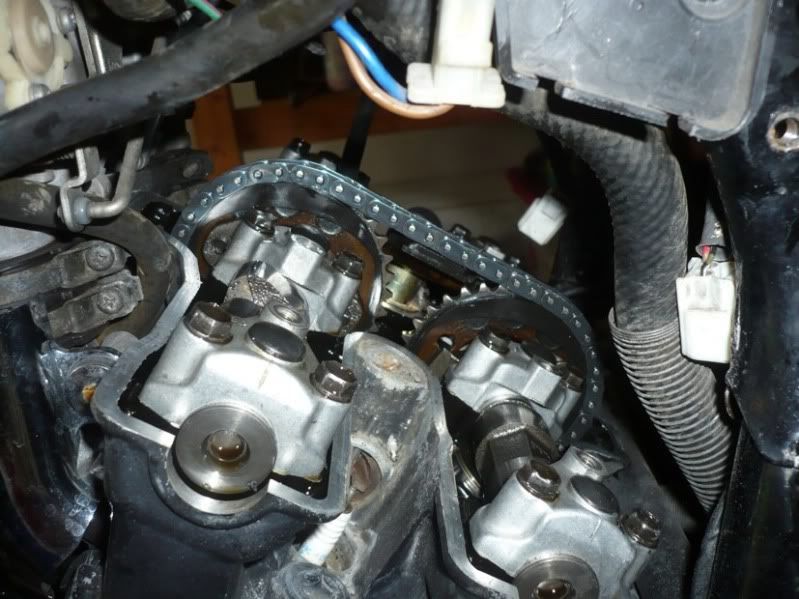
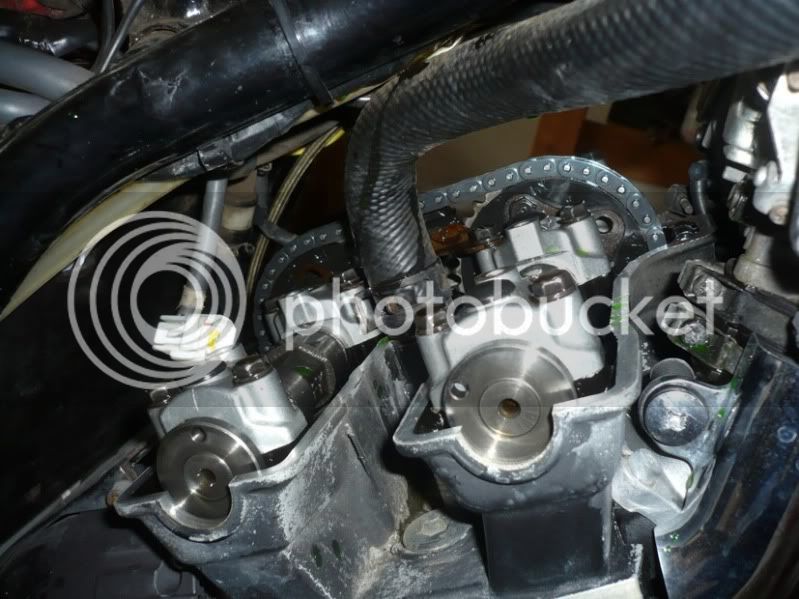
..and the back:
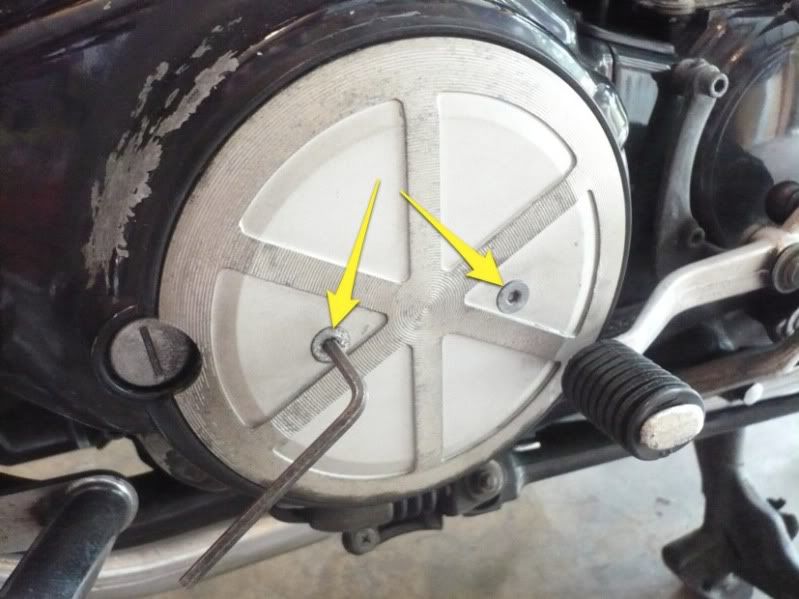
Last removal bits: we need to take off the stator cover screws:
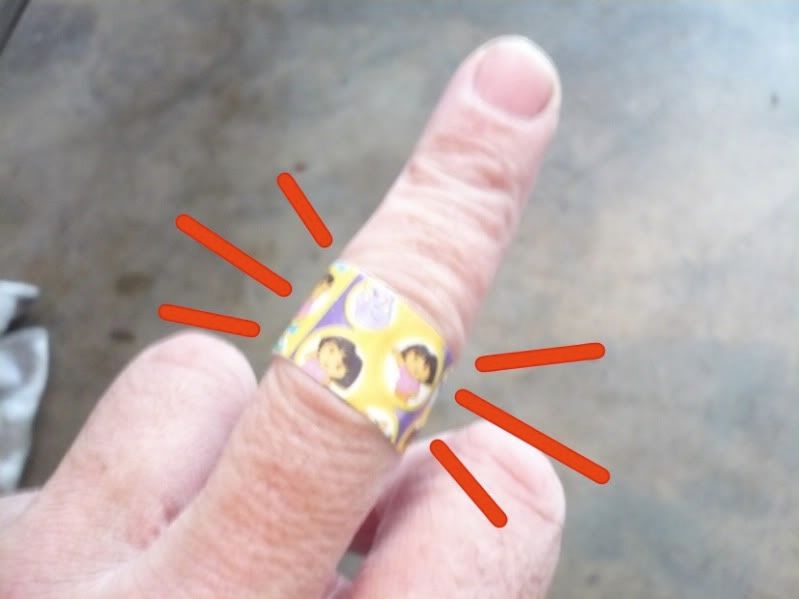
Those ******* were tight, and I left some finger skin in there - OUCH! Luckily I had my japanimation plasters to the rescue.. :biglaugh:
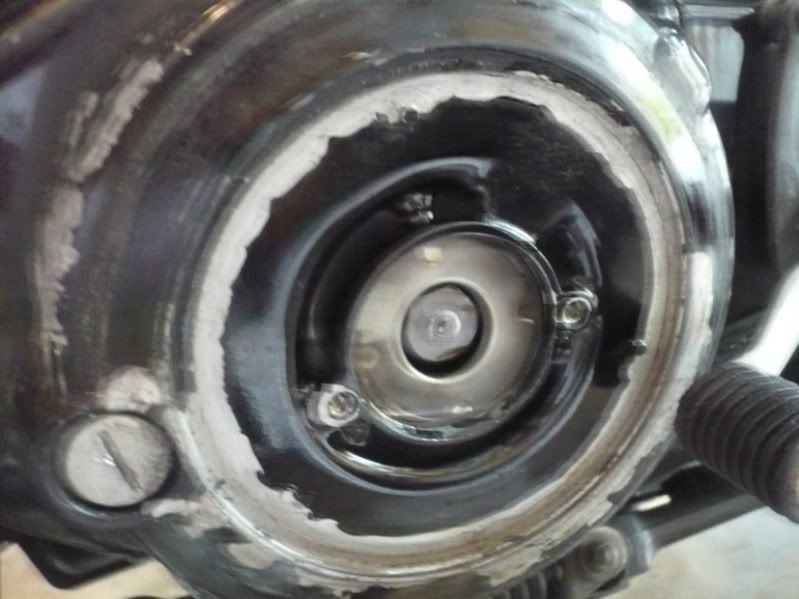
So now that the cover's off..
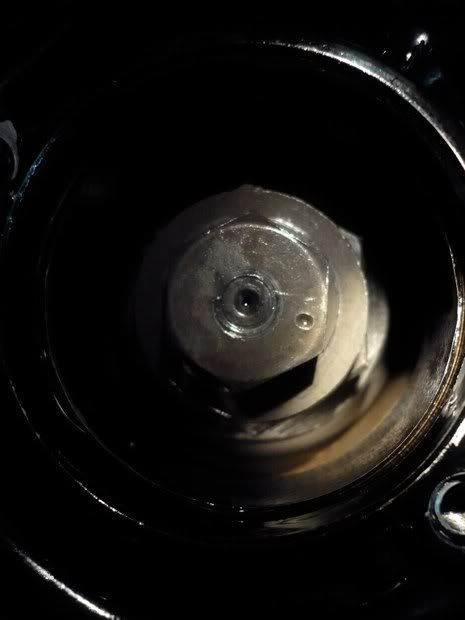
..we need to take off the washer:
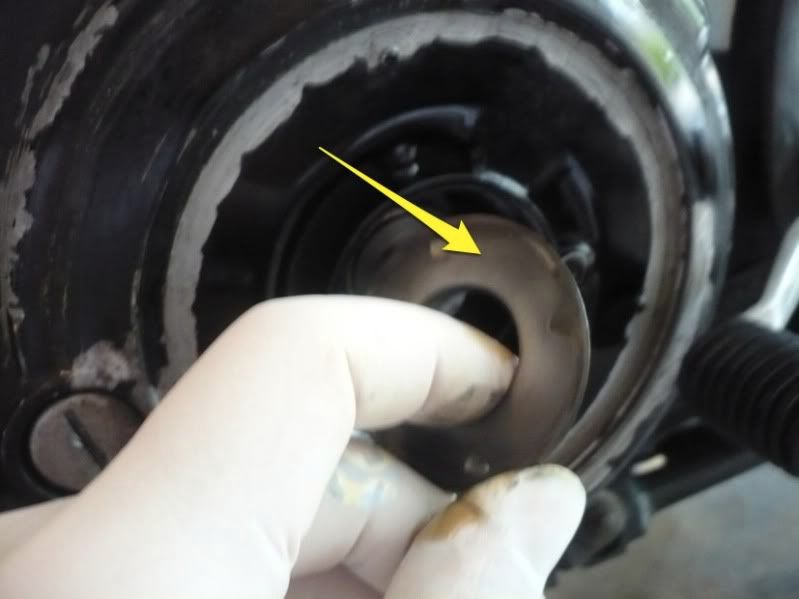
So we can access the nut to spin the engine. Now that photo is art:
We also need to take off the little cover to the left, so we can see the timing marks:
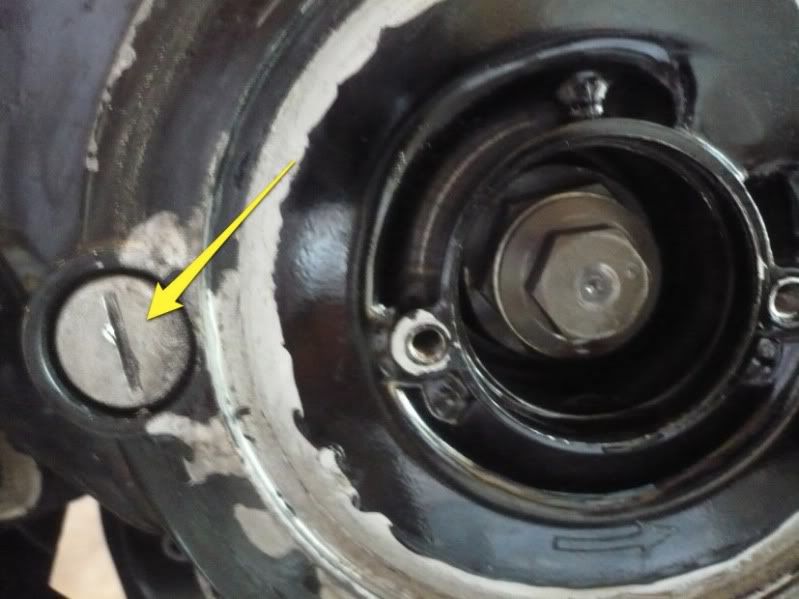
I always use coins for these guys - they seem to fit better than any screwdriver. Here's the first attempt:
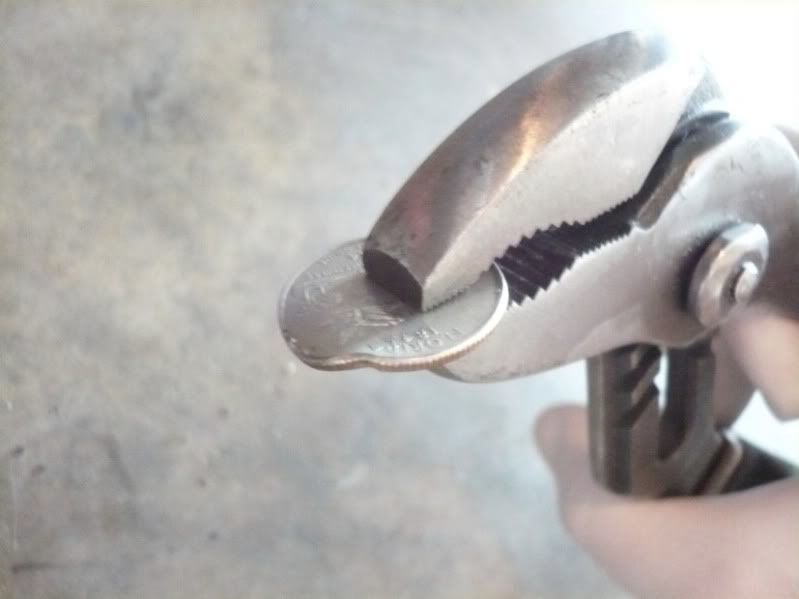
***** is tight. Try again...
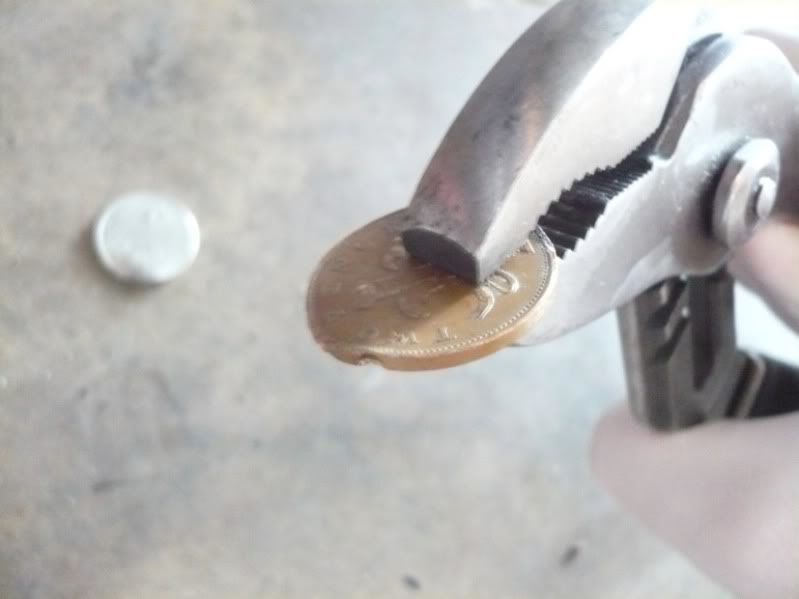
This is the 4th coin now. They don't make them like they used to!?
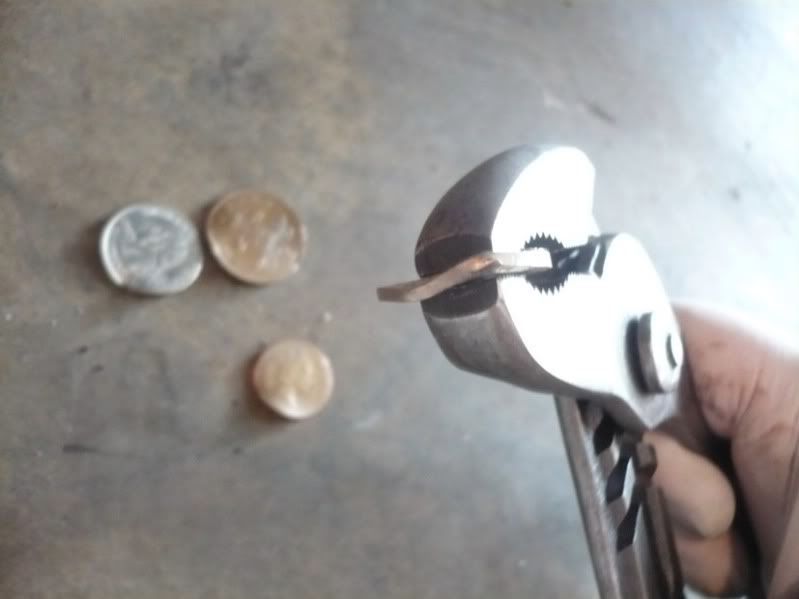
So I gave up and got the hammer out!
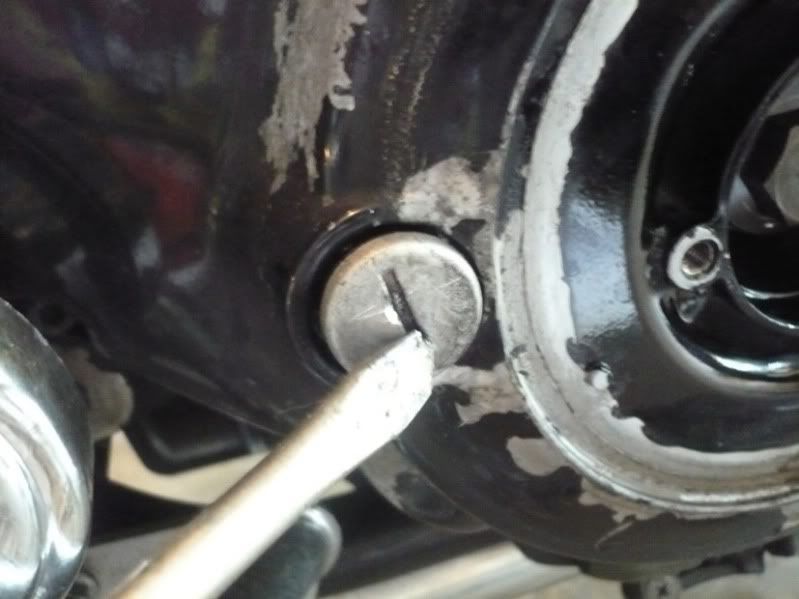
Got it off. Also, let's now remove all four spark plugs - when you go to spin the crank it will be a helluva lot easier without compression!
In Part 2 we will adjust our valves clearances! :eusa_dance:
I agree that it would be a helluva lot easier to do this with the engine out, but it's not that easy for everyone to remove their motor. Plus that SOAB weighs a ton, so on your own you'll struggle, whereas doing the valves in situ is no problem at all.
So 'ere we go. I assume anyone reading this already knows how to:
- remove the faux-tank cover
- remove both scoops
- probably best to remove seat and disconnect battery
- remove the airbox complete (no need to open it - just take off the breather hoses, loosen the rubber clamps above the carbs, and pull the whole thing off)
To start with, let's remove the component on the left-hand electrical panel. The fuel pump relay and flasher relay are arrowed in yellow, blue arrow points to my T-boost unit (never bloody worked I should trash that thing):

Next we'll remove that panel altogether and set it aside, by taking out the 3 arrowed screws:

Then let's get the radiator side covers off. Screws arrowed:

We'll also take off the radiator mounting bolts, so we can lean it forward out of the way later. On the left..

and on the right:

Let's unplug all four spark plug leads. I'm running COPs (Coils Over Plugs) on my bike so that's what you get in the photos. I've arrowed the COP connectors and the COPs themselves in yellow. The blue arrow in the first picture shows a relay I'm using to switch power to my horns - you may not have this on your setup:


The red arrow in this pic shows the rubber shield I cut up a bit and reused to keep my COPs tight with the heat shield on the rear:


Then we're going to remove the rear cylinders' heat shield:

Here is is sliding out - easy:

Nice space above the rear cylinders - just enough to take the valve cover off:

Coming back to the front, let's remove the rubber heat shield. On the left-hand side, you should have untucked its tabs already when removing the relays panel earlier on. On the right, let undo the two tabs on the right of the picture and the tie on the left:

Then at the front behind the radiator, there are four metal tabs holding the rubber shield. I've arrowed the top two. You may need thin pliers of a flat screwdriver to bend the tabs out a wee bit:

That heat shield should pull straight out.
Next, we'll remove the coolant overflow tank by pulling it straight up, and disconnecting its two hoses (arrowed):

If your airbox (arrowed) is still in place, take it off now.

Next we're gonna drain the coolant. I wasn't going to do that originally, but later found it necessary, so let's start by locating the drain valve (yellow arrow) under the radiator at the front. I put a clear hose on its nipple (green arrow) but that was a waste of time as nothing comes out of there. Skip this and..

..turn the valve to drain mode by aligning the word (drain) ON to the mark (arowed):

Then let's locate the coolant drain plug on the right of the engine:

..and remove it, having placed a suitable container underneath to catch it. Once the plug is removed, also remove the coolant filler cap on top of the thermostat housing behind the right scoop. Coolant will now gush out:

We're now ready to attack the rear valve cover. Let's remove its 4 Allen bolts on the right side..

..and on the left:

Then let's pull it up:

And take it out from the left because this coolant hose (arrowed) stops us on the right:

There's just enough space - it'll pull out:

The front cover doesn't look so fun. Notice how much busier it is in there?

This is what made me drain the coolant. I couldn't see how I could pull the cover from the right, and on the left was this hose. So I squeeze that arrowed clip with long thin pliers..

..and removed it (with the help of a flat blade screwdriver):

But then I realized I could STILL not pull the cover off. The Yamaha Service Manual fails miserably to tell you this, but above the cover, the metal elbow attached to the Vboost servo stops the cover..

..from going high enough to clear the cam sprockets underneath:

So here's the solution (and the reason the airbox had to go). On the right side, remove the 3 screws (arrowed) holding the panel with the thermostat etc:

Also pull off the main radiator coolant hose..

..as this will allow you to set aside this whole panel:

Now we can access the two Philips screws (arrowed) that hold the Vboost servo. The red arrow shows the right side of the TCI for reference.
Make SURE to use the right Philips screwdriver (#2) or bit, or you WILL strip those screws. They're in tight.

Once the screws are off, it's easy to set the Vboost servo aside, and now you have plenty enough room to remove the front valves cover.
We're almost done with removing **** - we now have access to all our valve shims. Here's the front..

..and the back:

Last removal bits: we need to take off the stator cover screws:

Those ******* were tight, and I left some finger skin in there - OUCH! Luckily I had my japanimation plasters to the rescue.. :biglaugh:

So now that the cover's off..

..we need to take off the washer:

So we can access the nut to spin the engine. Now that photo is art:

We also need to take off the little cover to the left, so we can see the timing marks:

I always use coins for these guys - they seem to fit better than any screwdriver. Here's the first attempt:

***** is tight. Try again...

This is the 4th coin now. They don't make them like they used to!?

So I gave up and got the hammer out!

Got it off. Also, let's now remove all four spark plugs - when you go to spin the crank it will be a helluva lot easier without compression!
In Part 2 we will adjust our valves clearances! :eusa_dance:
Last edited:


![Bovemanx Motorcycle Phone Mount Holder, [150mph Wind Anti-Shake][7.2inch Big Phone Friendly] Bike Phone Holder, Motorcycle Handlebar Cell Phone Clamp, Compatible with iPhone 16 Pro Max Smartphones](https://m.media-amazon.com/images/I/51F+1sontPL._SL500_.jpg)


