naughtyG
Well-Known Member
Ok so now we're ready to start measuring clearances and adjusting them with the use of shims. DO NOT attempt to start this job without first talking to Sean Morley ([email protected]), because he may just lend you his shim kit.
Without it, you'll need a Yamaha special tool (YM-33961 Tappet Adjusting tool), and shims of unknown values that will take forever to order, so you won't be riding for a while..
Here's the kit Sean so gracefully sent me (have I mentioned Sean rocks!?):
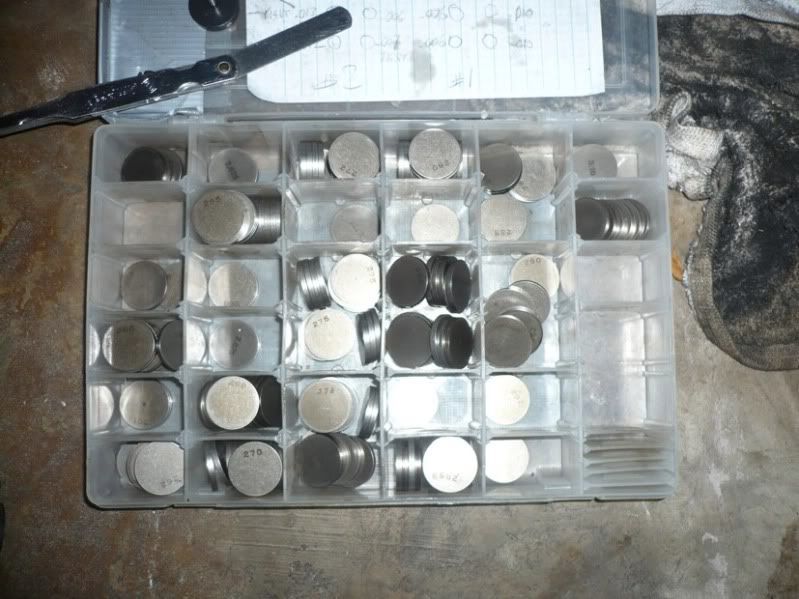
Plenty of shims there! Also, not shown are the special tool and another goodie - a nice little magnet tool that helps tremendously in catching and repositioning shims.
Let's get started. First you need to locate TDC (Top Dead Centre) by spinning the motor and looking in the hole for the timing mark:
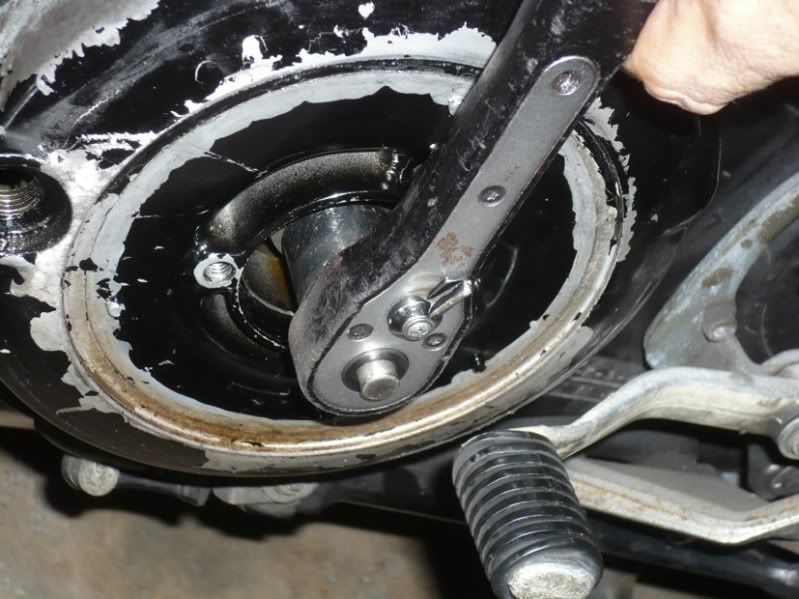
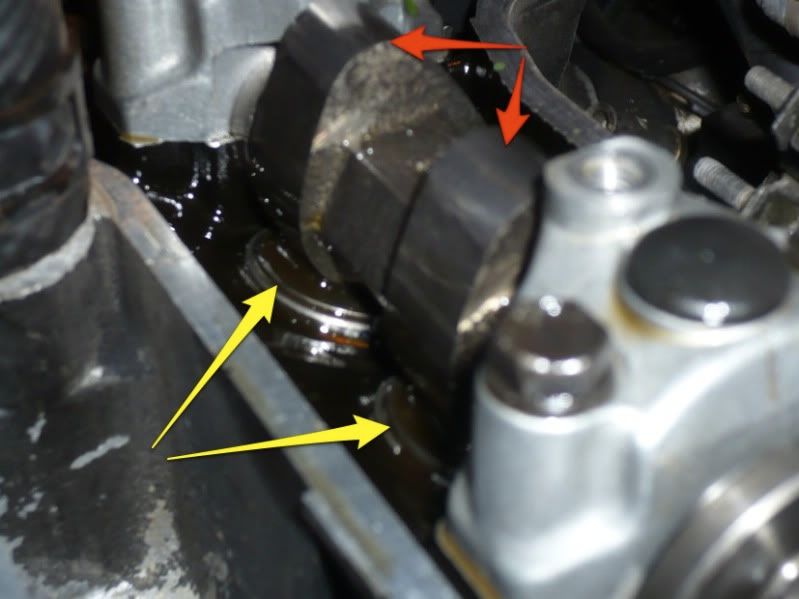
To be honest, I gave up on that procedure, and just made sure the cam lobes were facing up on the valves I was measuring/adjusting. The lobes are arrowed in red, and the shims in yellow:
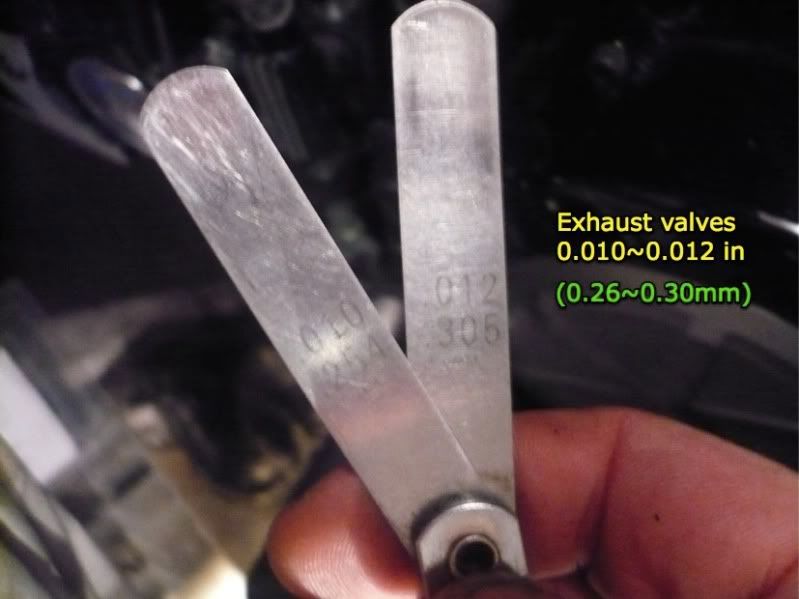
I started by doing the exhaust valves. Get yer gauges ready:
Spin the engine until the intake cam lobes of the cylinder you want to measure are pointing up, then insert the gauges and feel how tight or loose the clearance is. Again. lobe (yellow) must be right up, and the gauge goes between the back side of the lobe and the shim(red):
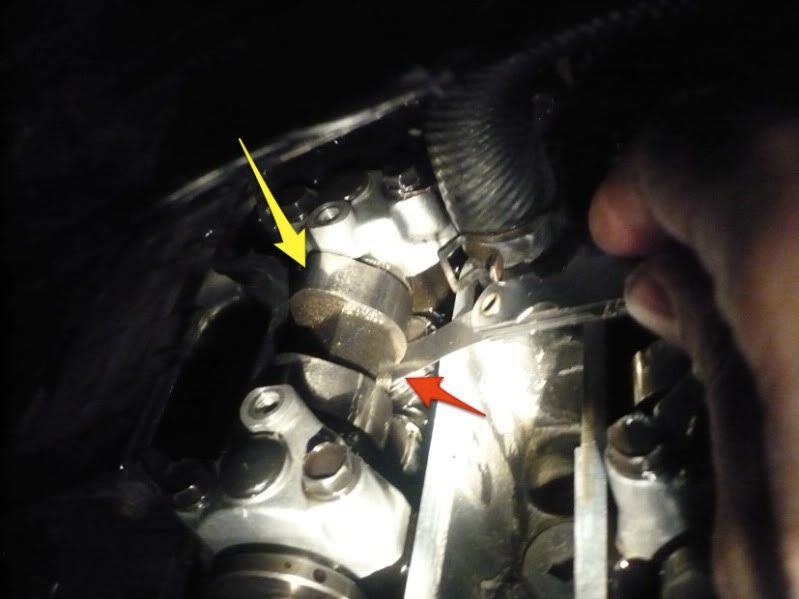
Once you've measured the clearance, and if it needs adjusting, you need to use the special tool to remove the the shims.
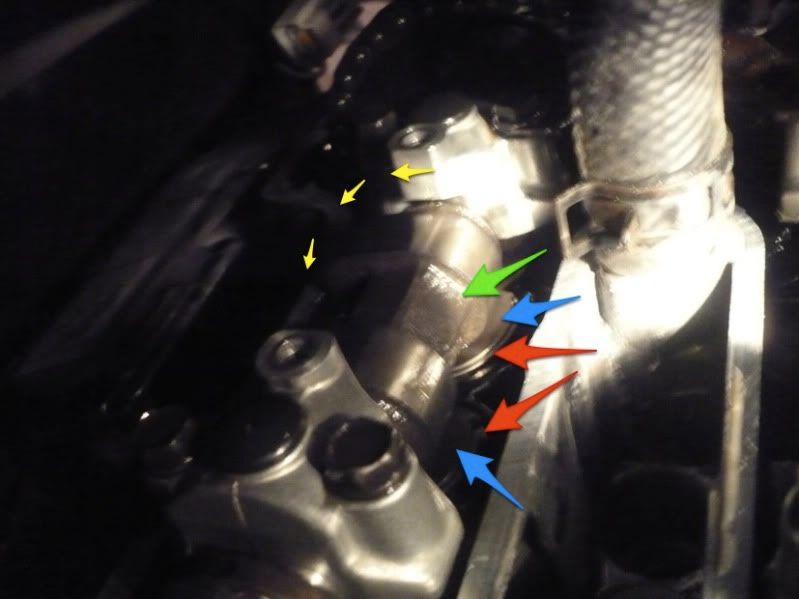
Before inserting the tool, you need to rotate the engine (yellow arrows) as it will need to rotate back with the tool in place.
- the green arrow shows where the tool attaches
- the blue arrows point at the shims
- the red arrows point at the shim buckets that the tool will push down:
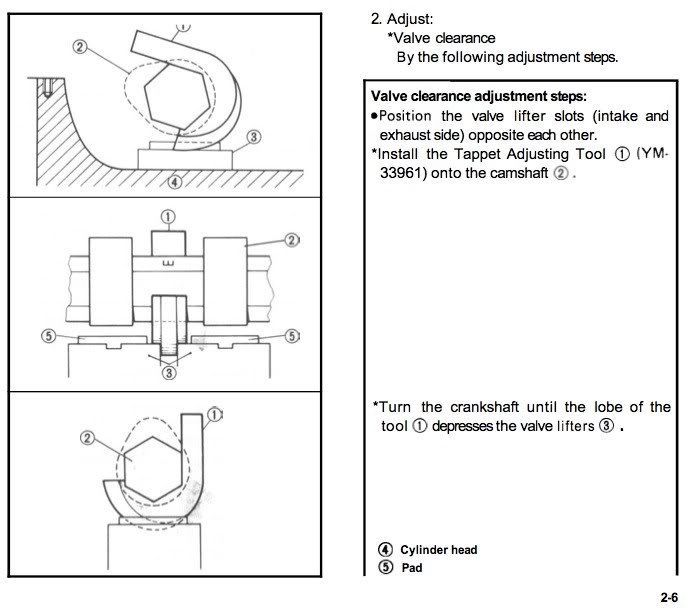
Here's Yamaha's take on the tool for reference:
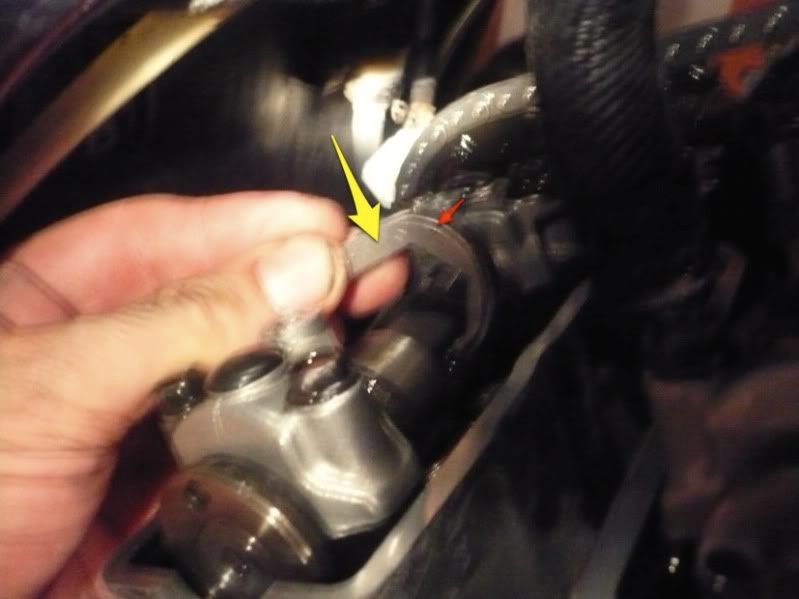
Here's the tool going in:
Now it's in place. It's of UTMOST IMPORTANCE that the tool is perfectly centered BEFORE you spin the engine. The blue arrow shows the groove of the tool that will allow the shim to move while the inner part of the tool pushes the bucket down. This MUST line up perfectly:
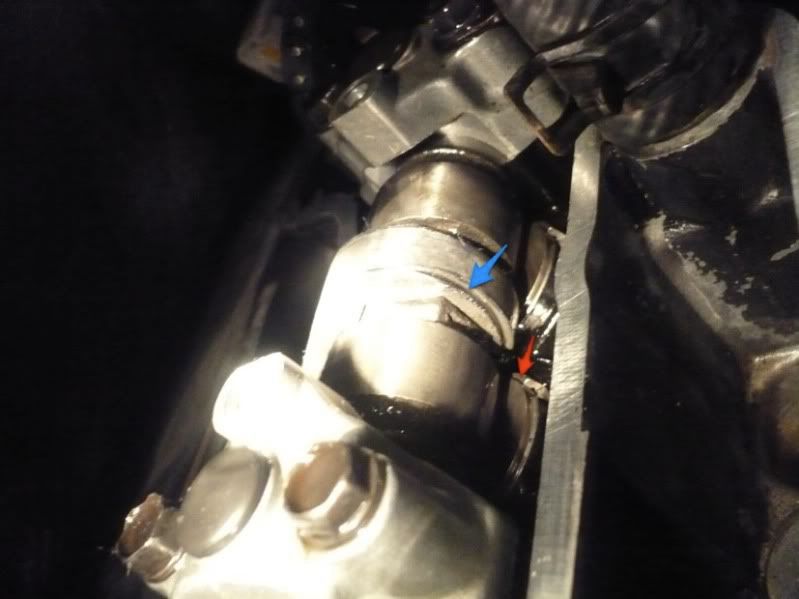
Then turn the crank until the tool (red) pushes the buckets (blue) down, freeing the shims:
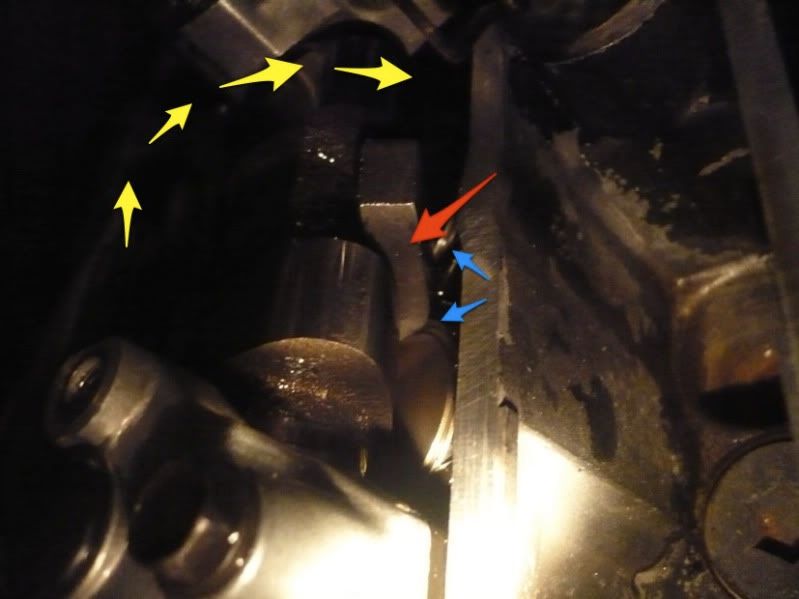
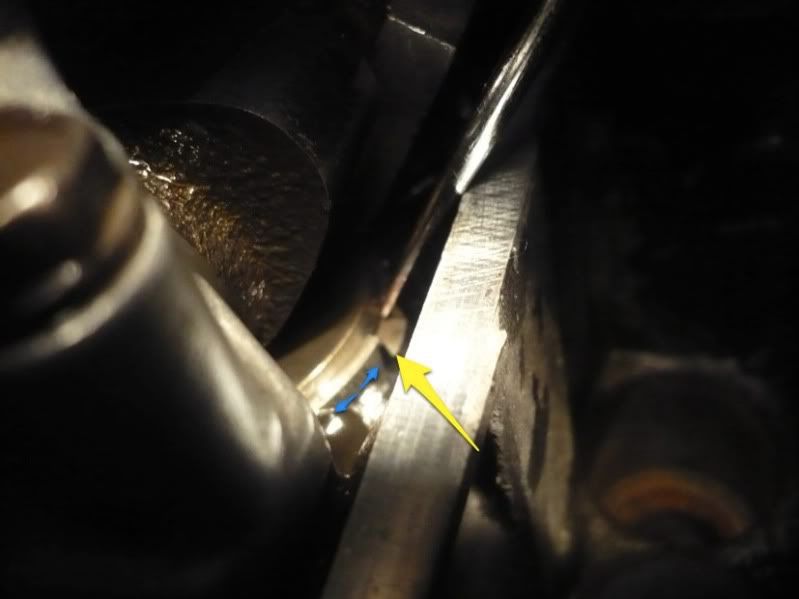
Now you can get the shim out. I used a combination of a small picking tool and the magnet that comes in Sean's kit. Notice the opening in the bucket (yellow arrow). This really helps getting under the shim. However, once the tool is pushing the bucket down it won't spin (blue arrows), but as you turn the crank the tool spins the bucket as it pushes on it. This means that you must make sure that the opening in the bucket is in the right place to start with (spinning the bucket while it's free) so it end up where it is in the photo.
I hope that makes sense, it will become obvious as you do it:
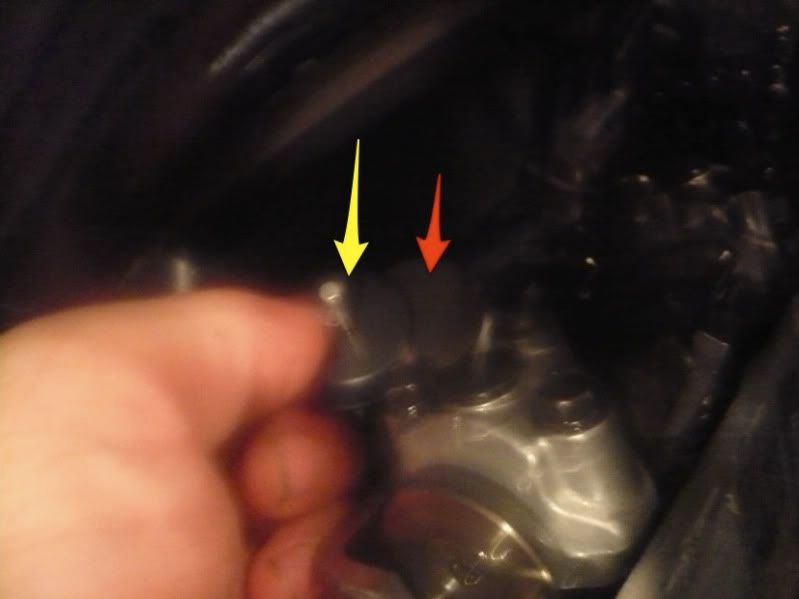
I've got my first shim out (red) using Sean's lil' magnet (yellow):
Just 'cos not everybody's got glasses...
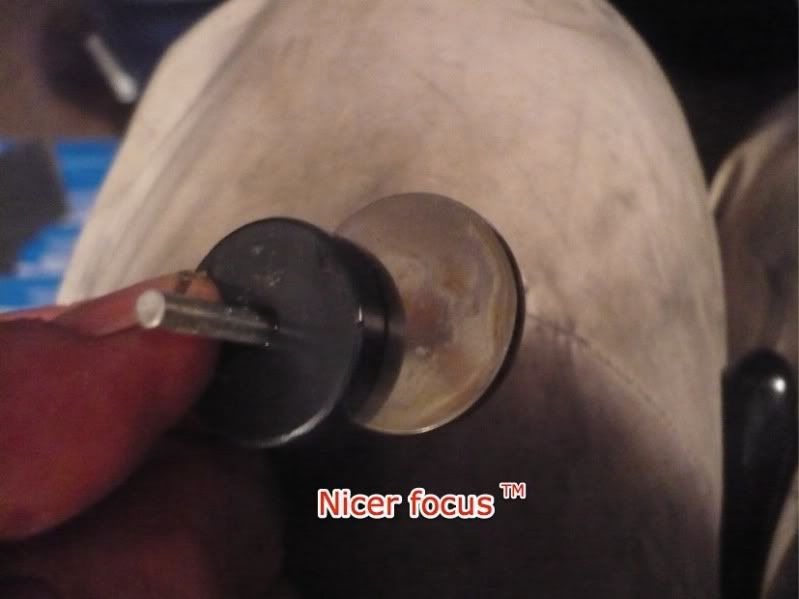
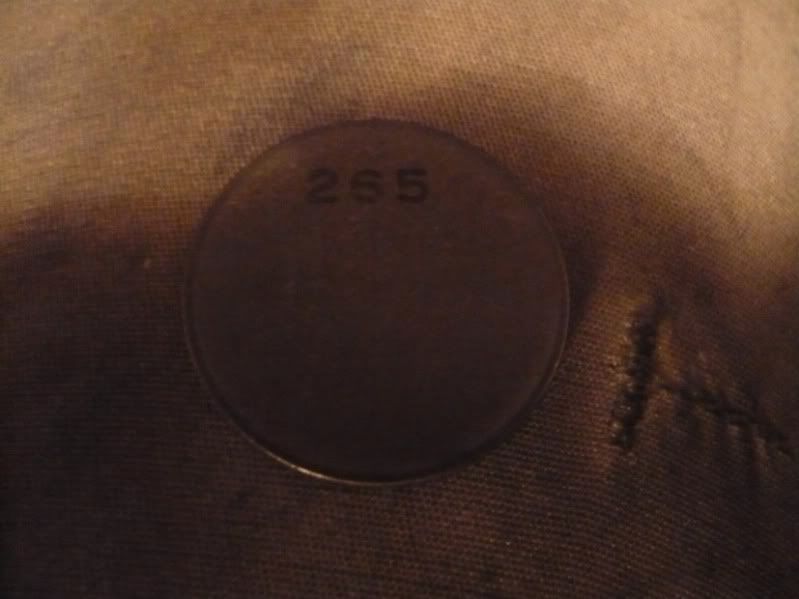
OK so this shim is a 265:
You have to refer to Yamaha's diagram to work out which shim is to be used to get the required clearance:
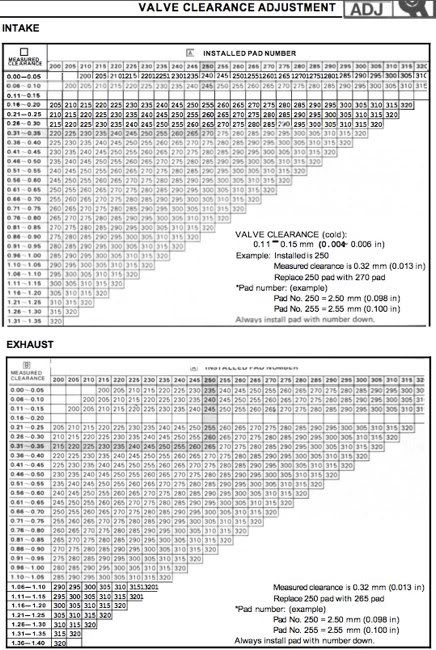
In my case, the clearance was still within spec, but still a little on the tight side, so I decided to install a 262:
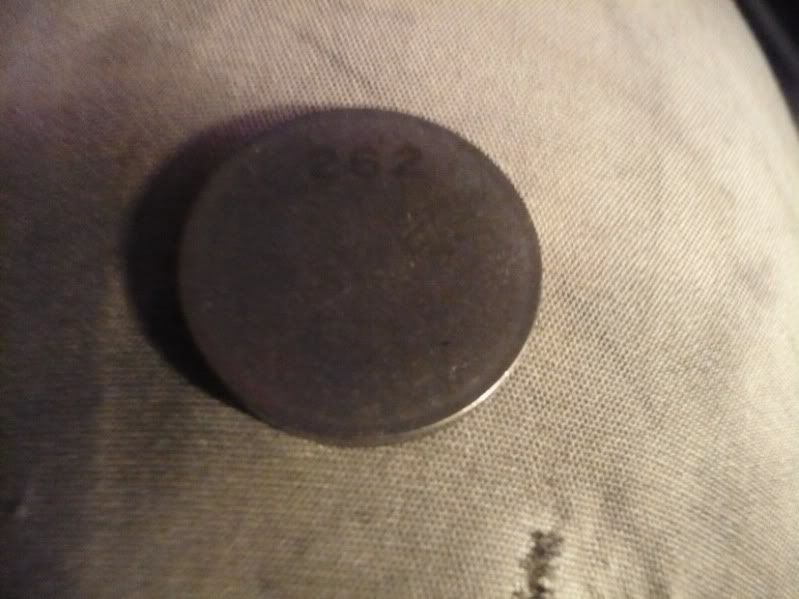
Slide it in there, you must remember to install with the number facing down:
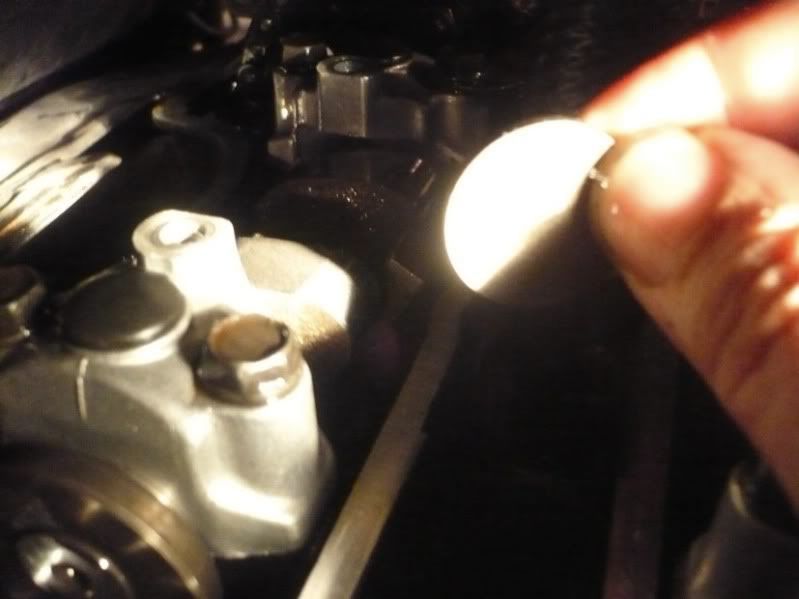
Get it to sit right, again I'm using my little pick (arrowed) to make sure it's in right:
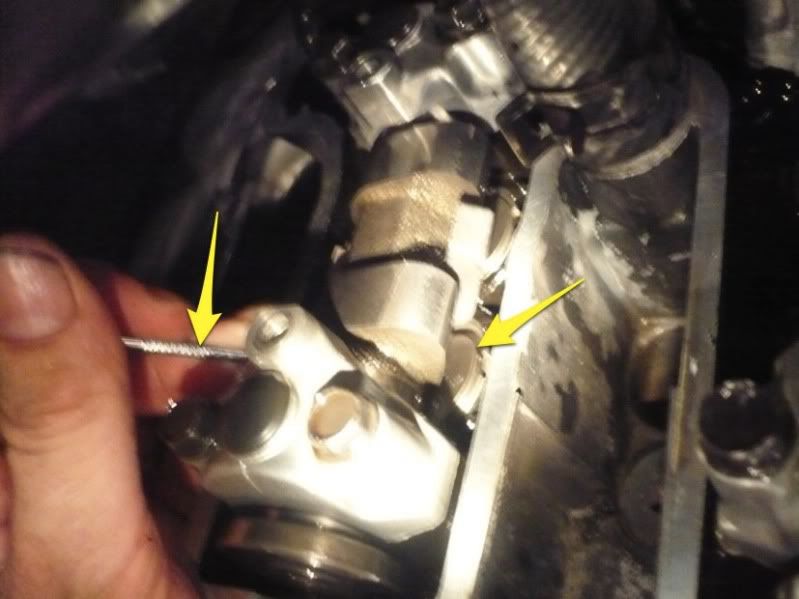
Once it's in, make double-sure it's sitting nice n flat in the bucket:
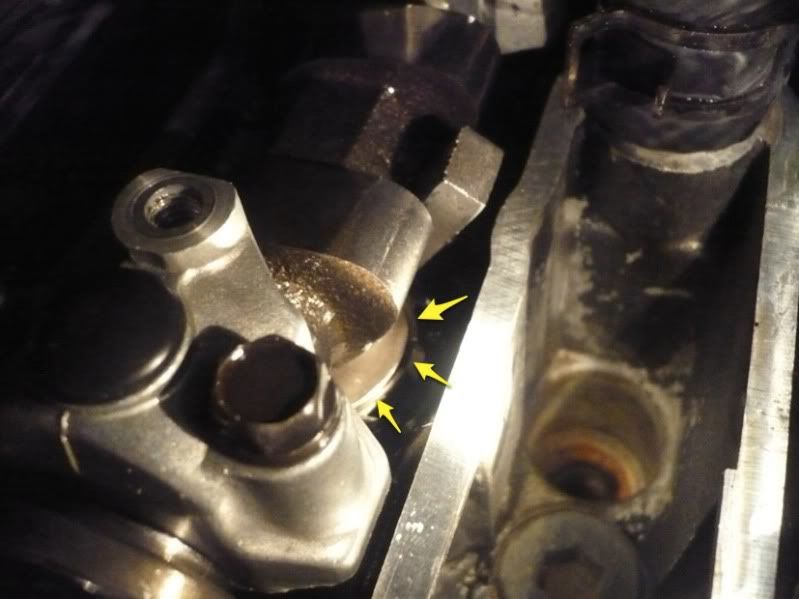
Write your clearances down as you measure them! That way you're now ready to pull out the shim next to it (the other exhaust valve of the same cylinder):
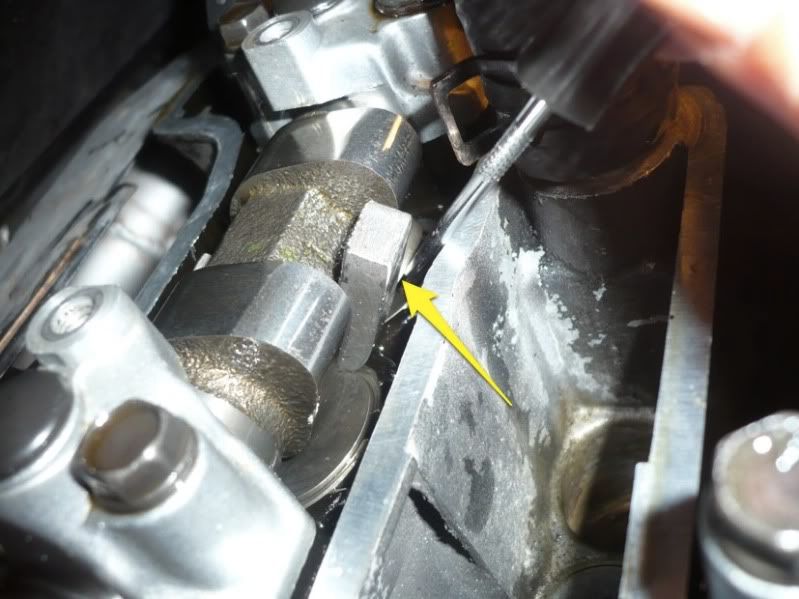
Having dislodged it with the pick, I caught it easy withthe magnet. That thing's a godsend!
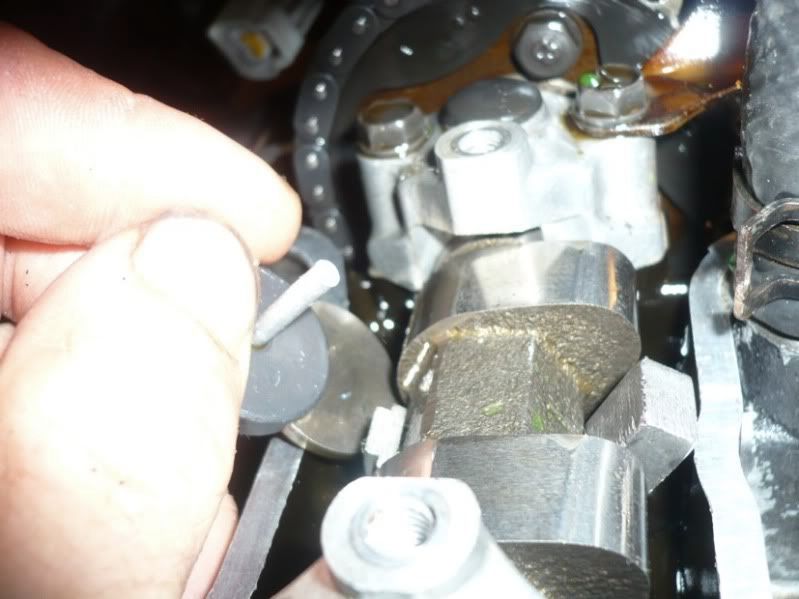
This one's a 260:
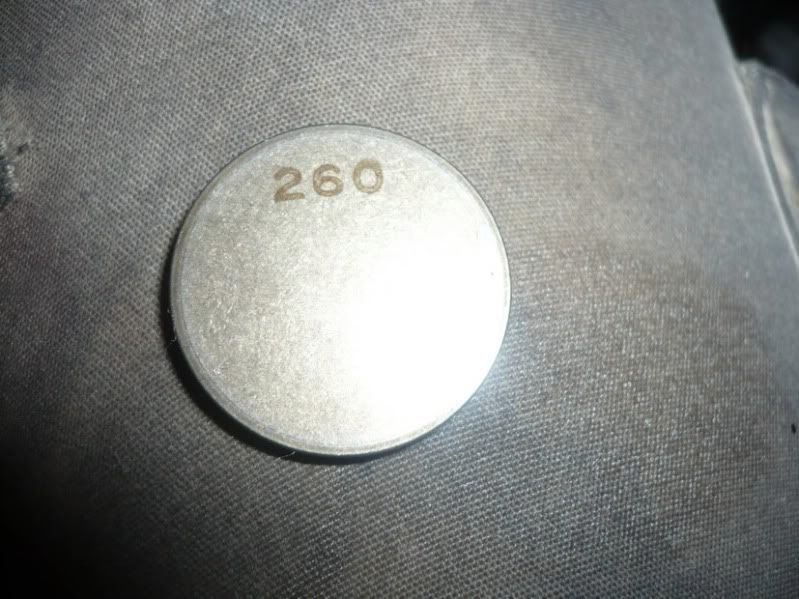
Again, it was within spec, but on the tight side, so according to the chart, to get a little higher clearance, I used a 258:
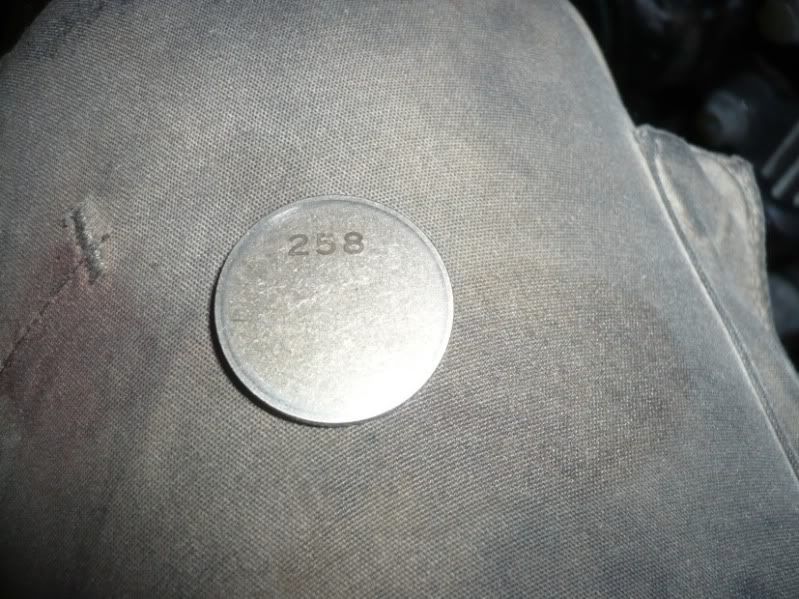
Installed it making sure it's sitting perfectly flat in its bucket:
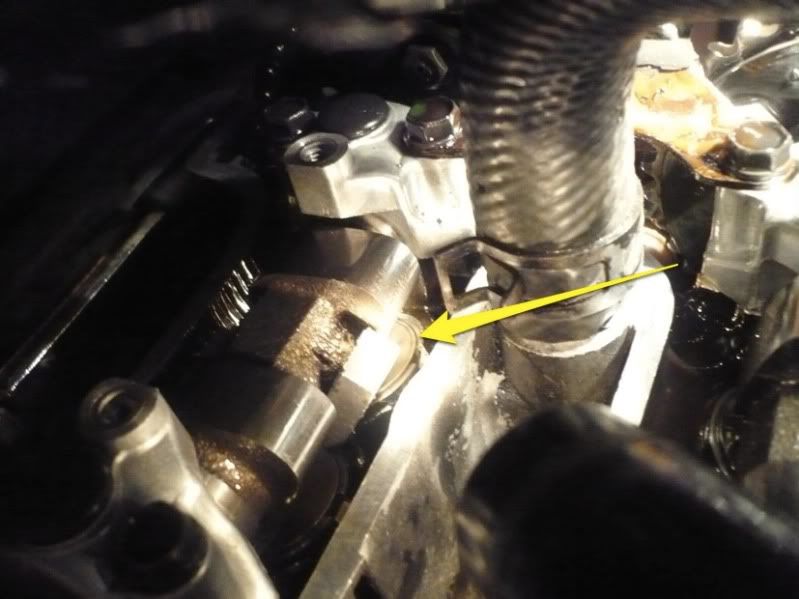
Sometimes it's a bit hit and miss, just take it slowly. You WILL be spinning the motor back and forth A LOT: to get the lobes up, measure, spin; get the tool in place, spin the buckets, spin; spin back, readjust tool/buckets, spin again; remove/replace shims, spin back; remove tool, spin to lobes up, measure; if good, move on, if not go over it again.
You WILL get better at it as you go along. The first few will be a pain, and then it gets easier. Get through all four cylinders doing the exhaust valves, that way you use the same set of gauges. DON'T get confused with the clearances in Inch and MM - I did. Then I had to redo it all, oh joy. :bang head:
Then recheck all four cylinders' exhaust clearances, and once you're happy, move on to the intakes.
Here we go, I've spun the motor for the millionth time..

..in order to get my first cylinder's intake lobes up (red) and be able to measure my clearances between shims and cams (yellow):

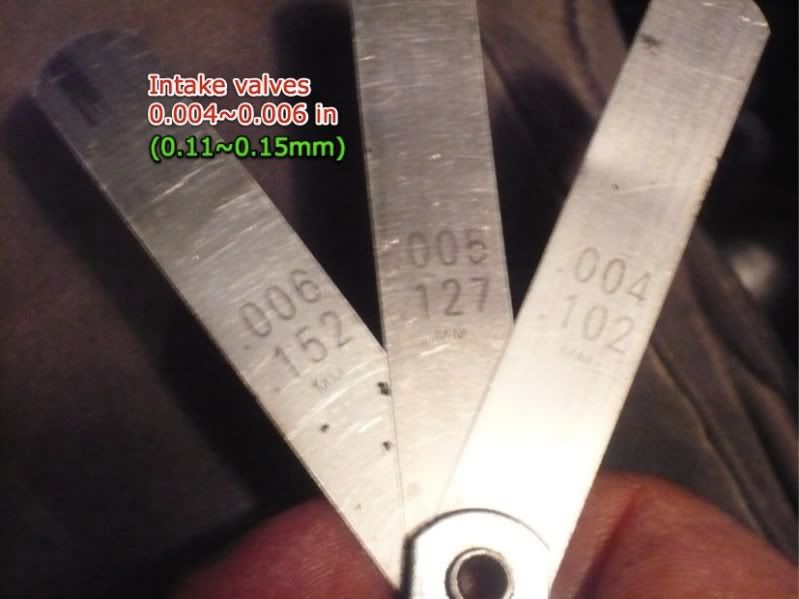
IMPORTANT!!! Change of gauges and clearances:
Again, once measured (and written down), spin the lobes away...
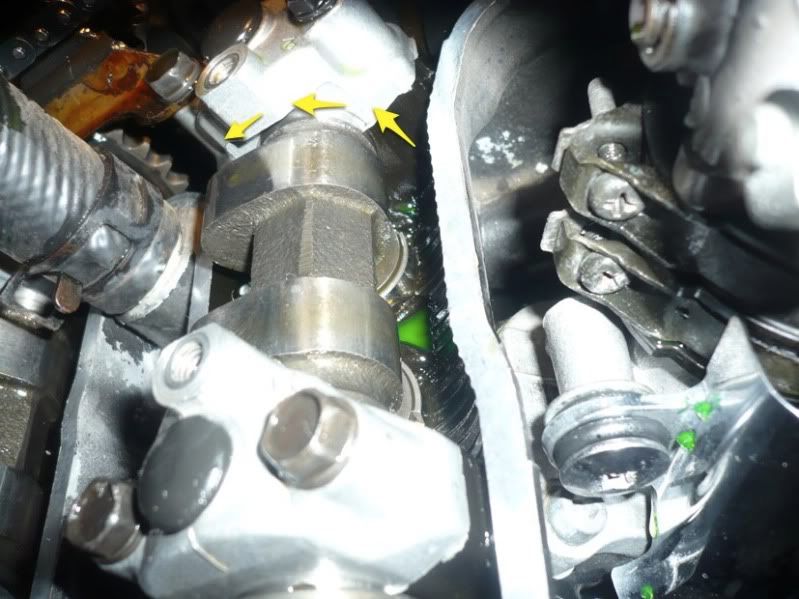
..so the tool can be inserted:
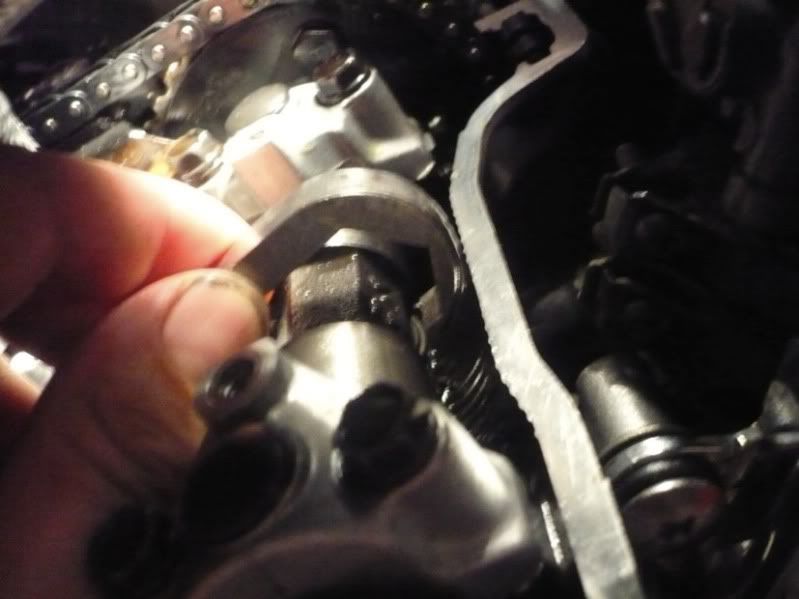
Tool's in place, buckets are spun so their opening will face the right way..
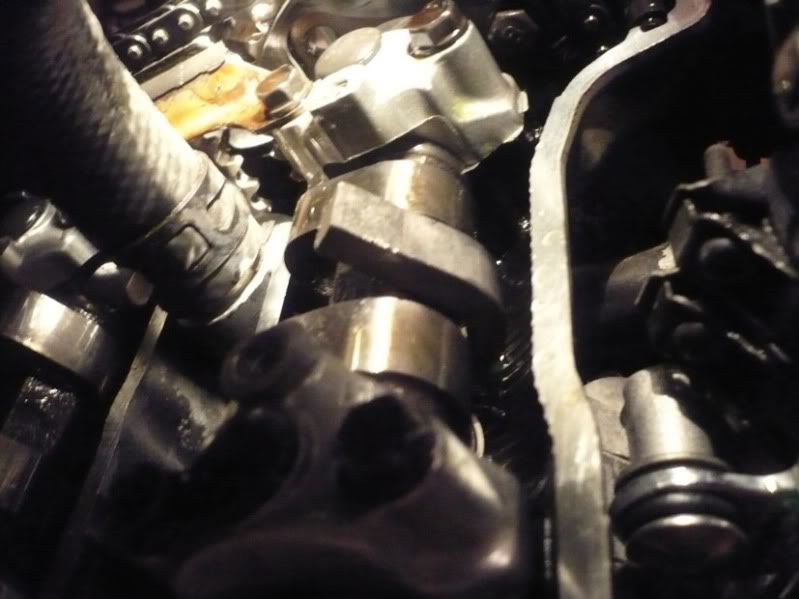
..then spin that motor once more (feel those muscles yet? :rofl_200 so that the lobes are up (red arrows) and with the tool (yellow) perfectly centered, the shims are free:
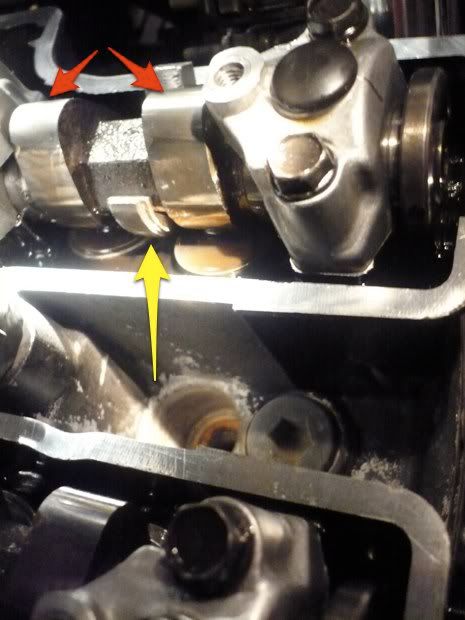
Pull the shim out..
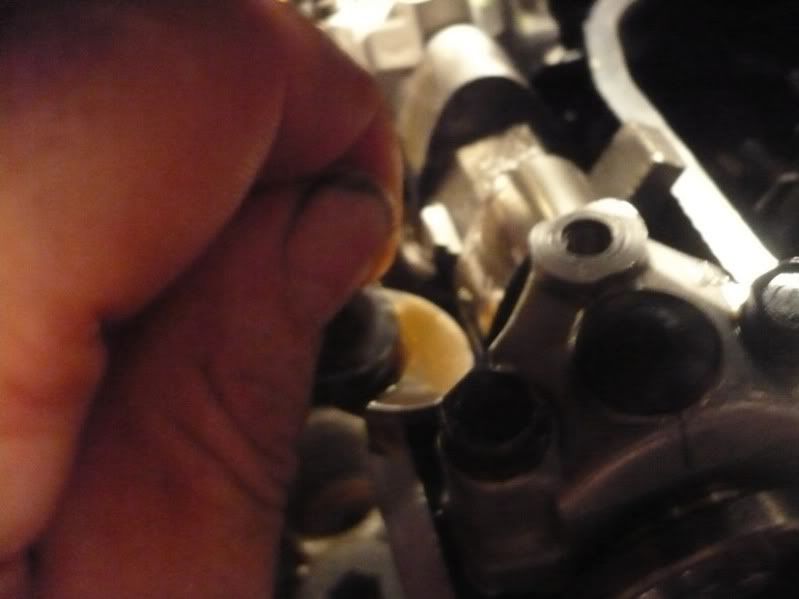
..it's a 280:
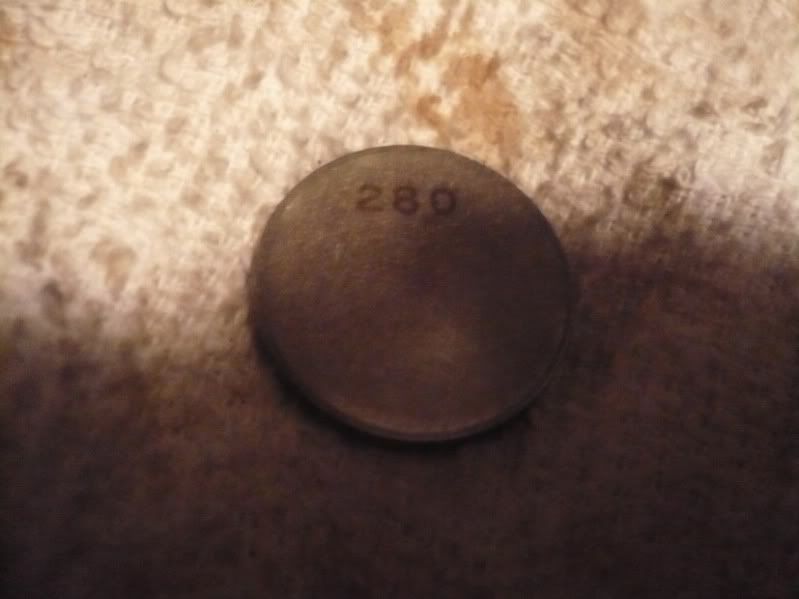
Again it was just a tiny bit tight on the clearance, so in goes a 275:
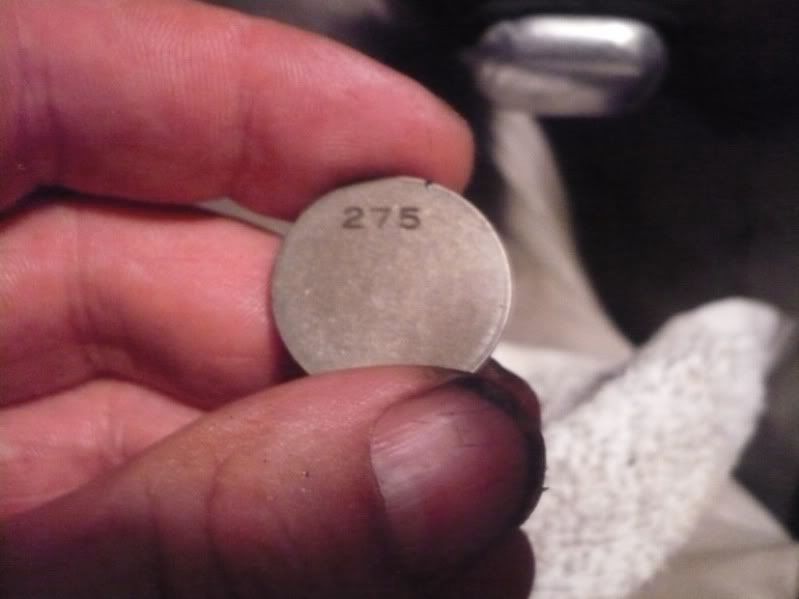
There it is nicely seated:
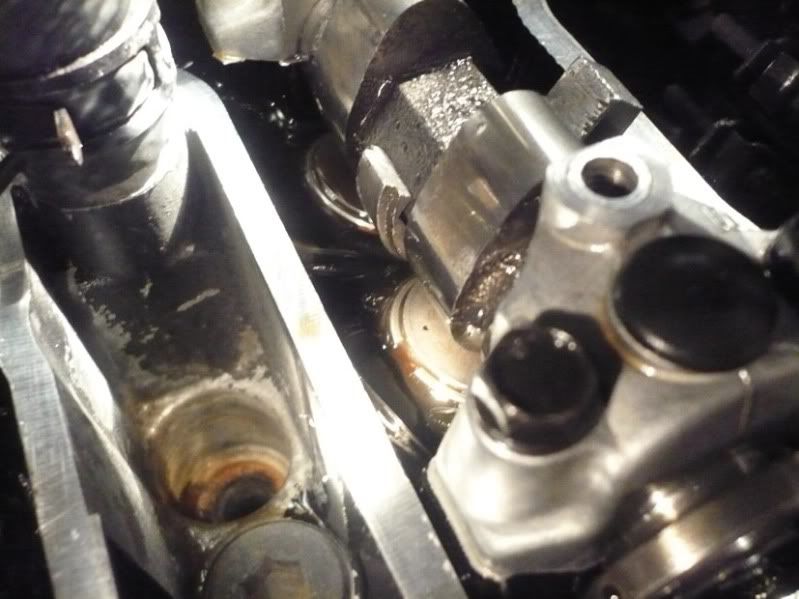
Carry on like that until all your intakes are within specification. I can't remember exactly how it went - I'm sure Sean can clarify - one set (intakes?) goes tighter over time, and the other looser, so factor that in when adjusting your clearances.
That's all there is to it - the mystery of shims and buckets valve adjustment is no more! I still am not sure why they went with this system - there must be some advantages, but it sure is a major Pain In The Arse compared to most cars of bikes that use screws and locknuts! IMHO of course..
In part 3 we'll look at putting it all back together! :clapping:
Without it, you'll need a Yamaha special tool (YM-33961 Tappet Adjusting tool), and shims of unknown values that will take forever to order, so you won't be riding for a while..
Here's the kit Sean so gracefully sent me (have I mentioned Sean rocks!?):

Plenty of shims there! Also, not shown are the special tool and another goodie - a nice little magnet tool that helps tremendously in catching and repositioning shims.
Let's get started. First you need to locate TDC (Top Dead Centre) by spinning the motor and looking in the hole for the timing mark:

To be honest, I gave up on that procedure, and just made sure the cam lobes were facing up on the valves I was measuring/adjusting. The lobes are arrowed in red, and the shims in yellow:

I started by doing the exhaust valves. Get yer gauges ready:

Spin the engine until the intake cam lobes of the cylinder you want to measure are pointing up, then insert the gauges and feel how tight or loose the clearance is. Again. lobe (yellow) must be right up, and the gauge goes between the back side of the lobe and the shim(red):

Once you've measured the clearance, and if it needs adjusting, you need to use the special tool to remove the the shims.
Before inserting the tool, you need to rotate the engine (yellow arrows) as it will need to rotate back with the tool in place.
- the green arrow shows where the tool attaches
- the blue arrows point at the shims
- the red arrows point at the shim buckets that the tool will push down:

Here's Yamaha's take on the tool for reference:

Here's the tool going in:

Now it's in place. It's of UTMOST IMPORTANCE that the tool is perfectly centered BEFORE you spin the engine. The blue arrow shows the groove of the tool that will allow the shim to move while the inner part of the tool pushes the bucket down. This MUST line up perfectly:

Then turn the crank until the tool (red) pushes the buckets (blue) down, freeing the shims:

Now you can get the shim out. I used a combination of a small picking tool and the magnet that comes in Sean's kit. Notice the opening in the bucket (yellow arrow). This really helps getting under the shim. However, once the tool is pushing the bucket down it won't spin (blue arrows), but as you turn the crank the tool spins the bucket as it pushes on it. This means that you must make sure that the opening in the bucket is in the right place to start with (spinning the bucket while it's free) so it end up where it is in the photo.
I hope that makes sense, it will become obvious as you do it:

I've got my first shim out (red) using Sean's lil' magnet (yellow):

Just 'cos not everybody's got glasses...

OK so this shim is a 265:

You have to refer to Yamaha's diagram to work out which shim is to be used to get the required clearance:

In my case, the clearance was still within spec, but still a little on the tight side, so I decided to install a 262:

Slide it in there, you must remember to install with the number facing down:

Get it to sit right, again I'm using my little pick (arrowed) to make sure it's in right:

Once it's in, make double-sure it's sitting nice n flat in the bucket:

Write your clearances down as you measure them! That way you're now ready to pull out the shim next to it (the other exhaust valve of the same cylinder):

Having dislodged it with the pick, I caught it easy withthe magnet. That thing's a godsend!

This one's a 260:

Again, it was within spec, but on the tight side, so according to the chart, to get a little higher clearance, I used a 258:

Installed it making sure it's sitting perfectly flat in its bucket:

Sometimes it's a bit hit and miss, just take it slowly. You WILL be spinning the motor back and forth A LOT: to get the lobes up, measure, spin; get the tool in place, spin the buckets, spin; spin back, readjust tool/buckets, spin again; remove/replace shims, spin back; remove tool, spin to lobes up, measure; if good, move on, if not go over it again.
You WILL get better at it as you go along. The first few will be a pain, and then it gets easier. Get through all four cylinders doing the exhaust valves, that way you use the same set of gauges. DON'T get confused with the clearances in Inch and MM - I did. Then I had to redo it all, oh joy. :bang head:
Then recheck all four cylinders' exhaust clearances, and once you're happy, move on to the intakes.
Here we go, I've spun the motor for the millionth time..

..in order to get my first cylinder's intake lobes up (red) and be able to measure my clearances between shims and cams (yellow):

IMPORTANT!!! Change of gauges and clearances:

Again, once measured (and written down), spin the lobes away...

..so the tool can be inserted:

Tool's in place, buckets are spun so their opening will face the right way..

..then spin that motor once more (feel those muscles yet? :rofl_200

Pull the shim out..

..it's a 280:

Again it was just a tiny bit tight on the clearance, so in goes a 275:

There it is nicely seated:

Carry on like that until all your intakes are within specification. I can't remember exactly how it went - I'm sure Sean can clarify - one set (intakes?) goes tighter over time, and the other looser, so factor that in when adjusting your clearances.
That's all there is to it - the mystery of shims and buckets valve adjustment is no more! I still am not sure why they went with this system - there must be some advantages, but it sure is a major Pain In The Arse compared to most cars of bikes that use screws and locknuts! IMHO of course..
In part 3 we'll look at putting it all back together! :clapping:


![Bovemanx Motorcycle Phone Mount Holder, [150mph Wind Anti-Shake][7.2inch Big Phone Friendly] Bike Phone Holder, Motorcycle Handlebar Cell Phone Clamp, Compatible with iPhone 16 Pro Max Smartphones](https://m.media-amazon.com/images/I/51F+1sontPL._SL500_.jpg)


