naughtyG
Well-Known Member
Ok so since I couldn't ride today (missing that front wheel spacer) I went ahead with Birdoprey's Coils Over Plugs mod. Thanks for sending that wire harness Mark!:worthy:
I got a set of COPs from an '05 GSXR 600 ($10), and another set from an '01 CBR 929 RR ($5) as spares - both ended up being the Denso brand and the longer ones.
I decided to remove the OEM coils too, but didn't use their factory connectors for the COPs wiring so I could sell my old coils as they're in excellent shape.
To start with, I assume anyone reading this knows how to remove their faux-tank, faux-air cowls and the seat (front if you have stock). It might help to remove the carbs' chrome H covers - not really imperative but mine just happened to be off. Also, you must make absolutely sure you have the correct Philips head screwdrivers / bits for the job or you will have a total nightmare.
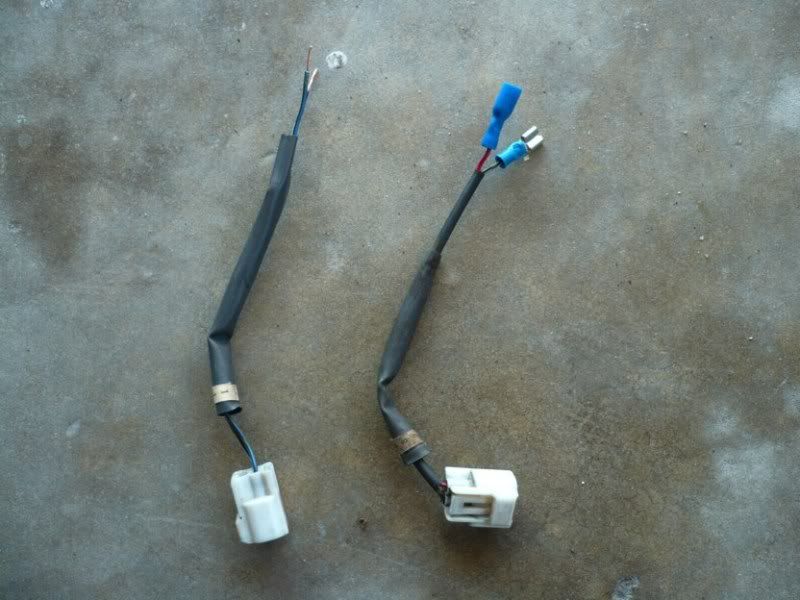
First let's prepare the wiring. On the left is how it came, on the right is what I did to it, adding heatshrink tubes to both ends and crimping the connectors on. On the harness I got the black/white wire is the common:
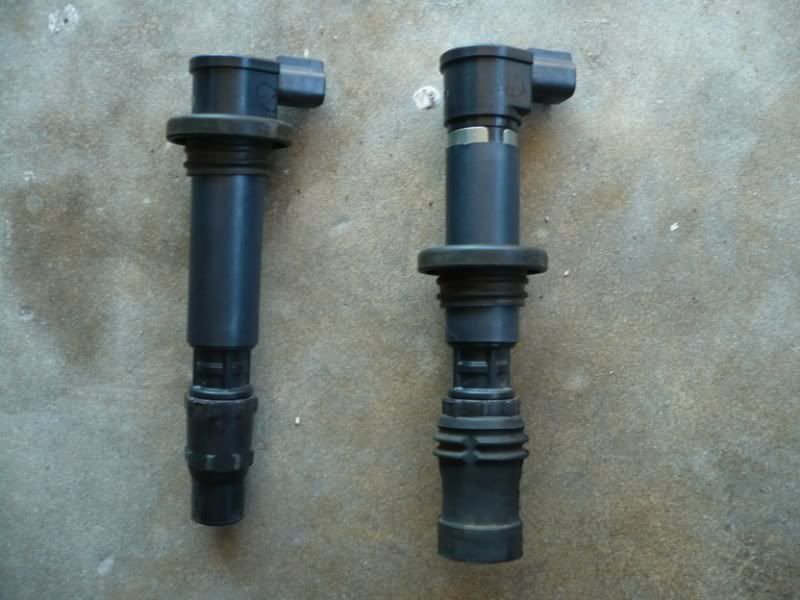
Then I prepared the COPs. Again original on the left, and on the right I slid the top rubber ring down (using it for vibration damping) and added the rubber boot from the OEM spark plug boots:
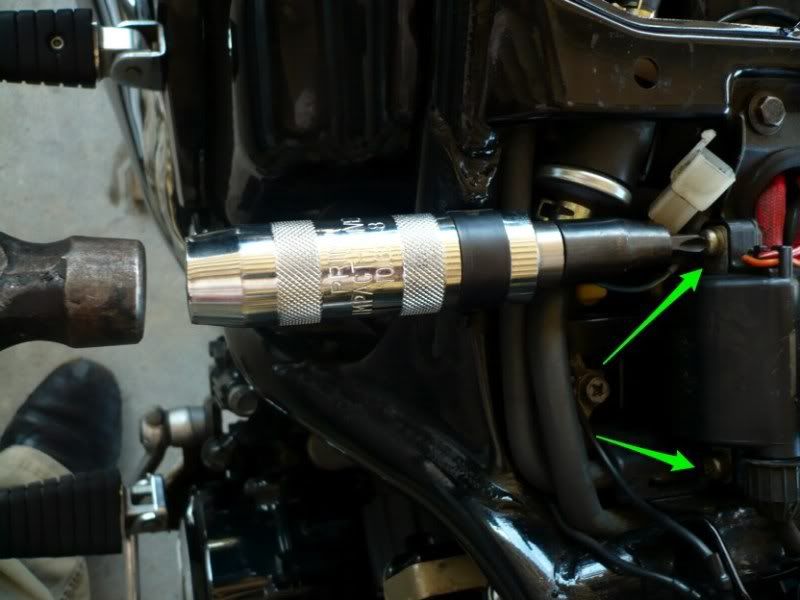
To remove the rear coils, I found I needed to use the impact driver to disturb those very tight screws. I cannot say it enough - make sure you're using the right size Philips driver or you don't stand a chance..
We're looking at the right-hand coil (#3) and I've arrowed the mounting screws
Then I removed the heatshield rubber and pulled the boot off the spark plug.
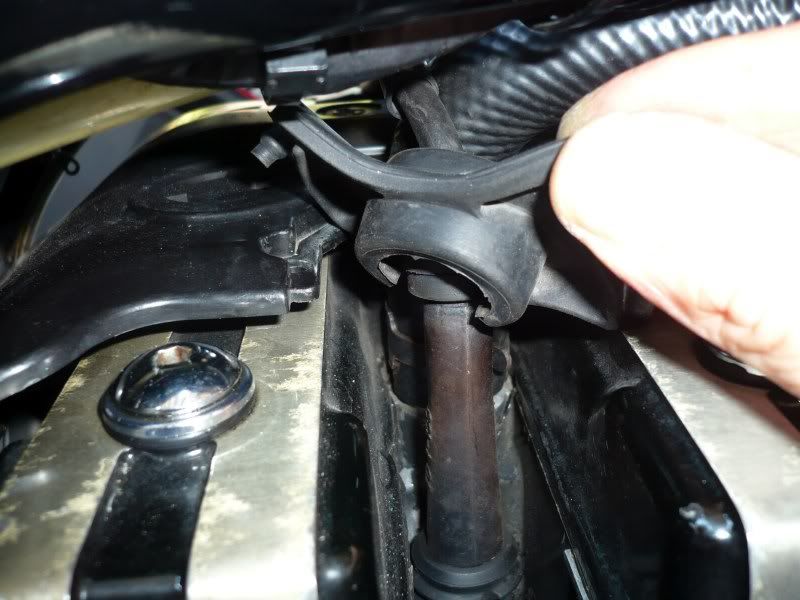
Here the rear right coil is coming off, pulling the HT wire and plug boot with it
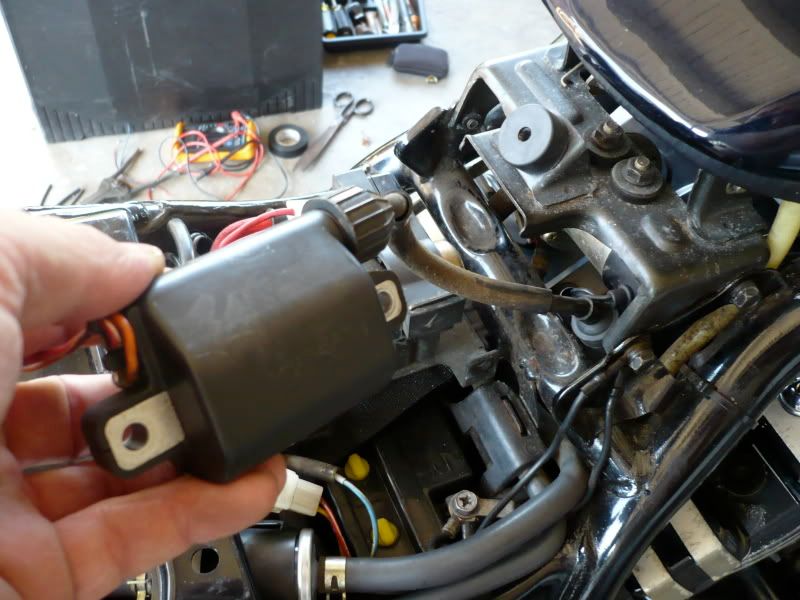
Looking on the left side - green arrow points at the #1 coil connector, and blue arrow points at the relay I removed from its mount (red arrow) for easy access to the COP wiring route:
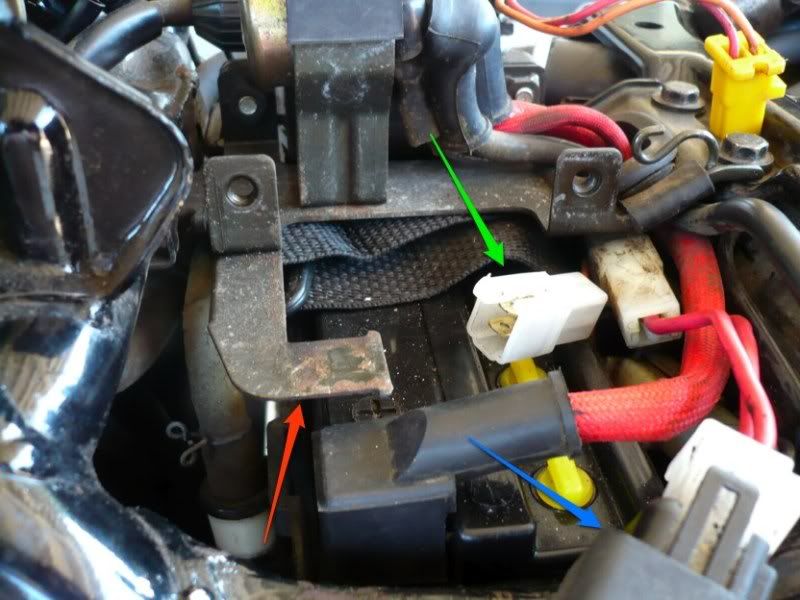
COP wiring (arrowed) in place and connected. As mentioned earlier, I decided not to use the factory wiring connectors so I could sell my OEM coils complete. If you prefer using the factory connectors for your COPs, check out Birdoprey's instructions on how to remove them from the OEM wiring.
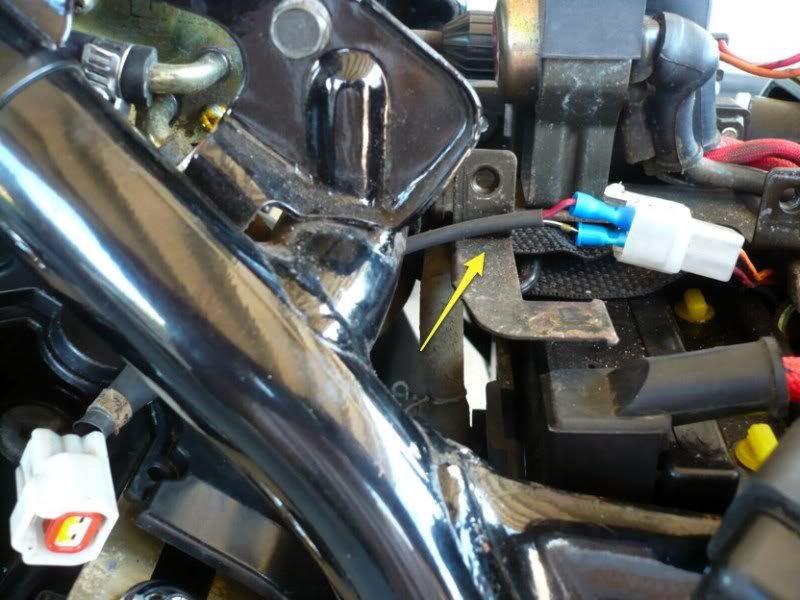
and here it is all electrical taped-up for waterproofing and peace of mind
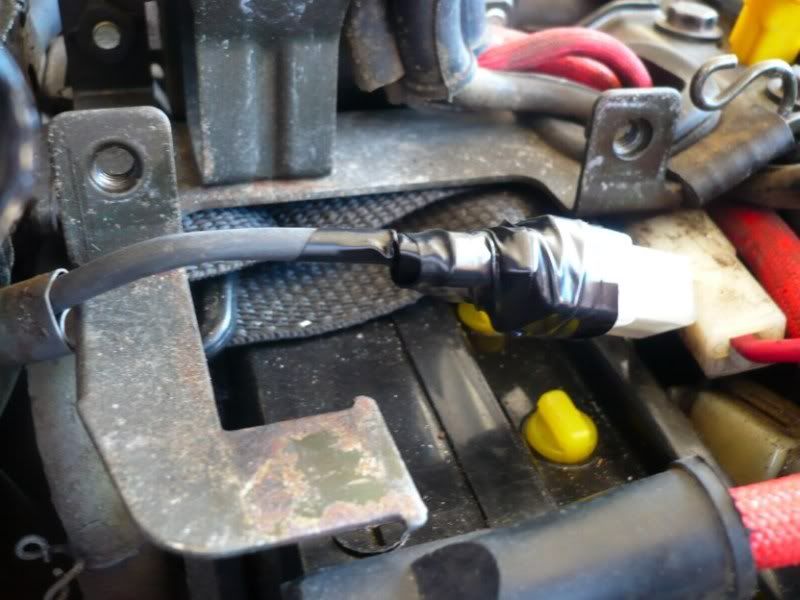
The #1 COP is in. Being the taller kind, you have to pop it in at an angle to clear the frame.
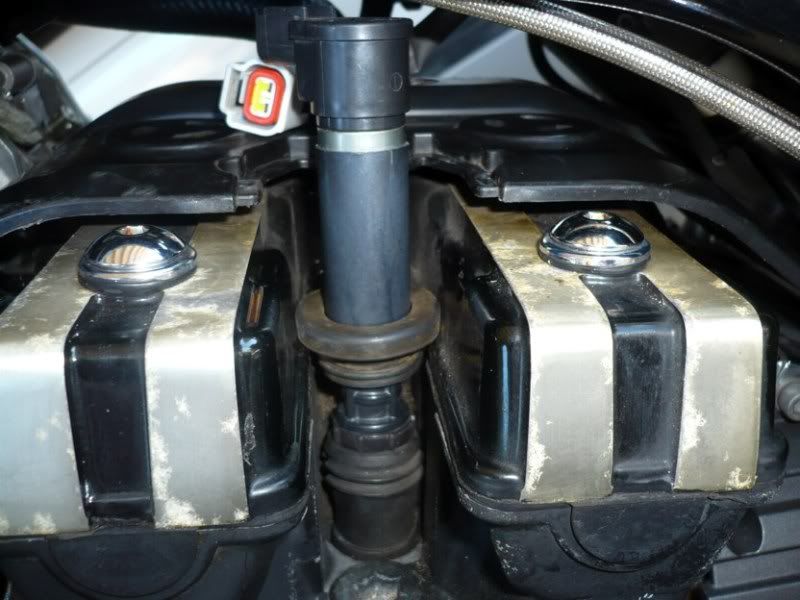
Then I tried wrapping the original heat shield rubber around it. It's quite tight and I thought about cutting some if it...
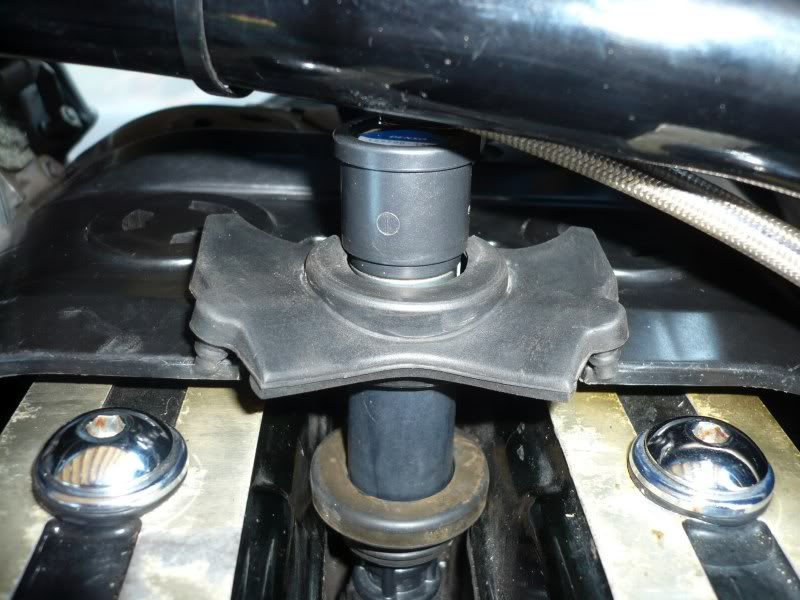
...but didn't need to and it fits! Here's one well secured #1 COP in place:
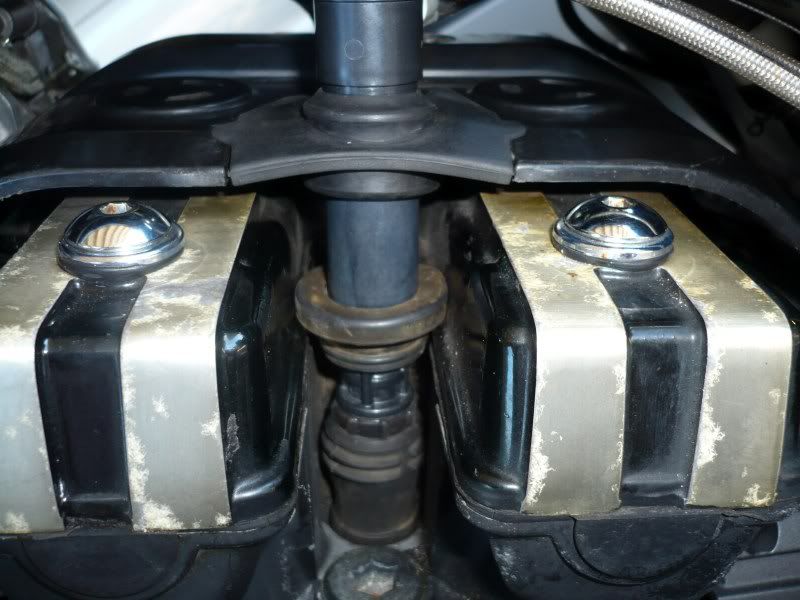
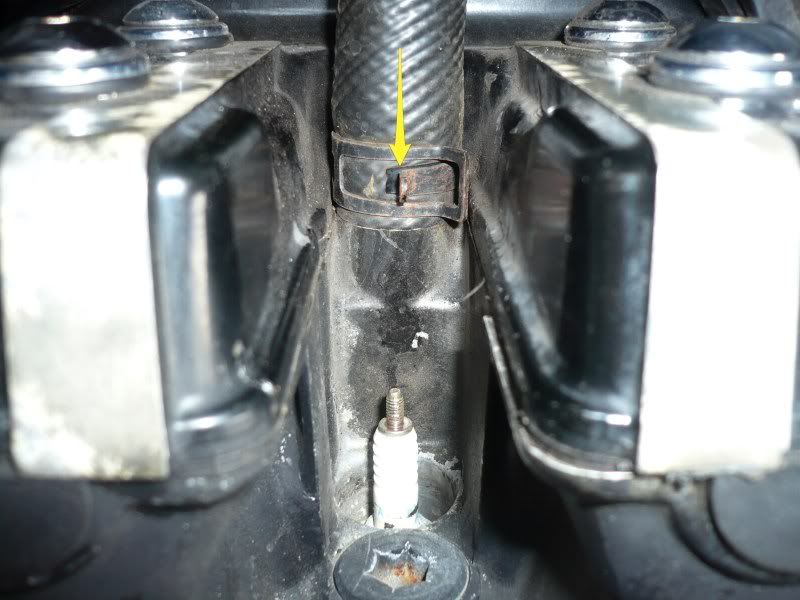
Over on the other side, I ran into another problem - the coolant hose clip put the COP at a bad angle and rubbed hard on it. I got the thin pliers out..
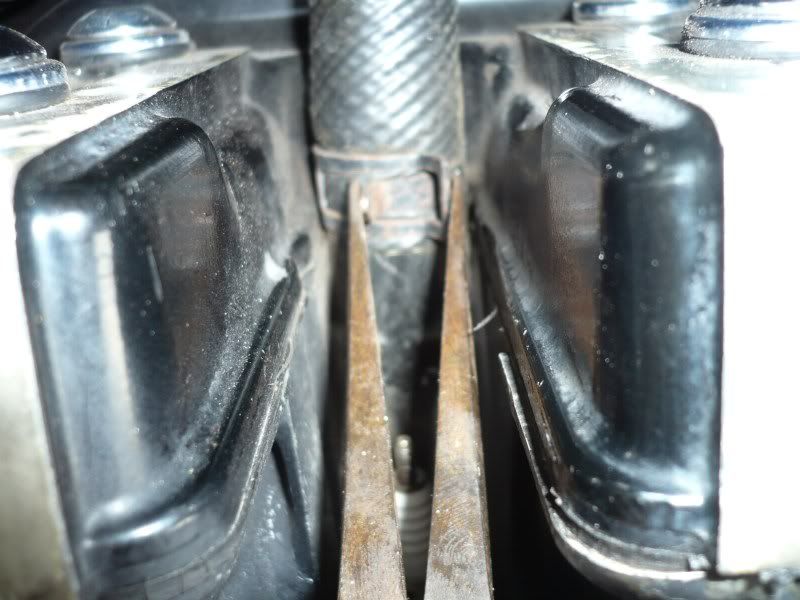
..and moved the bigger bit out of the way. The arrowed bit isn't as big a protusion as the other one, so the COP can sit pretty much straight in front of it
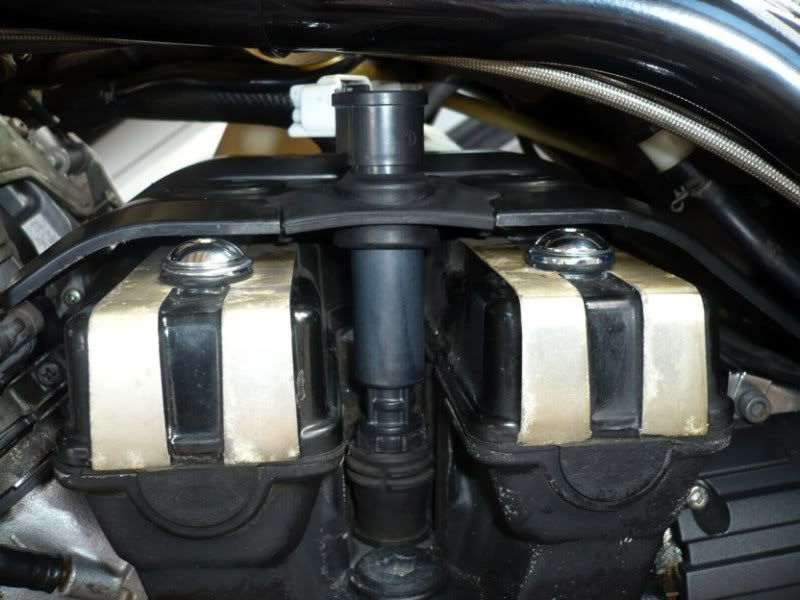
The rear right COP (#3) is going in, again at an angle to clear the frame. Also notice I decided to remove the middle rubber ring (on #1 also)...
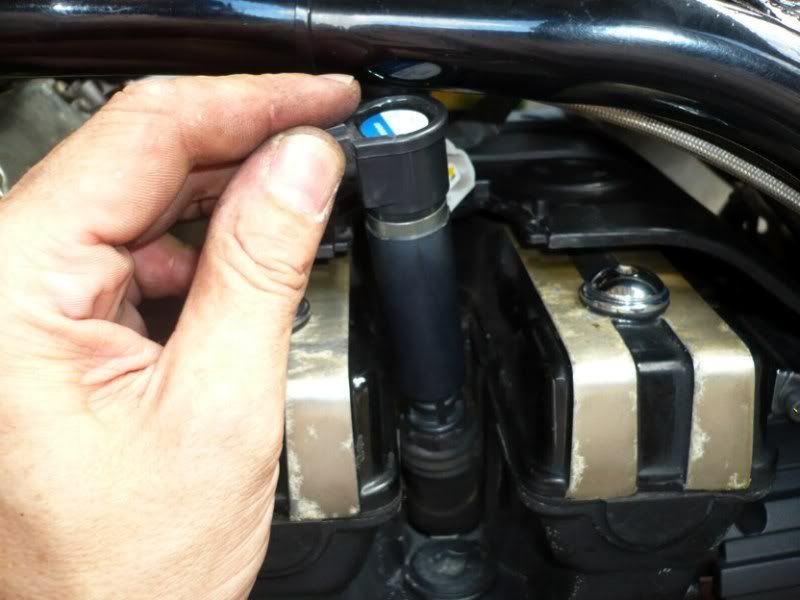
...because the original heat shield rubber keeps it in place just fine!
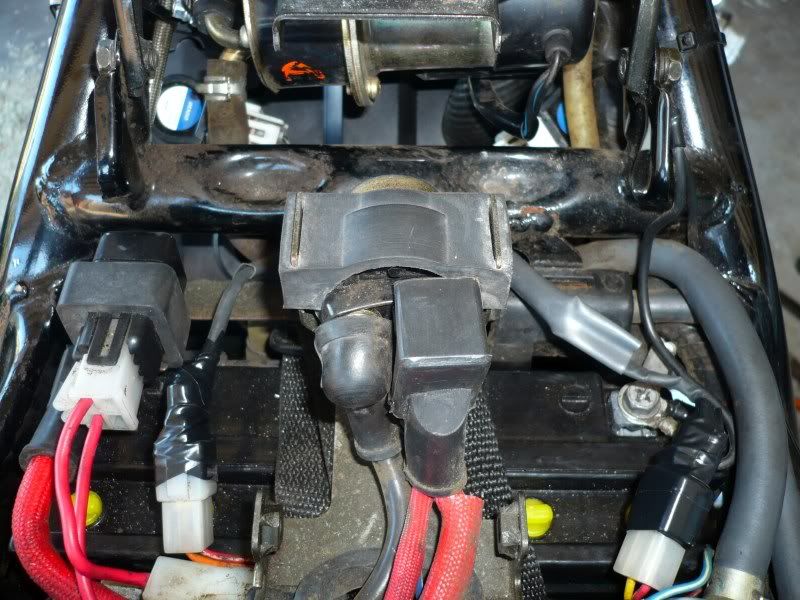
Here's a top view of the rear COPs wiring all done with the OEM rear coils removed - if I make a hole in my Corbin seat I'll have a nice safe space to park my balls LOL
In part 2 we'll get to the front coils - I'm splitting the thread again so that it doesn't take so long to load with all those images..
Here's part 2: http://www.vmaxforum.net/showthread.php?t=5868
I got a set of COPs from an '05 GSXR 600 ($10), and another set from an '01 CBR 929 RR ($5) as spares - both ended up being the Denso brand and the longer ones.
I decided to remove the OEM coils too, but didn't use their factory connectors for the COPs wiring so I could sell my old coils as they're in excellent shape.
To start with, I assume anyone reading this knows how to remove their faux-tank, faux-air cowls and the seat (front if you have stock). It might help to remove the carbs' chrome H covers - not really imperative but mine just happened to be off. Also, you must make absolutely sure you have the correct Philips head screwdrivers / bits for the job or you will have a total nightmare.
First let's prepare the wiring. On the left is how it came, on the right is what I did to it, adding heatshrink tubes to both ends and crimping the connectors on. On the harness I got the black/white wire is the common:

Then I prepared the COPs. Again original on the left, and on the right I slid the top rubber ring down (using it for vibration damping) and added the rubber boot from the OEM spark plug boots:

To remove the rear coils, I found I needed to use the impact driver to disturb those very tight screws. I cannot say it enough - make sure you're using the right size Philips driver or you don't stand a chance..
We're looking at the right-hand coil (#3) and I've arrowed the mounting screws

Then I removed the heatshield rubber and pulled the boot off the spark plug.

Here the rear right coil is coming off, pulling the HT wire and plug boot with it

Looking on the left side - green arrow points at the #1 coil connector, and blue arrow points at the relay I removed from its mount (red arrow) for easy access to the COP wiring route:

COP wiring (arrowed) in place and connected. As mentioned earlier, I decided not to use the factory wiring connectors so I could sell my OEM coils complete. If you prefer using the factory connectors for your COPs, check out Birdoprey's instructions on how to remove them from the OEM wiring.

and here it is all electrical taped-up for waterproofing and peace of mind

The #1 COP is in. Being the taller kind, you have to pop it in at an angle to clear the frame.

Then I tried wrapping the original heat shield rubber around it. It's quite tight and I thought about cutting some if it...

...but didn't need to and it fits! Here's one well secured #1 COP in place:

Over on the other side, I ran into another problem - the coolant hose clip put the COP at a bad angle and rubbed hard on it. I got the thin pliers out..

..and moved the bigger bit out of the way. The arrowed bit isn't as big a protusion as the other one, so the COP can sit pretty much straight in front of it

The rear right COP (#3) is going in, again at an angle to clear the frame. Also notice I decided to remove the middle rubber ring (on #1 also)...

...because the original heat shield rubber keeps it in place just fine!

Here's a top view of the rear COPs wiring all done with the OEM rear coils removed - if I make a hole in my Corbin seat I'll have a nice safe space to park my balls LOL

In part 2 we'll get to the front coils - I'm splitting the thread again so that it doesn't take so long to load with all those images..
Here's part 2: http://www.vmaxforum.net/showthread.php?t=5868
Last edited:


![Bovemanx Motorcycle Phone Mount Holder, [150mph Wind Anti-Shake][7.2inch Big Phone Friendly] Bike Phone Holder, Motorcycle Handlebar Cell Phone Clamp, Compatible with iPhone 16 Pro Max Smartphones](https://m.media-amazon.com/images/I/51F+1sontPL._SL500_.jpg)


