naughtyG
Well-Known Member
As I went to do the front COPs, I thought there was no way I would leave the original coils in place - after all the COPs mod is as much about saving weight and space as it is about better performance through less resistance in the coils circuit and better reliability through removing those failure-prone HT leads and spark plug boots.
Here's the lowdown on how to get 'em fuckers out - Yamaha did bury them nicely out of the way!
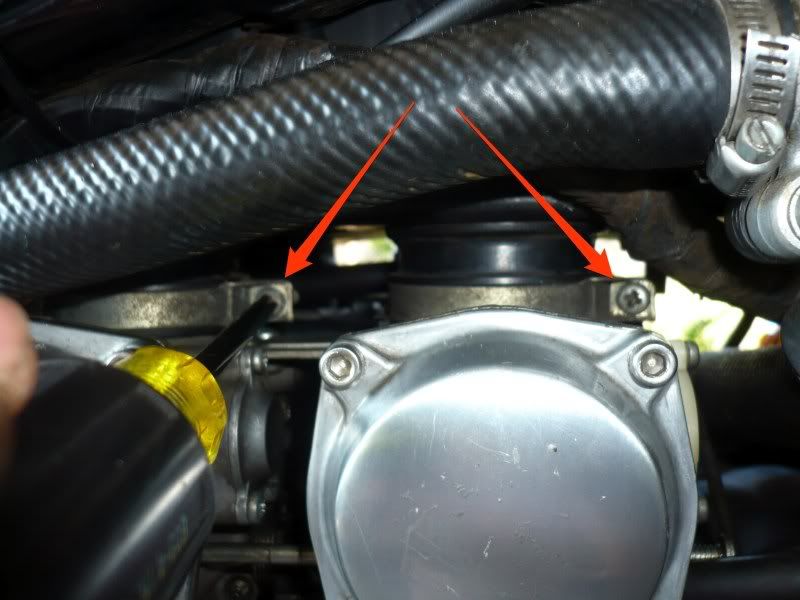
First things first, let's get access. To get to what we want, we need to remove the air box. No need to open it or remove the air filter - it all comes off in one piece dead easy. First loosen the air box boots clips (screws arrowed) on the left..
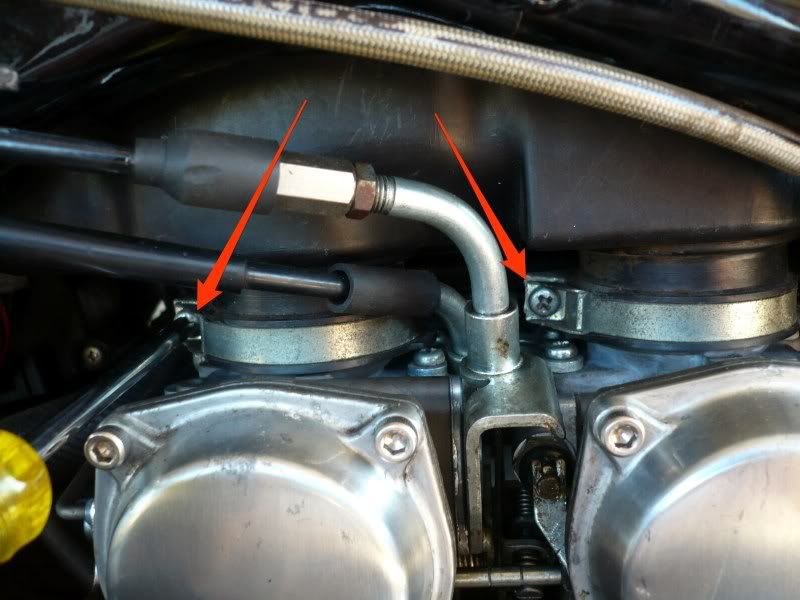
..and on the right.
Then remove the fuel bowls vent hoses from the airbox on both sides...
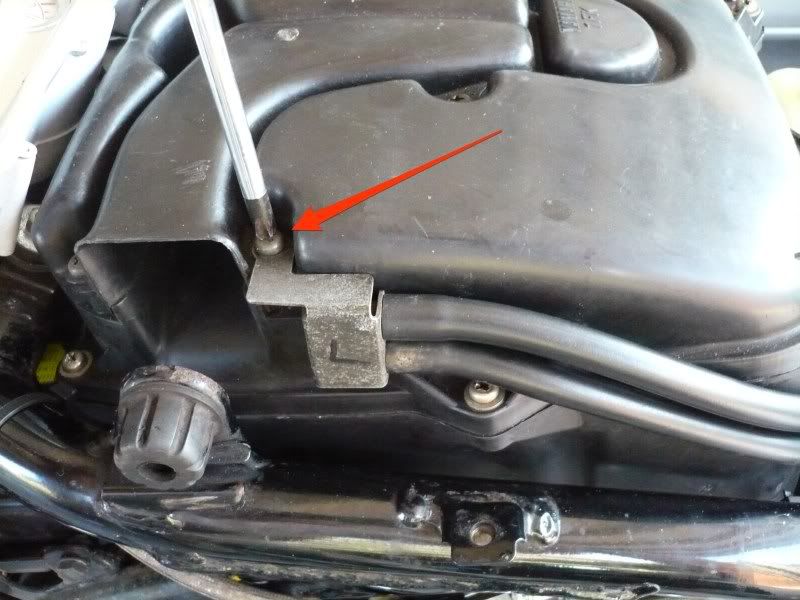
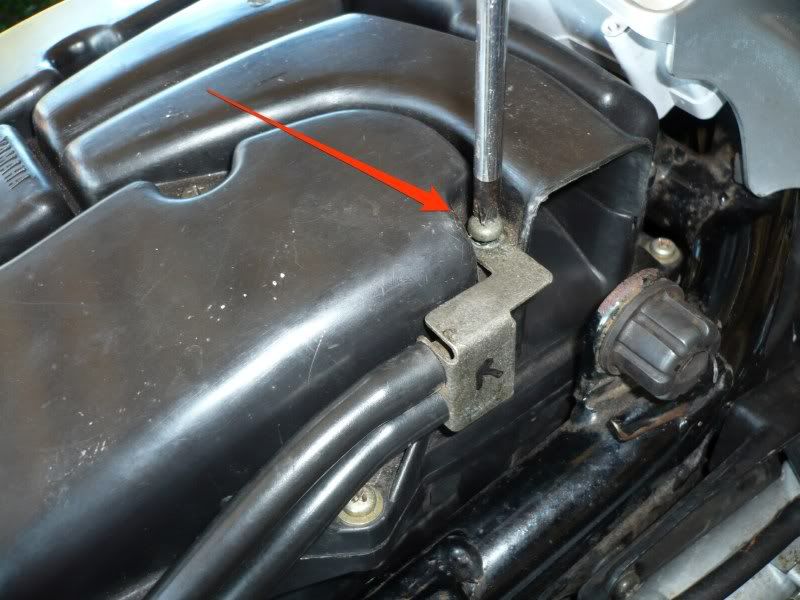
Pull off the puke tank and set it aside...
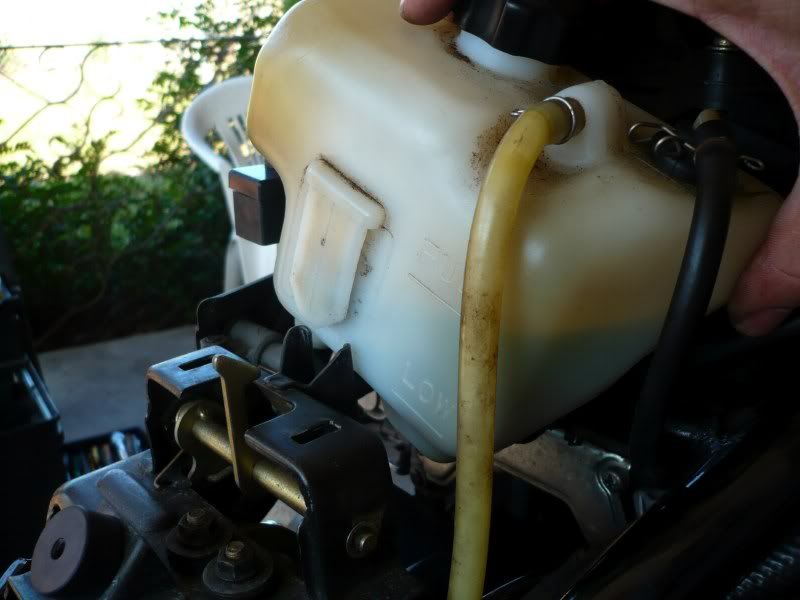
..and pull the crankcase vent hose from the bottom rear of the air box (the ***** clip is arrowed)...
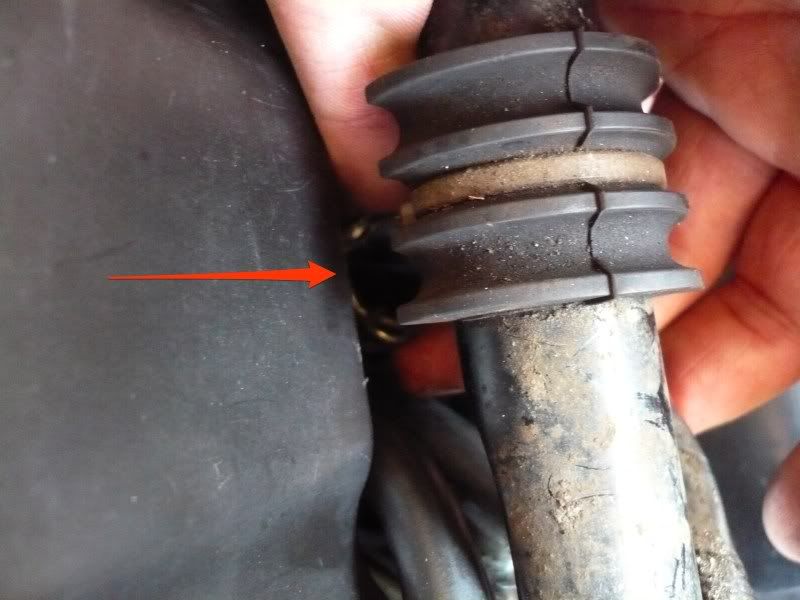
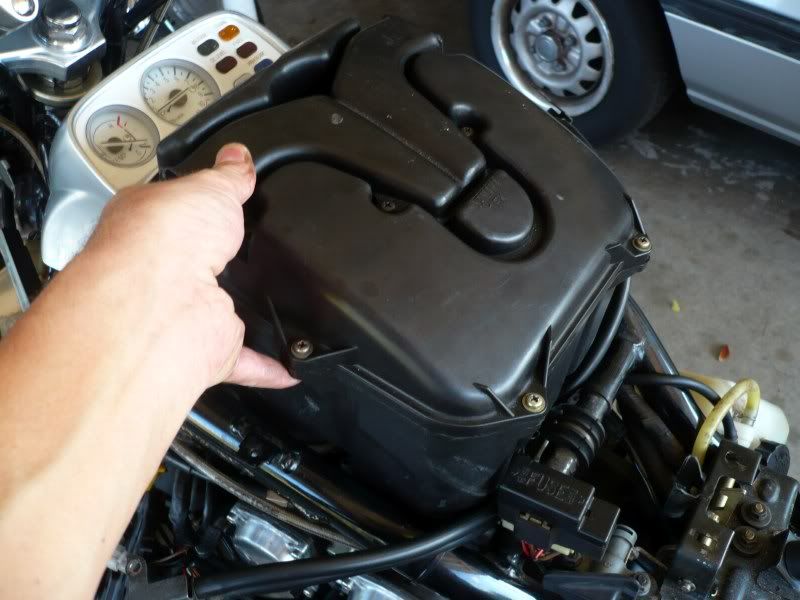
then pull the whole air box off and go play some football with it :rofl_200:
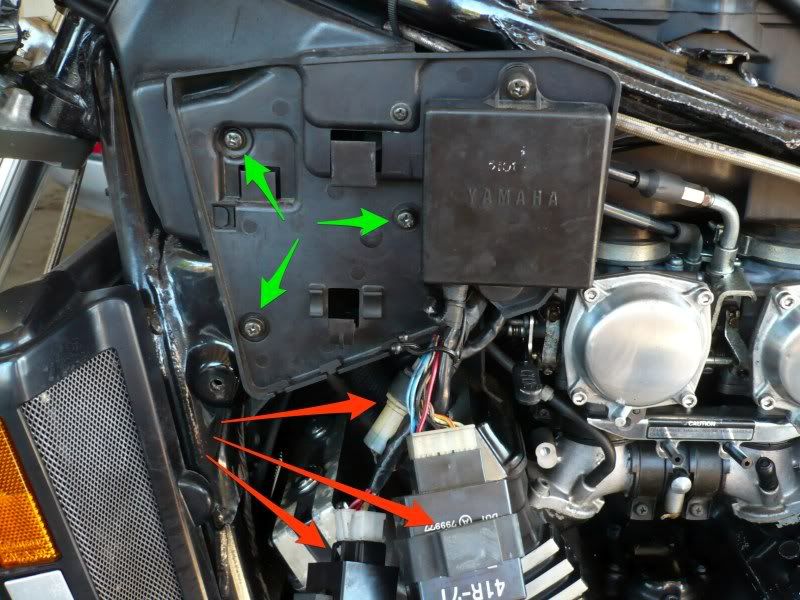
On the electrics panel under the left cowl, pull the relays off their mounts (arrowed in red) and remove the three screws (arrowed in green)
and then pull the coil HT lead and boot out
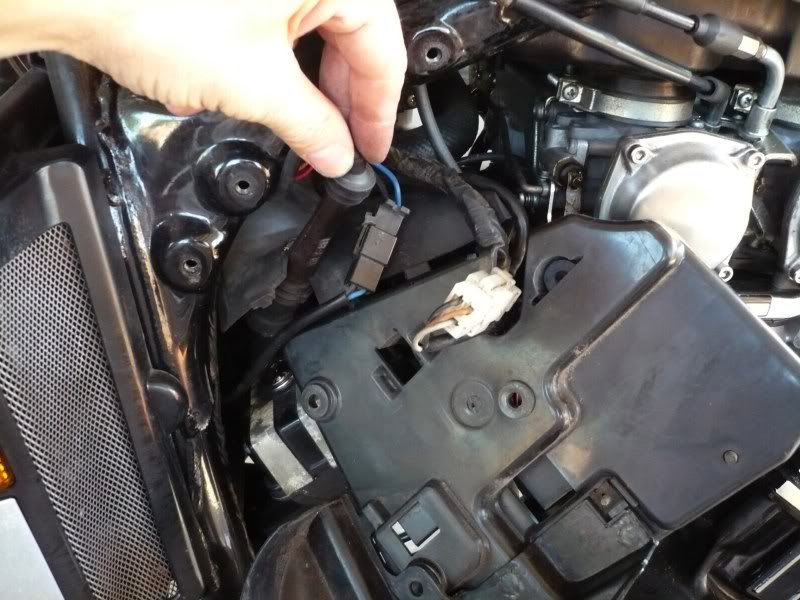
With the panel hanging down, we can now see the #4 coil connector. Remember the front coils are crossed - the left one feeds the right hand (#4) cylinder, and the right one feeds the left (#2) cylinder.
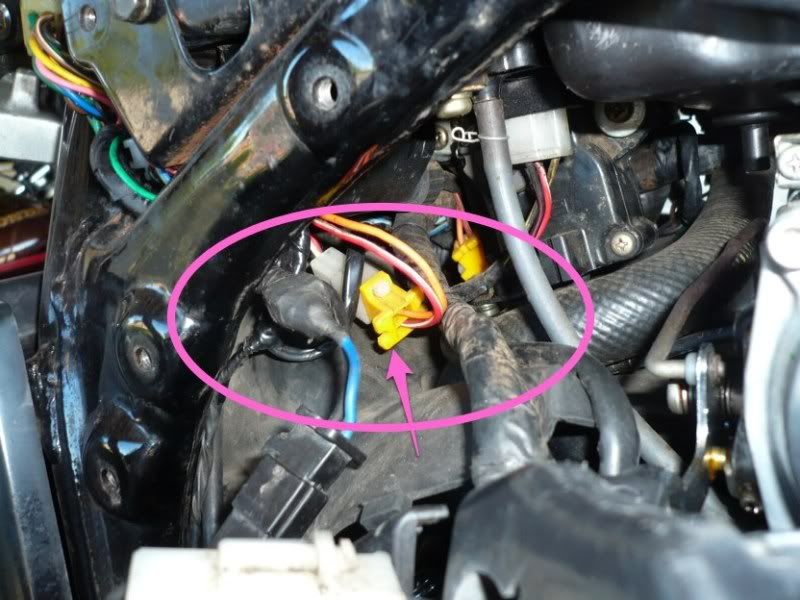
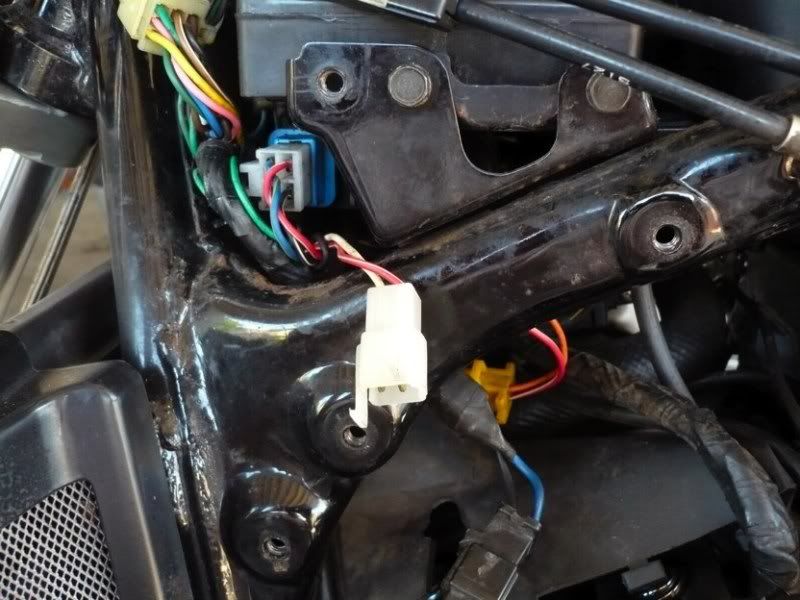
Once unplugged, I pulled it through the frame above for easy access
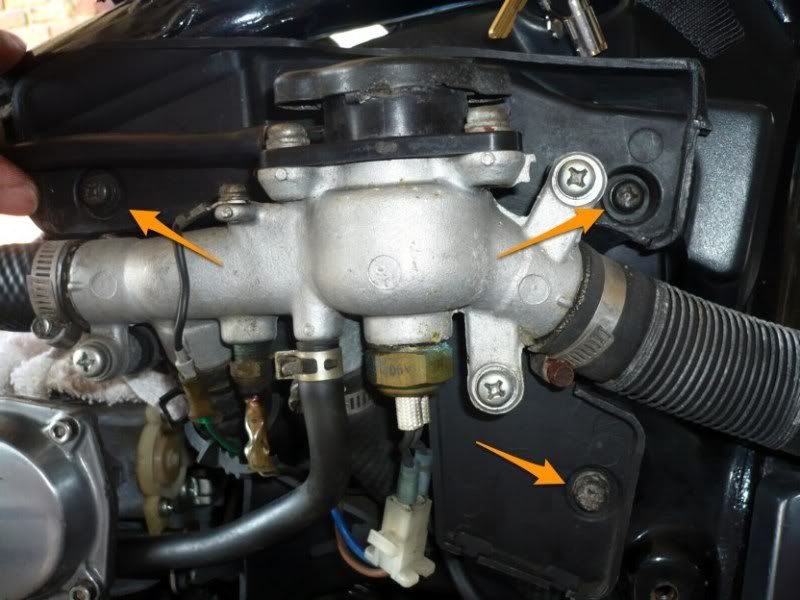
On the right hand side, the panel that holds the coolant filler cap etc needs to be moved (but not taken off) - remove the 3 screws arrowed:
Pull off the ignition switch cover
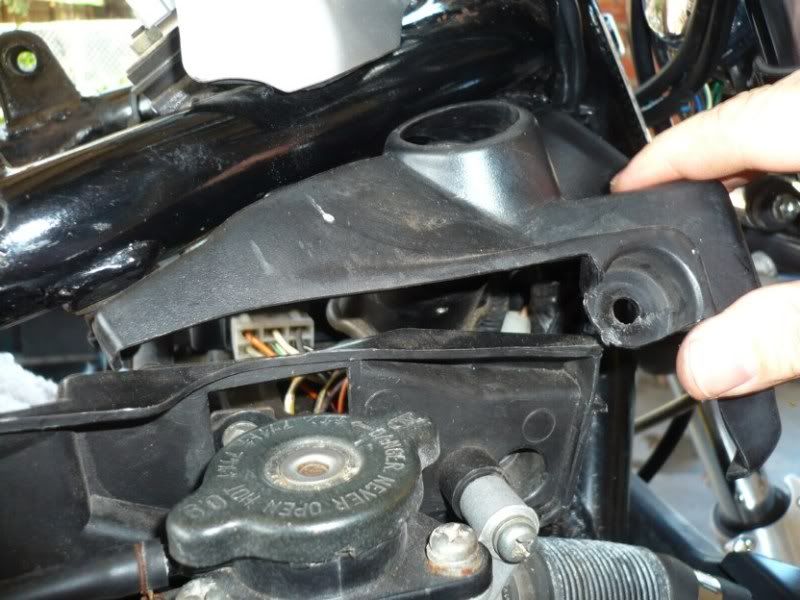
Here's the #2 coil - its first screw is just about accessible...
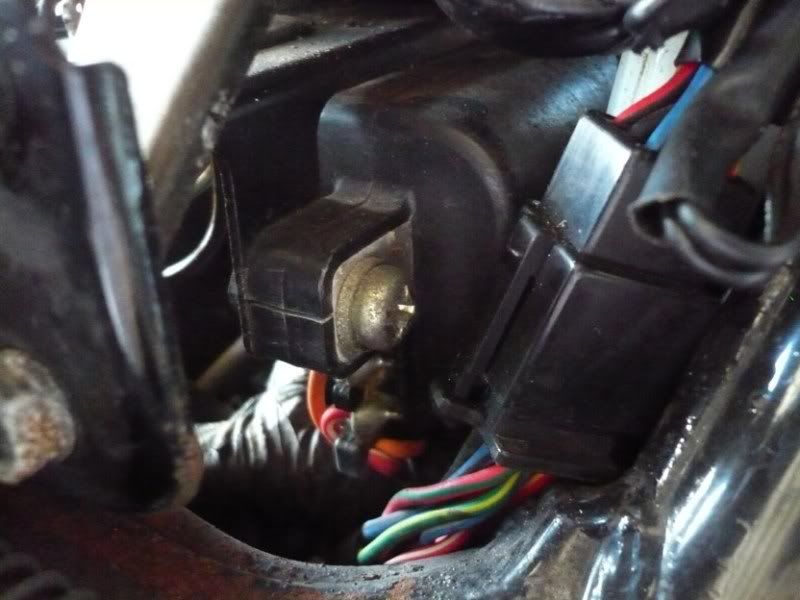
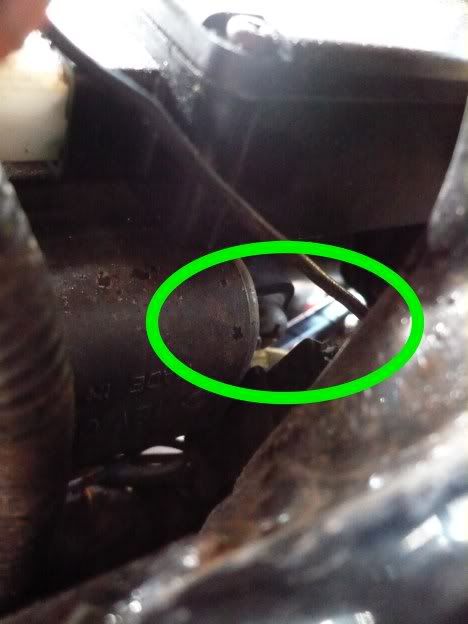
...the other one is most definitely not!
I took the ignition key bracket off as well for easier access - both retaining bolts are arrowed:
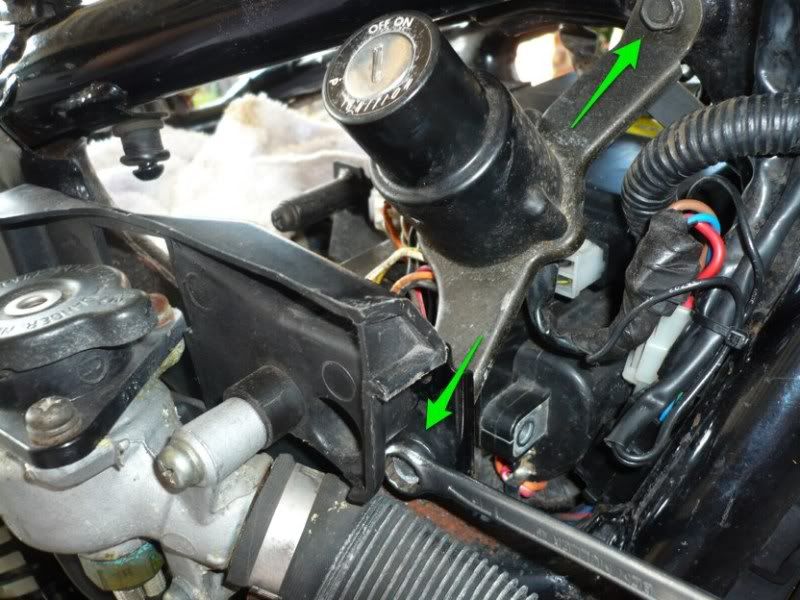
then underneath the loosened panel, I undid the rubber heat shield fasteners (arrowed):
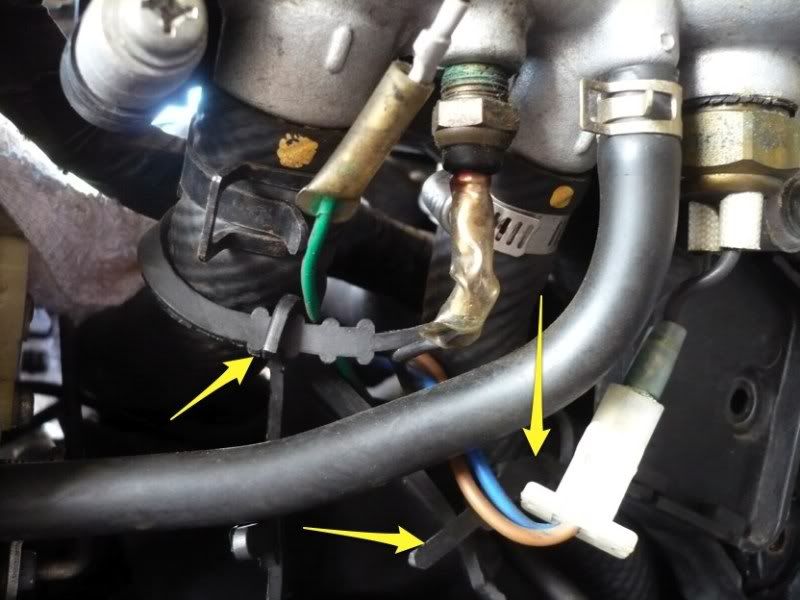
Pull the heat shield down, and here's the #2 coil connector!
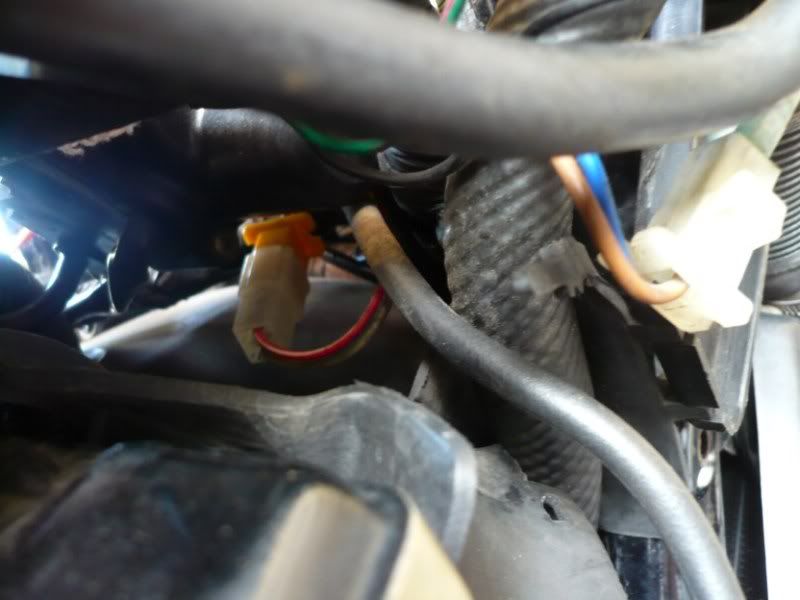
Too many pics - let's go to part 3 and get them ol' front coils out!
Part 3 here: http://www.vmaxforum.net/showthread.php?t=5869
Here's the lowdown on how to get 'em fuckers out - Yamaha did bury them nicely out of the way!
First things first, let's get access. To get to what we want, we need to remove the air box. No need to open it or remove the air filter - it all comes off in one piece dead easy. First loosen the air box boots clips (screws arrowed) on the left..

..and on the right.

Then remove the fuel bowls vent hoses from the airbox on both sides...


Pull off the puke tank and set it aside...

..and pull the crankcase vent hose from the bottom rear of the air box (the ***** clip is arrowed)...

then pull the whole air box off and go play some football with it :rofl_200:

On the electrics panel under the left cowl, pull the relays off their mounts (arrowed in red) and remove the three screws (arrowed in green)

and then pull the coil HT lead and boot out

With the panel hanging down, we can now see the #4 coil connector. Remember the front coils are crossed - the left one feeds the right hand (#4) cylinder, and the right one feeds the left (#2) cylinder.

Once unplugged, I pulled it through the frame above for easy access

On the right hand side, the panel that holds the coolant filler cap etc needs to be moved (but not taken off) - remove the 3 screws arrowed:

Pull off the ignition switch cover

Here's the #2 coil - its first screw is just about accessible...

...the other one is most definitely not!

I took the ignition key bracket off as well for easier access - both retaining bolts are arrowed:

then underneath the loosened panel, I undid the rubber heat shield fasteners (arrowed):

Pull the heat shield down, and here's the #2 coil connector!

Too many pics - let's go to part 3 and get them ol' front coils out!
Part 3 here: http://www.vmaxforum.net/showthread.php?t=5869
Last edited:


