naughtyG
Well-Known Member
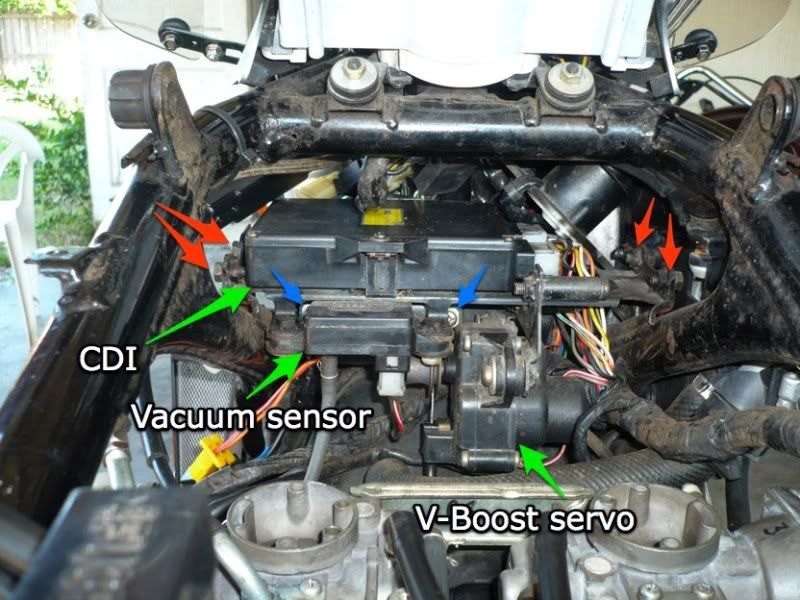
To remove the front coils, the only way to access all four coil mounting screws is to move the bracket that hold the CDI, ignition vacuum advance unit and V-boost servo. Here's a full view of it; the blue arrows shows the #4 coil screws, and the red arrows show the bracket mounting screws (x4):
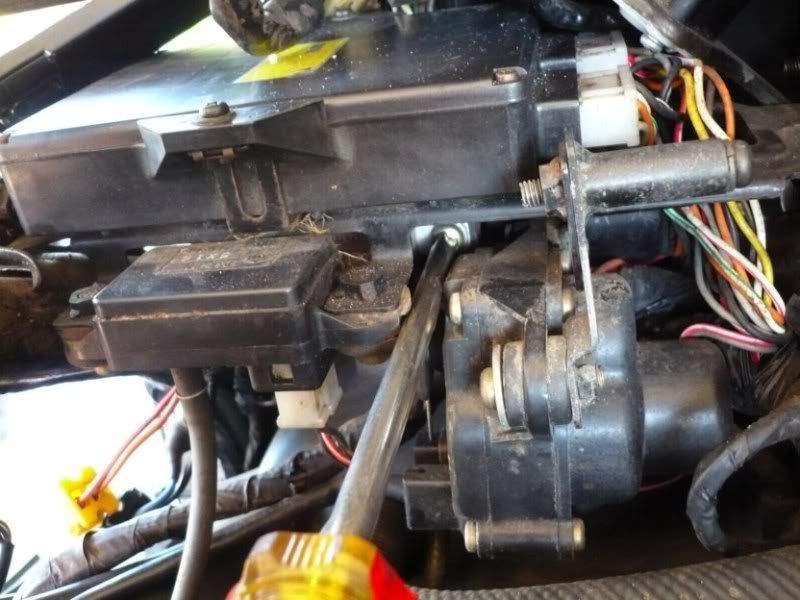
I first remove the #4 coil screw that was accessible:
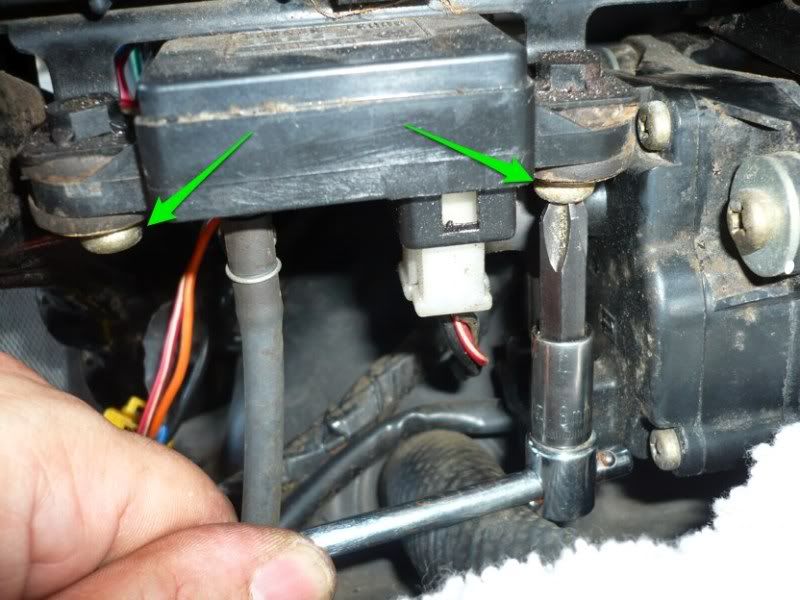
To get to the second one, I had to disturb the vacuum advance unit - both mounting screws arrowed. I just loosened the right one, then removed the left one and was then able to get to the #4 coil's second screw. Note I'm using the *correct* Philips bit for the mounting screw - it's the only way it will come off!
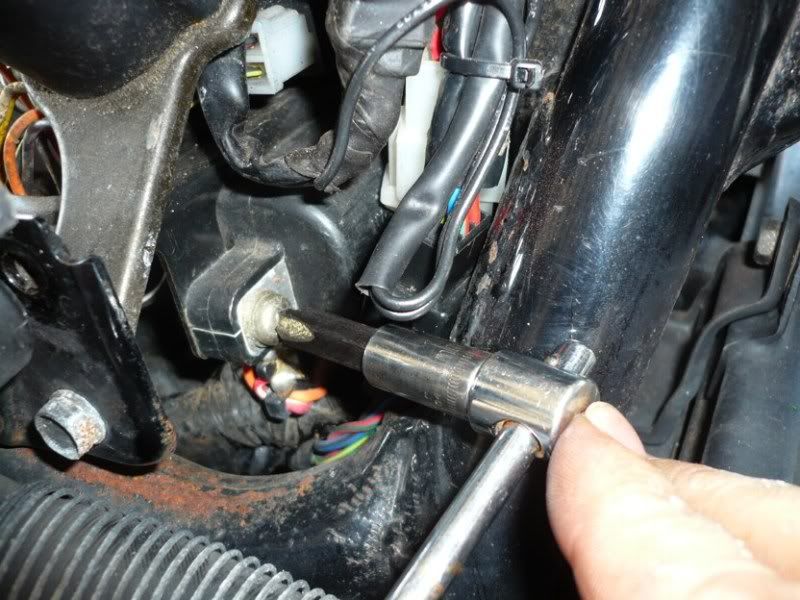
then I also removed the one screw I could get to for the #2 coil on the right-hand side:
Now it's time to remove the bracket's mounting screws on the left...
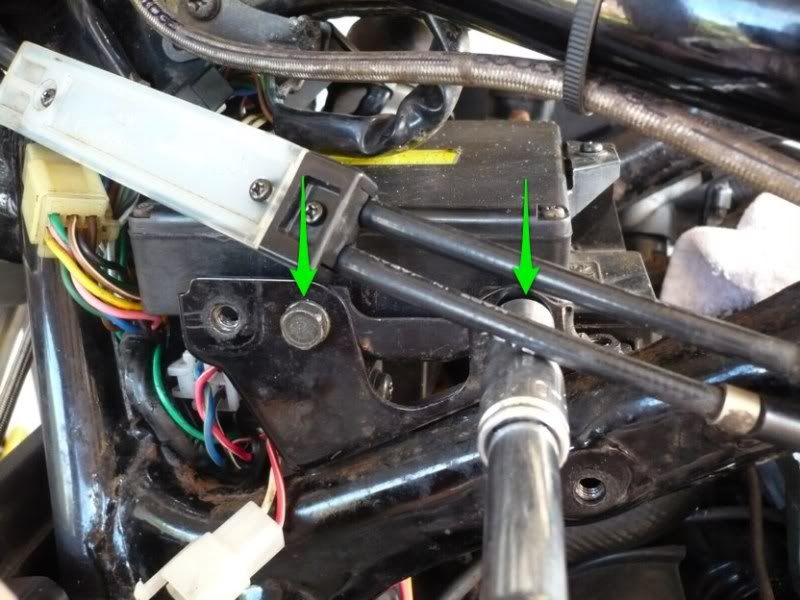
...and on the right
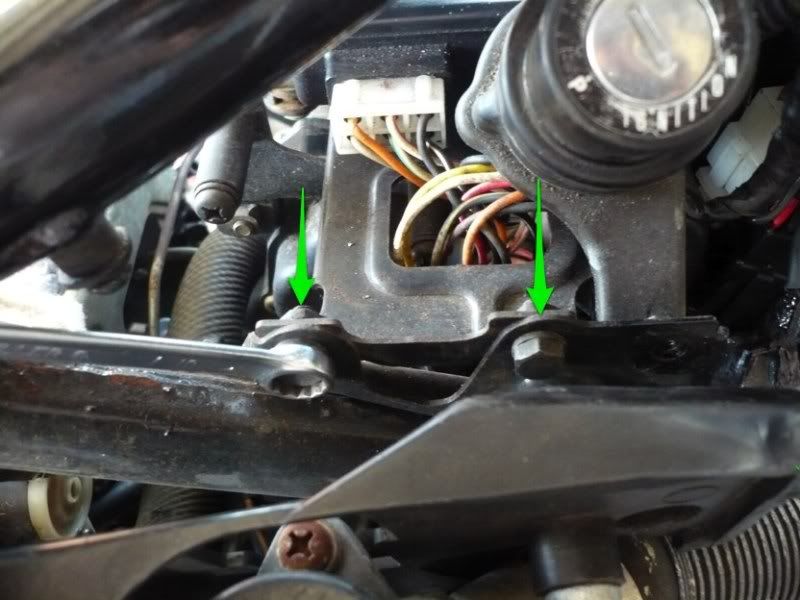
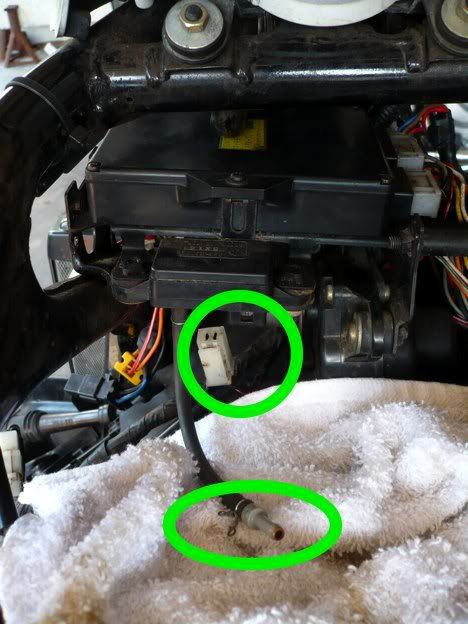
then unplug the vacuum advance unit's electrical connector and the vacuum hose. There no need to touch the V-boost assembly/cable/etc:
Grab the whole bracket and wiggle it out....
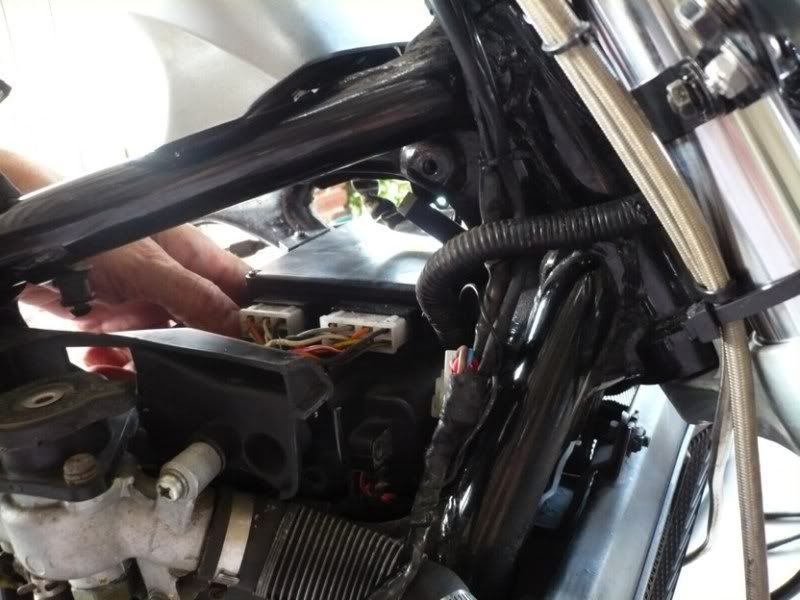
...then carefully swing it around enough...
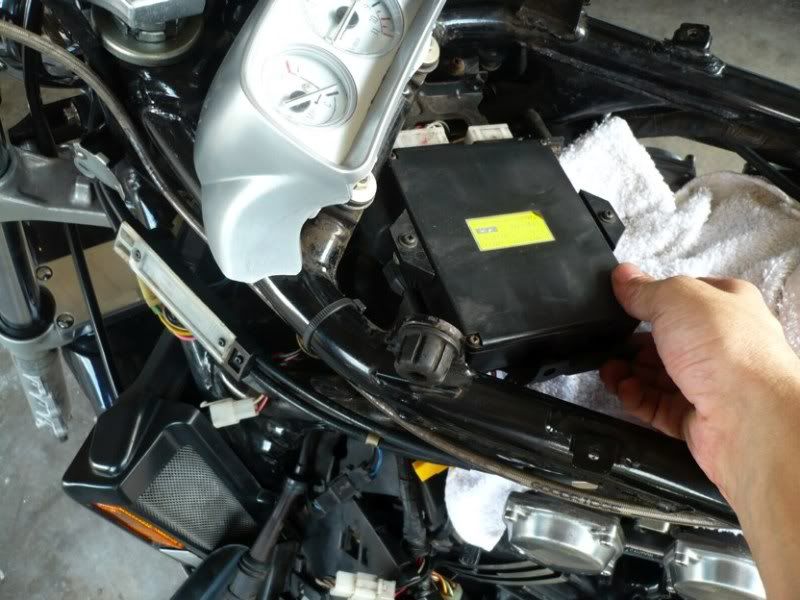
to expose those last bitchin' coil screws (#2 arrowed). Also notice the red arrow pointing at a relay holder - this guy has to pop out to swing that whole assembly:
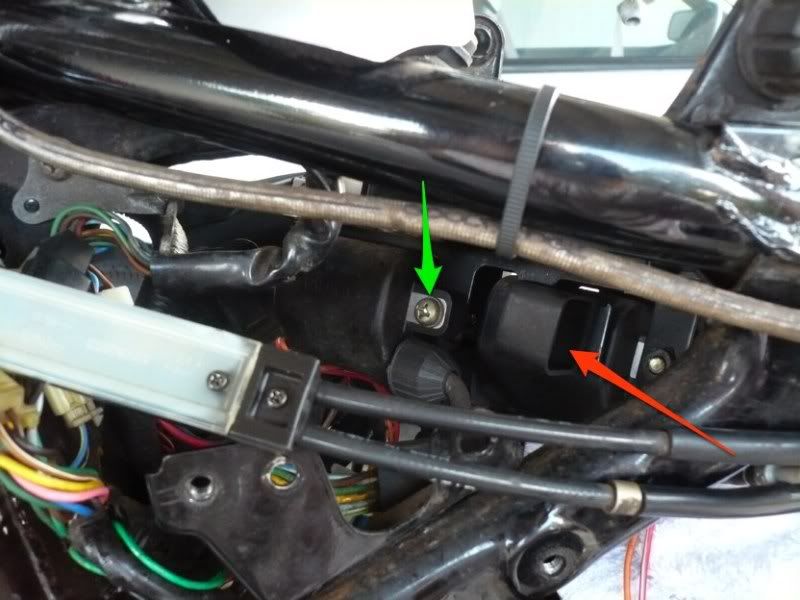
I could then remove the second #4 coil screw...
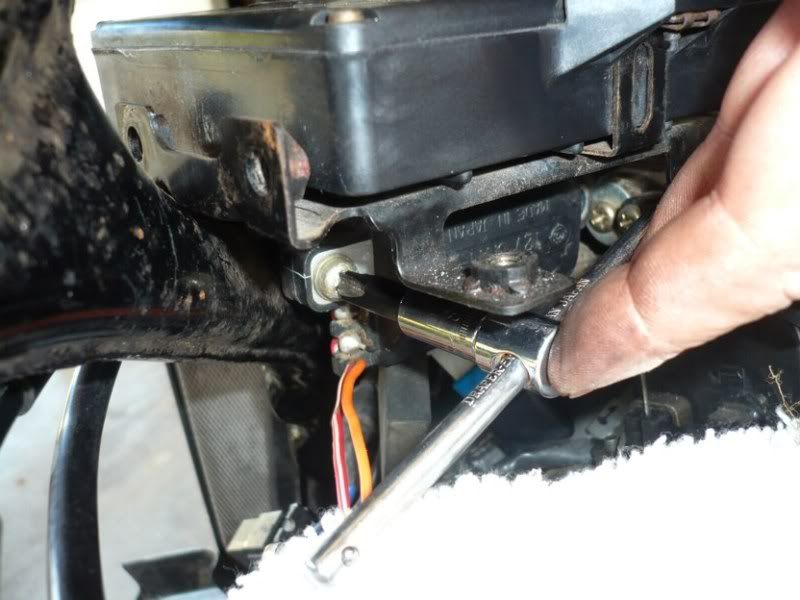
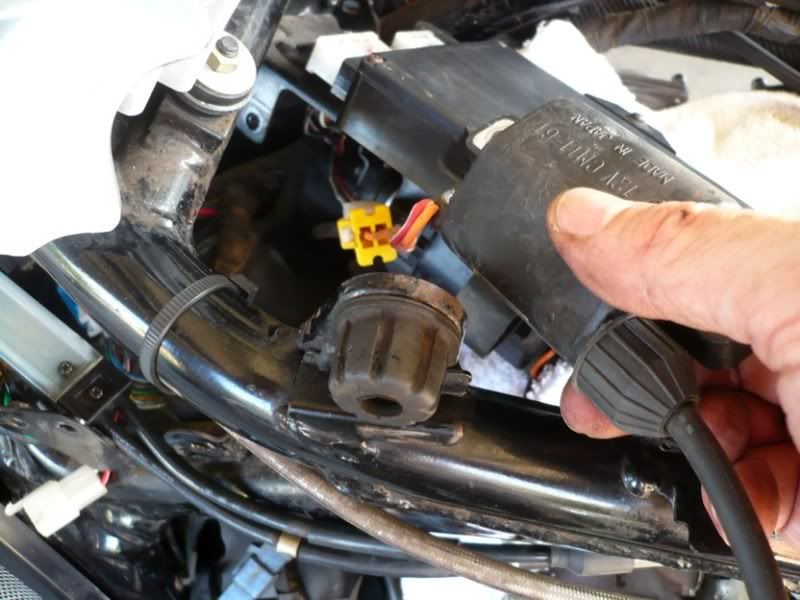
..and pull the #4 coil out with its HT lead and boot:
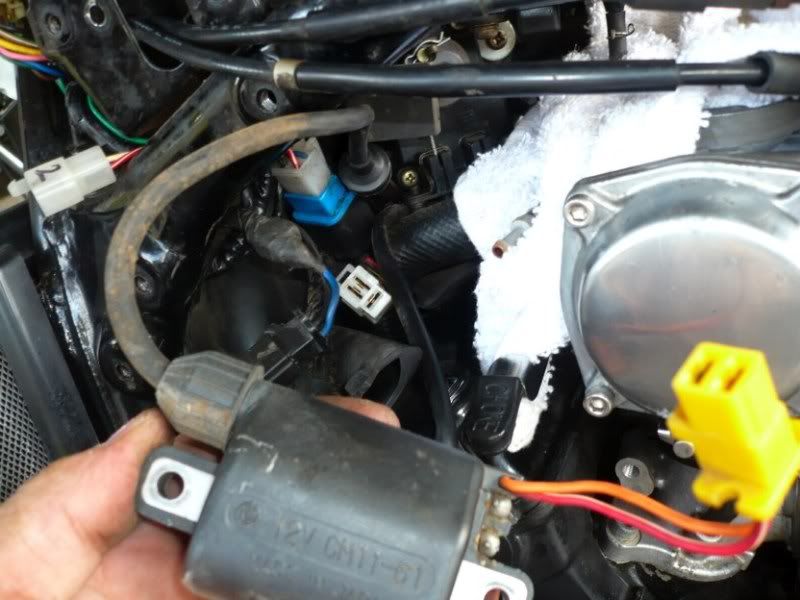
Let's get that last screw off...
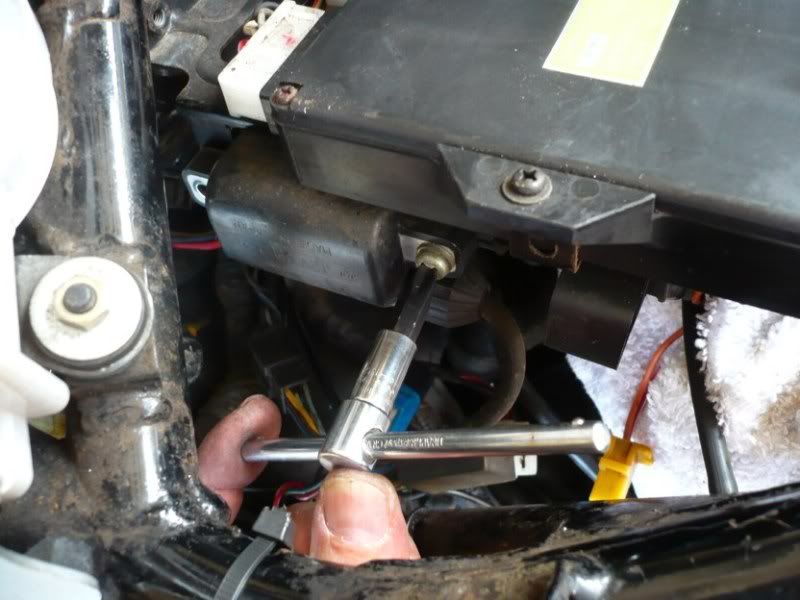
..and pull the #2 coil out
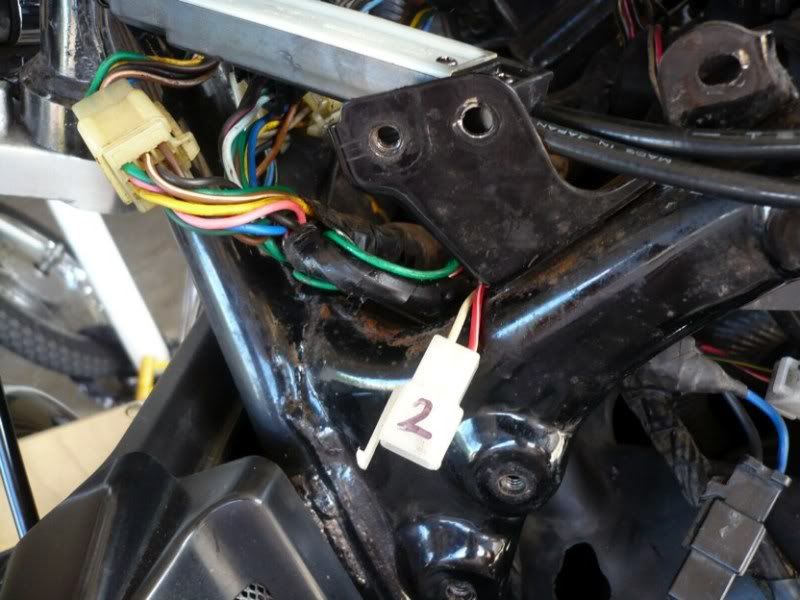
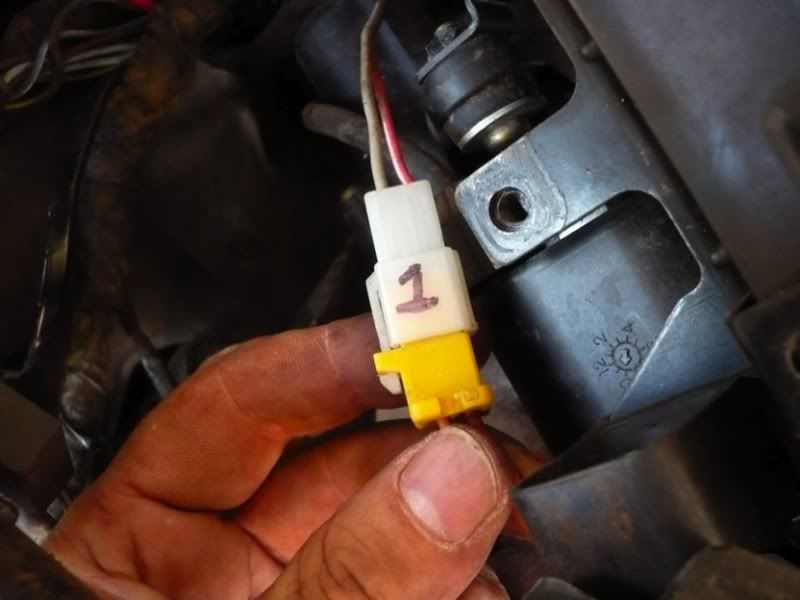
I numbered the front coil connectors to avoid confusion - remember they are crossed so the one on the left feeds the right front cylinder (#4) and the one on the right feeds the left front cylinder (#2).
***Please note that the numbers in my photos are wrong(!!) :whistlin:
Number 2 below should read 4, and number 1 should be 2 - sorry for the confusion..***
Coil removing job done! Maxine smiles at me for losing a little weight - she's feeling so sexy right now :rofl_200::clapping::tongue::tongue:
Link 2 part 4: http://www.vmaxforum.net/showthread.php?t=5870

I first remove the #4 coil screw that was accessible:

To get to the second one, I had to disturb the vacuum advance unit - both mounting screws arrowed. I just loosened the right one, then removed the left one and was then able to get to the #4 coil's second screw. Note I'm using the *correct* Philips bit for the mounting screw - it's the only way it will come off!

then I also removed the one screw I could get to for the #2 coil on the right-hand side:

Now it's time to remove the bracket's mounting screws on the left...

...and on the right

then unplug the vacuum advance unit's electrical connector and the vacuum hose. There no need to touch the V-boost assembly/cable/etc:

Grab the whole bracket and wiggle it out....

...then carefully swing it around enough...

to expose those last bitchin' coil screws (#2 arrowed). Also notice the red arrow pointing at a relay holder - this guy has to pop out to swing that whole assembly:

I could then remove the second #4 coil screw...

..and pull the #4 coil out with its HT lead and boot:

Let's get that last screw off...

..and pull the #2 coil out

I numbered the front coil connectors to avoid confusion - remember they are crossed so the one on the left feeds the right front cylinder (#4) and the one on the right feeds the left front cylinder (#2).
***Please note that the numbers in my photos are wrong(!!) :whistlin:
Number 2 below should read 4, and number 1 should be 2 - sorry for the confusion..***


Coil removing job done! Maxine smiles at me for losing a little weight - she's feeling so sexy right now :rofl_200::clapping::tongue::tongue:
Link 2 part 4: http://www.vmaxforum.net/showthread.php?t=5870
Last edited:


