naughtyG
Well-Known Member
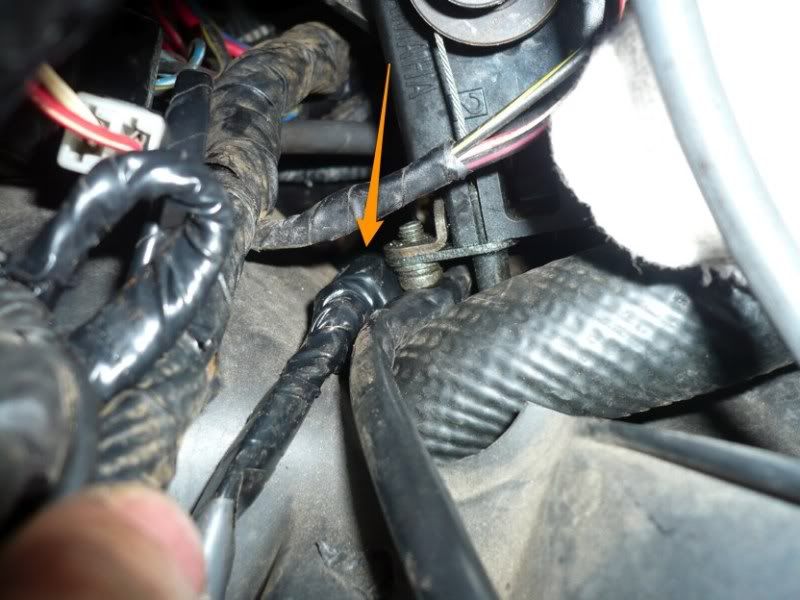
On the left-hand side, I made sure that the COP wiring (arrowed) was in front of the V-boost servo, so it wouldn't get in the way of the V-boost cable or cam movement:
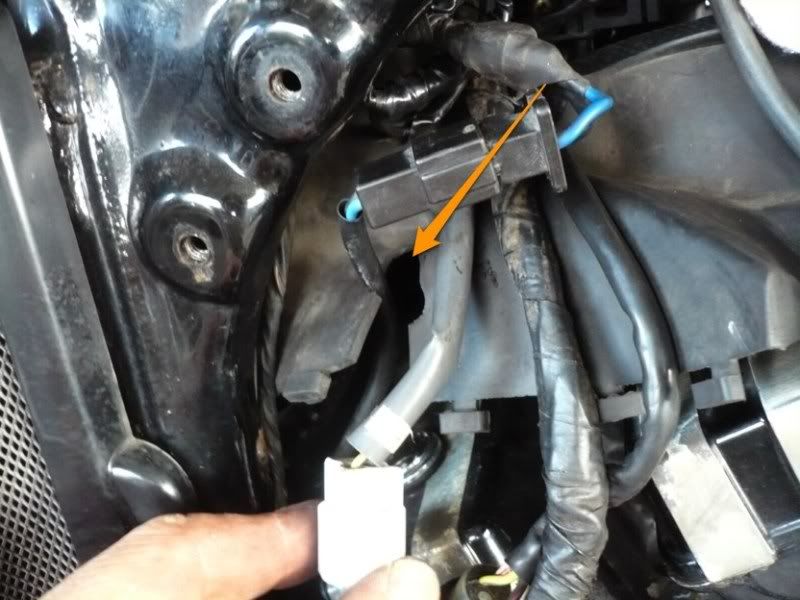
the wiring is routed through the opening in the heat shield (arrowed) that the HT lead used to go through:
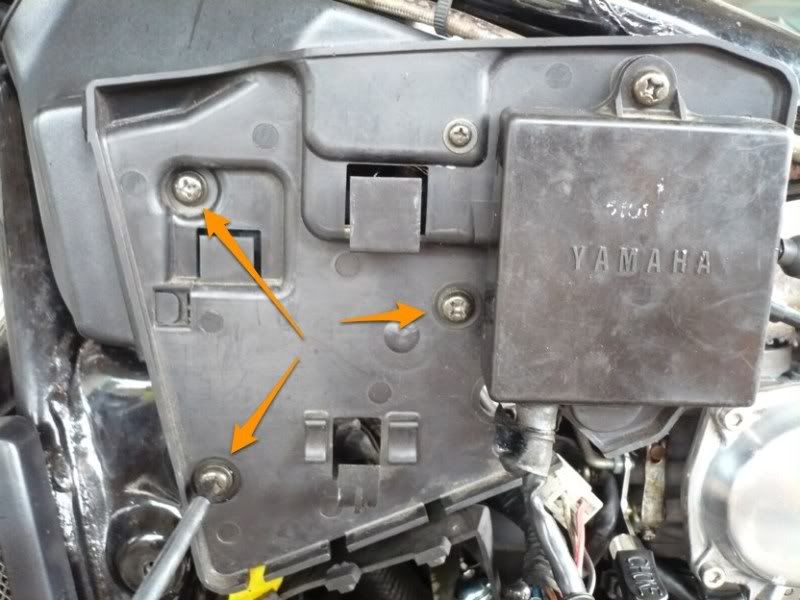
Now the left panel can go back on - screws arrowed:
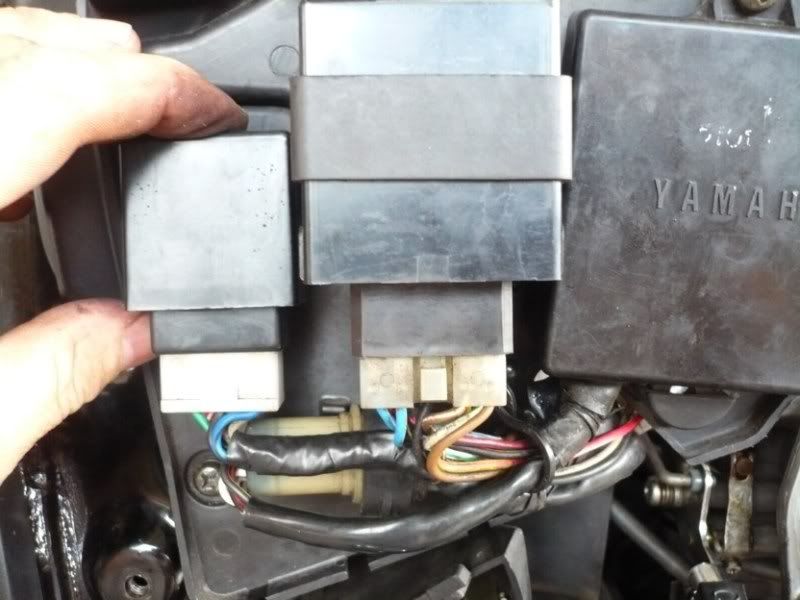
Refit all the electrical components to their holders, starting with the lower round one...
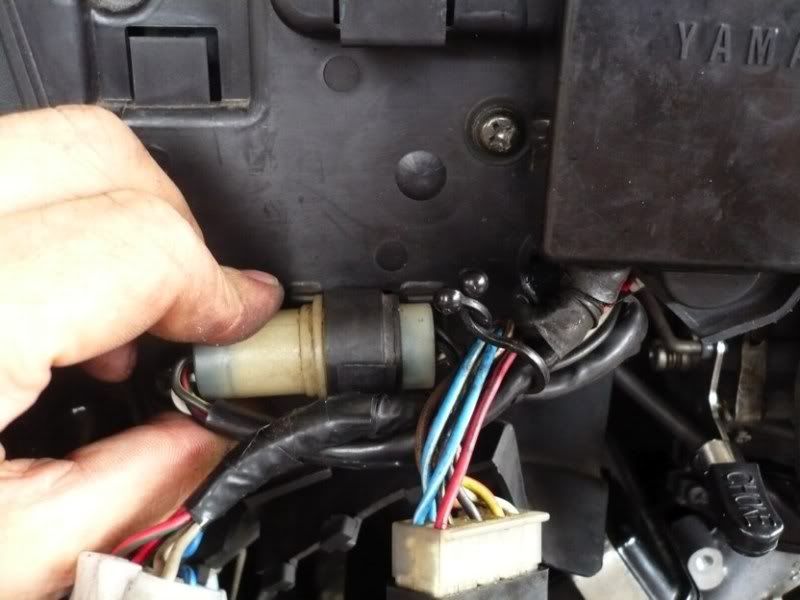
...followed by the other two above:
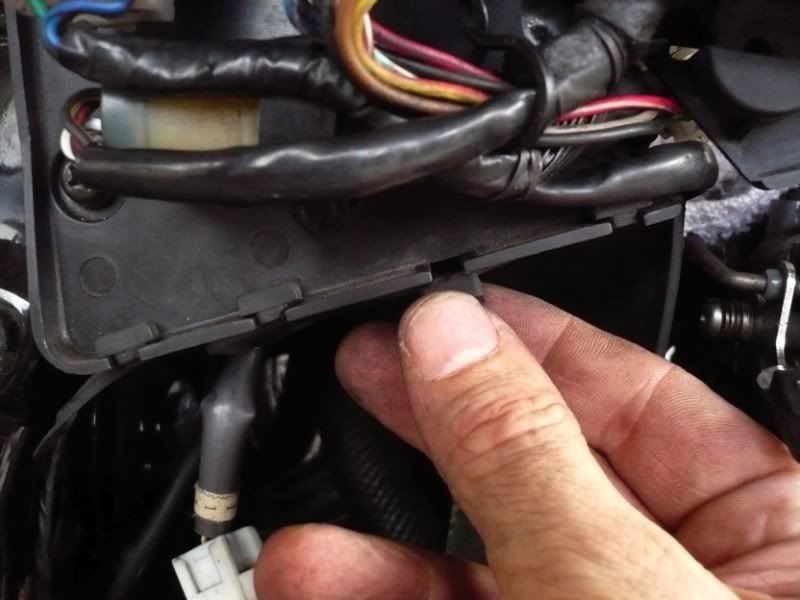
then the heat shield's rubber tabs get popped back in
Before fitting the COP, we have to get the thin blade pliers out again..
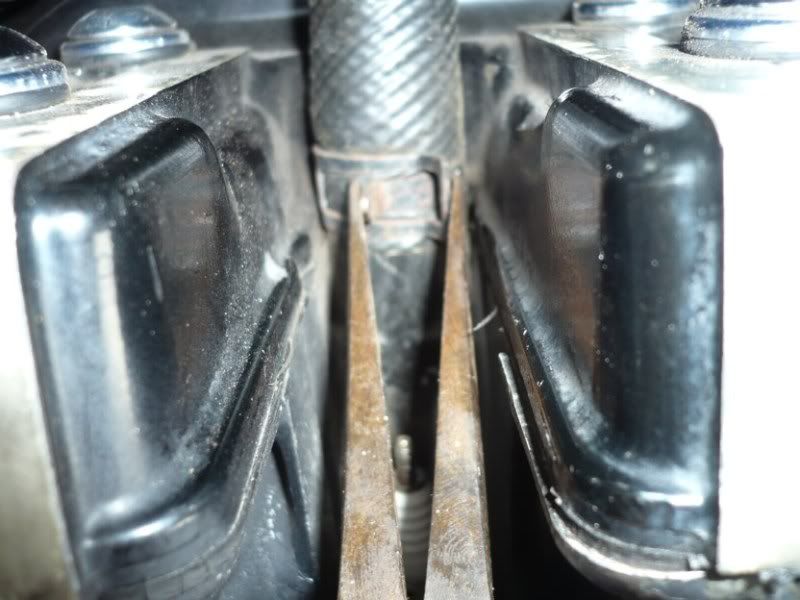
..and rotate the clip on the coolant hose so that the smaller (arrowed) bit faces forward so it's clear of the coil:
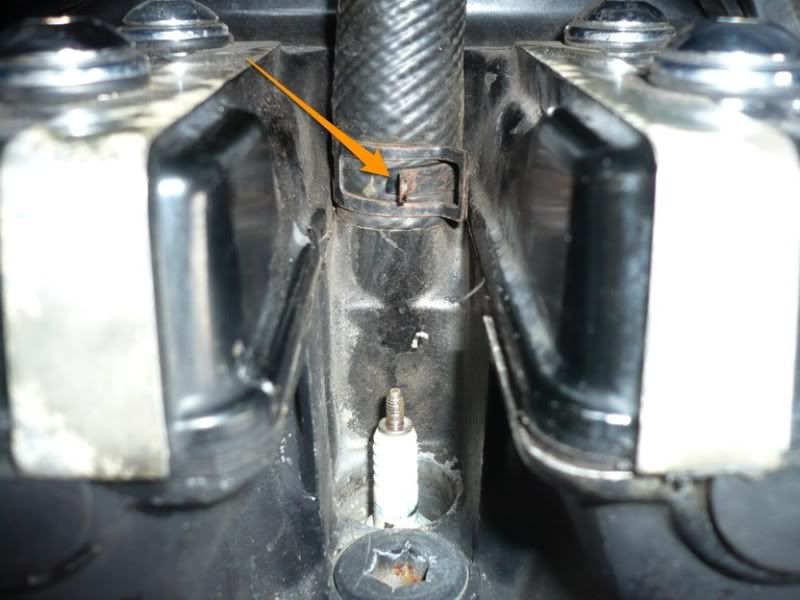
Then the COP goes in, and here I'm wedging the lower rubber ring in so that it's in front of the above clip, and nicely snug between the cylinder head walls:
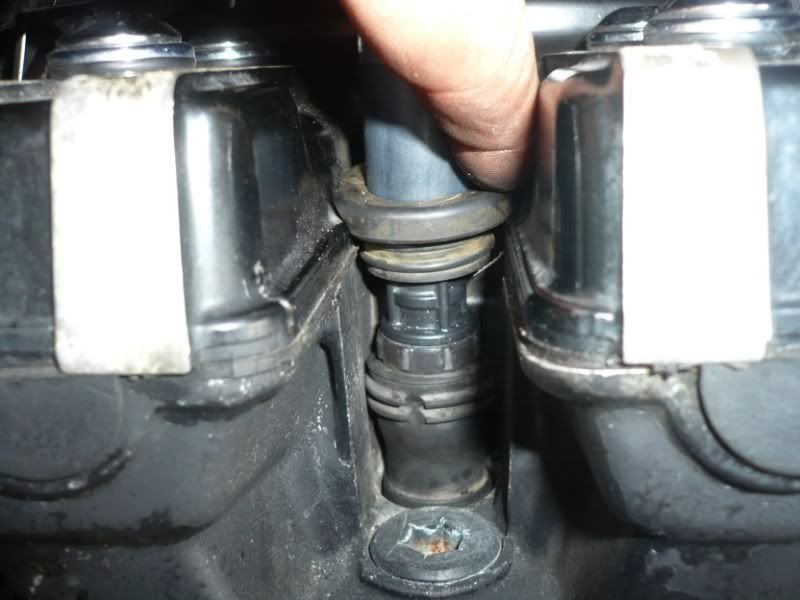
There we are, the last COP (#2) is in!
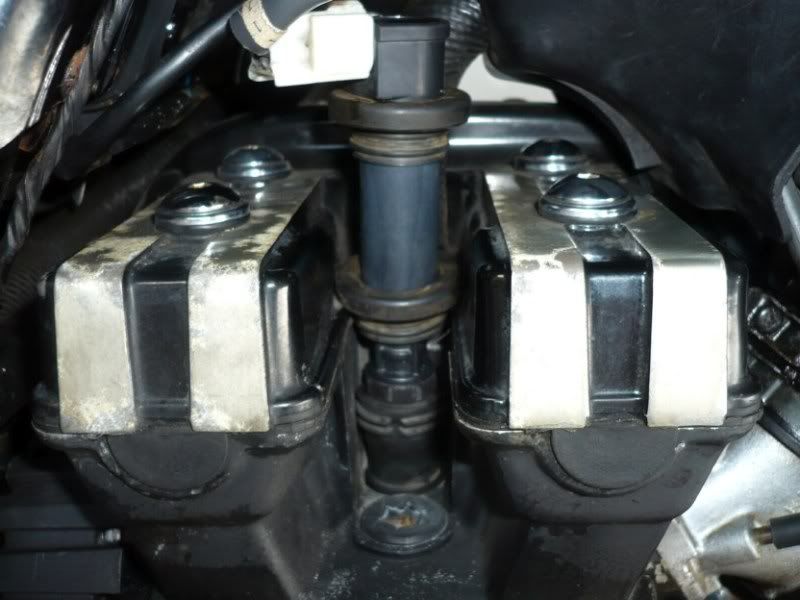
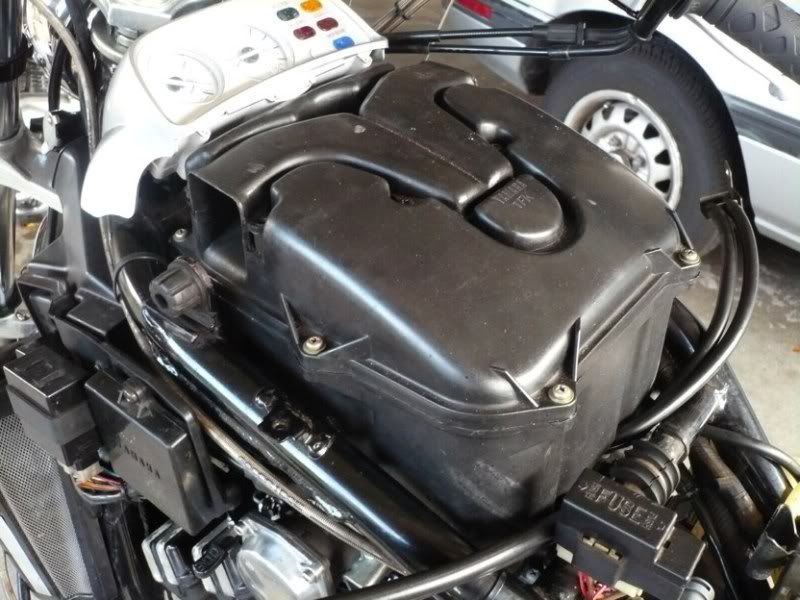
To finish up, let's throw that phat air box back in the frame...
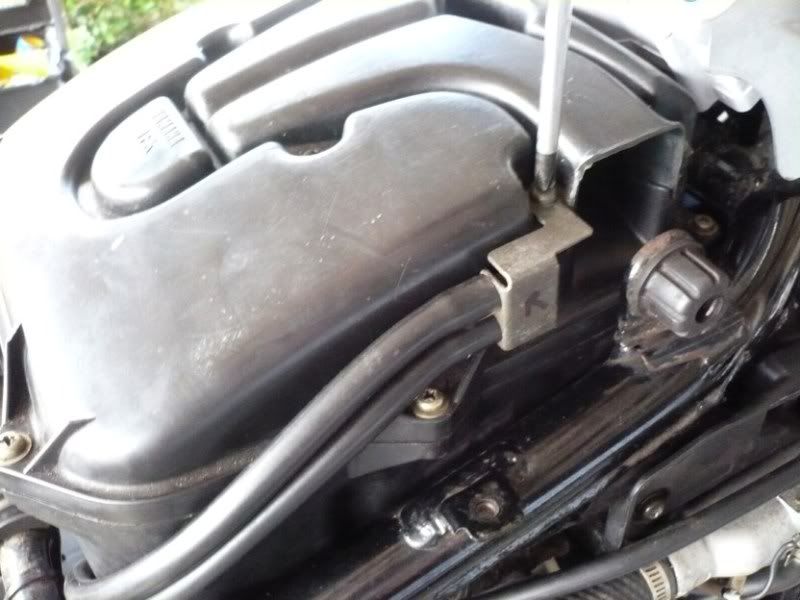
I like to get the crankcase oil breather pipe (arrowed) onto the nipple under the back of the air box in first. I find that holding the hose with my hand as in the picture and pushing the air box down onto it is the easiest way to get it in place:
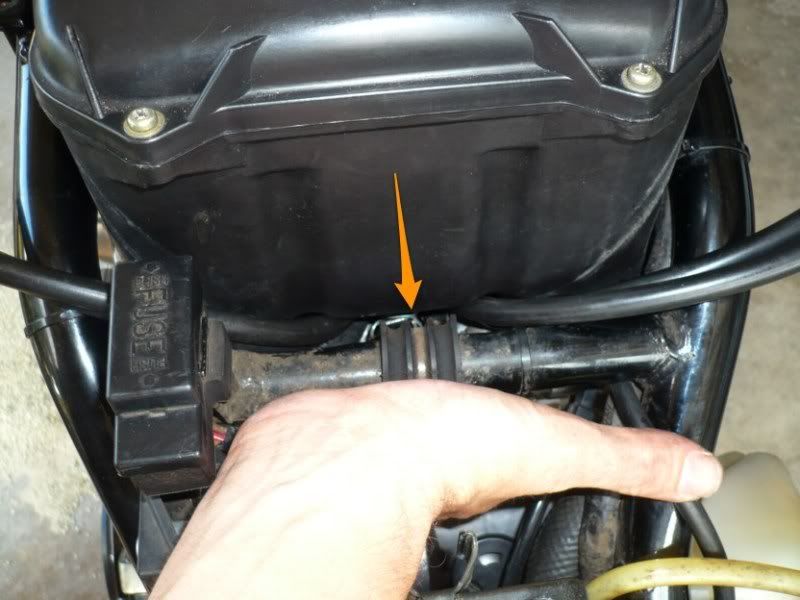
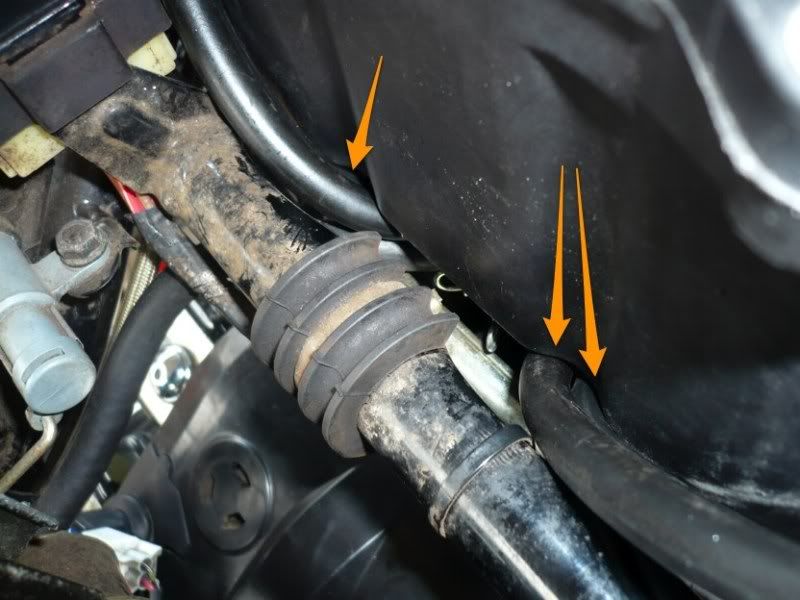
make absolutely sure that the fuel bowl vent hoses are not pinched anywhere under or between the air box and the frame (arrowed):
make sure all four boots are seated on the carbs properly, then while holding the air box down, secure the two boot clips on the left..
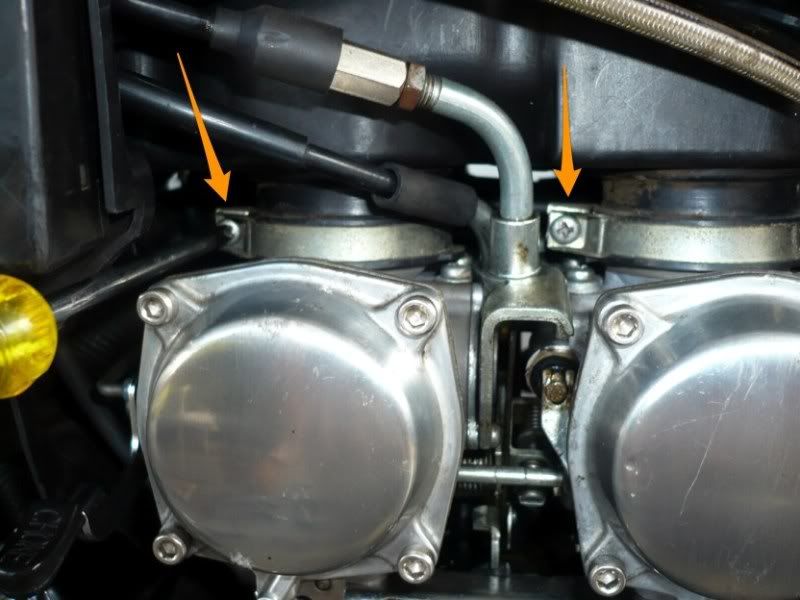
.. and on the right.
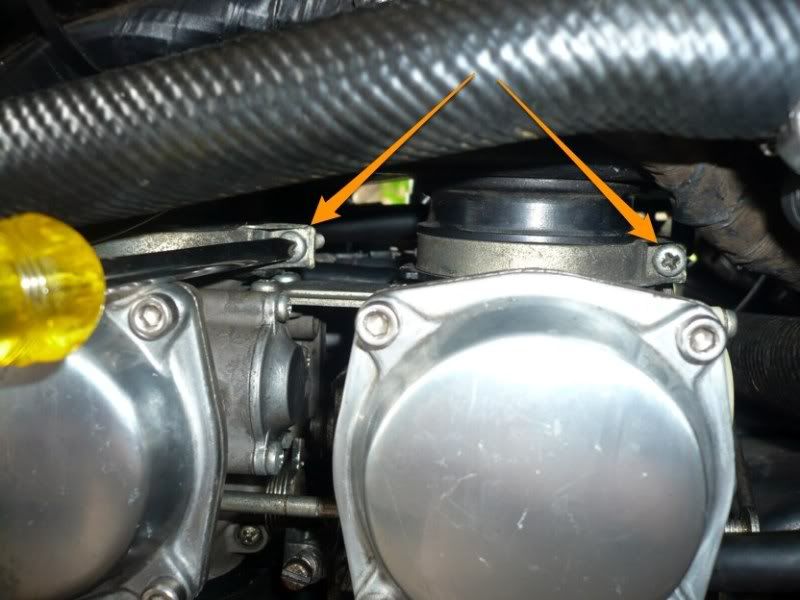
then refit the vent hoses holders on each side of the air box. These guys are really important, we've had some stories of strange behavior (misfiring, surge and other niceties) when these aren't exactly where and how they should be!
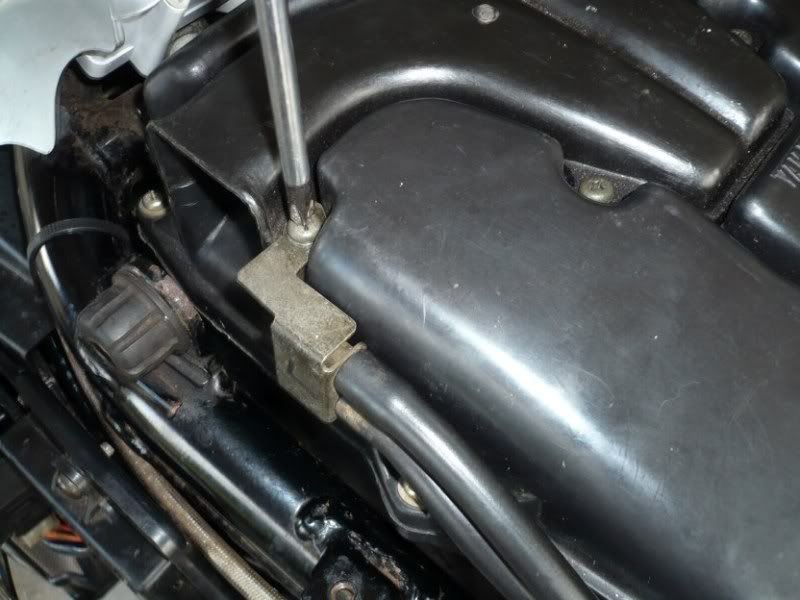
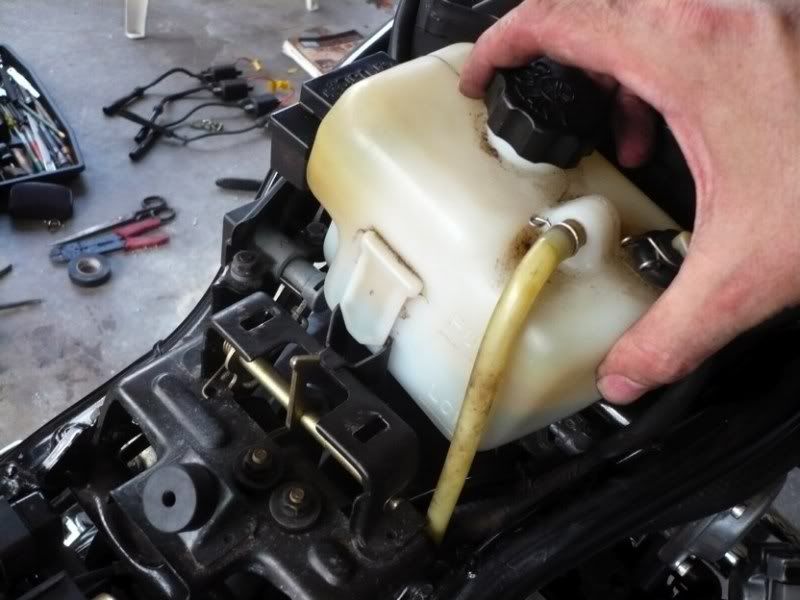
Let's slide the puke tank back in its slot..
And we're done! All that's left is to refit the seat, cowls and faux-tank cover. When I started mine (it hadn't run for almost two weeks) it definitely started quicker and easier with the COPs than before. It also seems to idle much smoother. I can't tell how well it rides yet, because I'm still waiting for that spacer to refit my front wheel :bang head::bang head:...
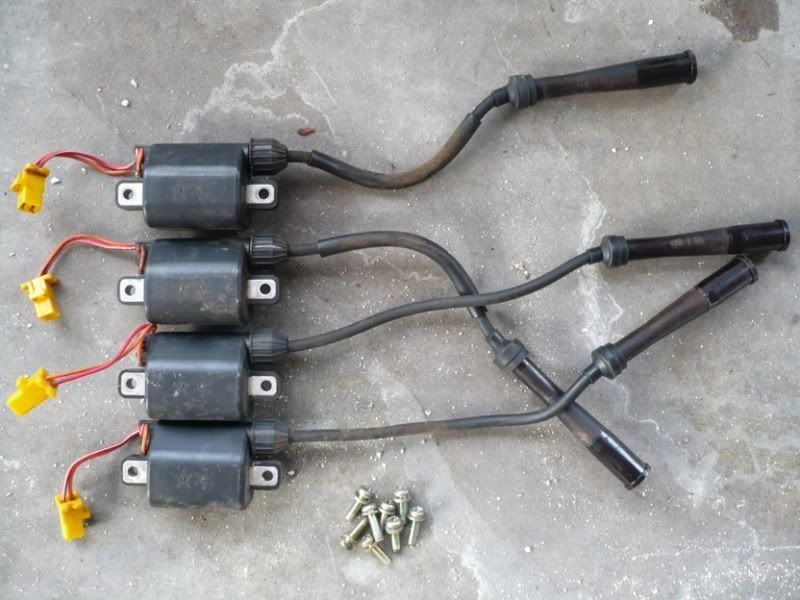
Now I have a nice set of spare OEM coils - these were made in 10/05 and do not have a single crack. I do think that either the boots or the leads are shot though, as the #1 cylinder was shooting sparks to its rubber heat shield in the dark..
I hope this will help anyone who wasn't too sure about doing the COPs mod to see how easy it is. At least now you know where your CDI is and how to get to it :biglaugh:
Also, thanks to :worthy: Birdoprey for introducing this mod, and for noticing that my wires labels are wrong!!:icon_rolleyes: For the avoidance of doubt, here are the correct cylinder numbers: rear left = 1, front left = 2, rear right = 3 and front right = 4.
Please ignore the wiring stickers and numbers written on front connectors in my photos!
I can't wait to take my '86 for a ride again, now that it's fitted with 21st century ignition technology unk::eusa_dance::clapping::scooter 1:

the wiring is routed through the opening in the heat shield (arrowed) that the HT lead used to go through:

Now the left panel can go back on - screws arrowed:

Refit all the electrical components to their holders, starting with the lower round one...

...followed by the other two above:

then the heat shield's rubber tabs get popped back in

Before fitting the COP, we have to get the thin blade pliers out again..

..and rotate the clip on the coolant hose so that the smaller (arrowed) bit faces forward so it's clear of the coil:

Then the COP goes in, and here I'm wedging the lower rubber ring in so that it's in front of the above clip, and nicely snug between the cylinder head walls:

There we are, the last COP (#2) is in!

To finish up, let's throw that phat air box back in the frame...

I like to get the crankcase oil breather pipe (arrowed) onto the nipple under the back of the air box in first. I find that holding the hose with my hand as in the picture and pushing the air box down onto it is the easiest way to get it in place:

make absolutely sure that the fuel bowl vent hoses are not pinched anywhere under or between the air box and the frame (arrowed):

make sure all four boots are seated on the carbs properly, then while holding the air box down, secure the two boot clips on the left..

.. and on the right.

then refit the vent hoses holders on each side of the air box. These guys are really important, we've had some stories of strange behavior (misfiring, surge and other niceties) when these aren't exactly where and how they should be!


Let's slide the puke tank back in its slot..

And we're done! All that's left is to refit the seat, cowls and faux-tank cover. When I started mine (it hadn't run for almost two weeks) it definitely started quicker and easier with the COPs than before. It also seems to idle much smoother. I can't tell how well it rides yet, because I'm still waiting for that spacer to refit my front wheel :bang head::bang head:...
Now I have a nice set of spare OEM coils - these were made in 10/05 and do not have a single crack. I do think that either the boots or the leads are shot though, as the #1 cylinder was shooting sparks to its rubber heat shield in the dark..

I hope this will help anyone who wasn't too sure about doing the COPs mod to see how easy it is. At least now you know where your CDI is and how to get to it :biglaugh:
Also, thanks to :worthy: Birdoprey for introducing this mod, and for noticing that my wires labels are wrong!!:icon_rolleyes: For the avoidance of doubt, here are the correct cylinder numbers: rear left = 1, front left = 2, rear right = 3 and front right = 4.
Please ignore the wiring stickers and numbers written on front connectors in my photos!
I can't wait to take my '86 for a ride again, now that it's fitted with 21st century ignition technology


![Bovemanx Motorcycle Phone Mount Holder, [150mph Wind Anti-Shake][7.2inch Big Phone Friendly] Bike Phone Holder, Motorcycle Handlebar Cell Phone Clamp, Compatible with iPhone 16 Pro Max Smartphones](https://m.media-amazon.com/images/I/51F+1sontPL._SL500_.jpg)


