yukonerdave
Well-Known Member
There is a stickied thread about this upgrade HERE, but I thought a step-by-step with pics might be helpful. I gather that pre-99 model vmax's have a shitty segment that is prone to fail. More than one guy has called this upgrade one of the best things you can do for an older Max. I took it entirely on their word - haven't had her running yet to see if its made any noticeable difference, but at least I don't have to worry about it failing in the future.
I was pretty intimidated by the thought of pulling the clutch in order to do this one myself, but it really wasn't so bad. For tools you will need:
-5mm allen key
-T30 torx
-10mm socket
-12mm socket
-1 3/16ths socket (that's one [inch AND 3/16ths] socket, not one 3/16ths socket)
For parts you will need:
4NK-18185-00-00 SEGMENT Qty: 1
93604-12037-00 PIN, DOWEL Qty: 5
93604-16092-00 PIN, DOWEL Qty: 1
3JP-15462-00-00 gasket crankcase cover Qty: 1
and maybe a 90151-06013-00 torx bolt to replace the one you're gonna take out (it is prone to stripping)
Drain the oil before starting!
Start by removing the cover screws, in a criss-cross pattern. Before doing this, you'll need to remove the footrest and rear brake assembly:
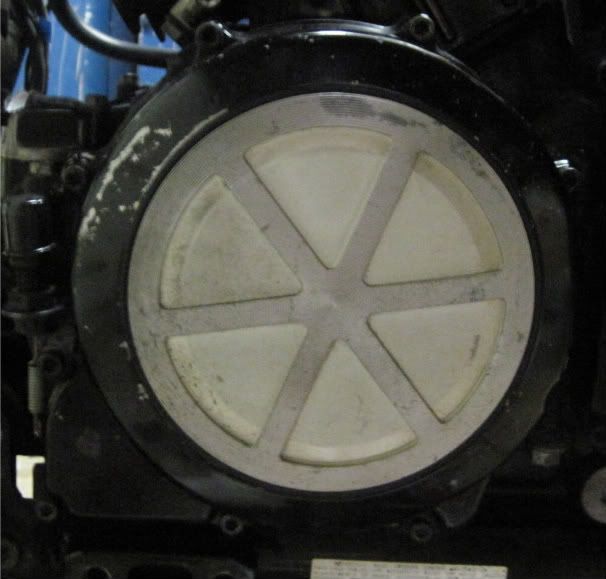
Be prepared to catch some more oil when you remove the cover. Remove the old gasket (I had to scrape parts of it off with a knife), and take note of the two small dowels in the 10:00 and 2:00 holes. Now remove the diaphragm spring retainer plate by slowly loosening the bolts, again in criss-cross pattern:
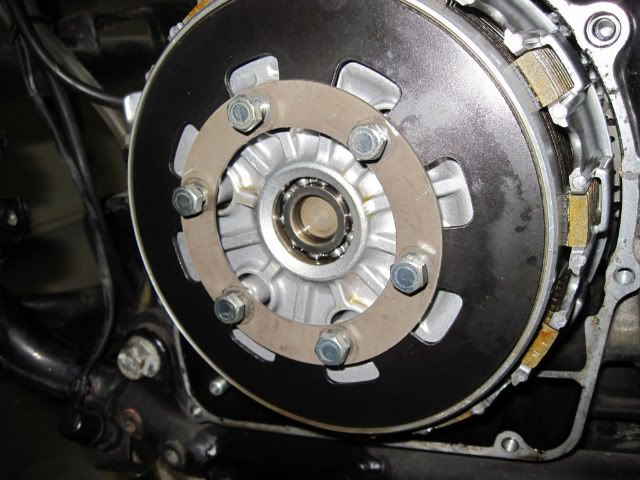
Once the bolts are out you will remove the retainer plate, the diaphragm spring, and a large ring spring seat:
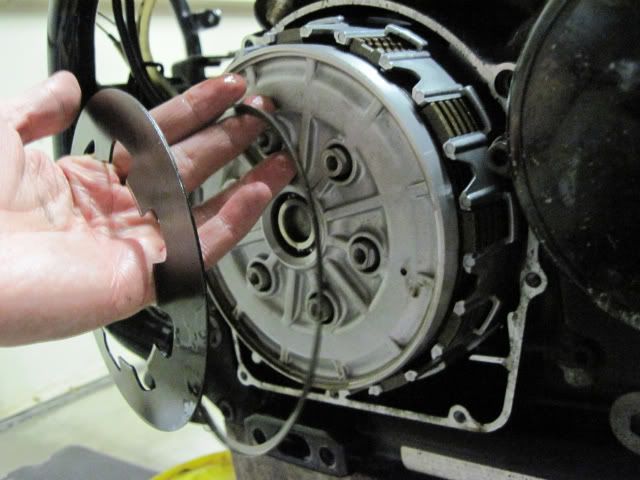
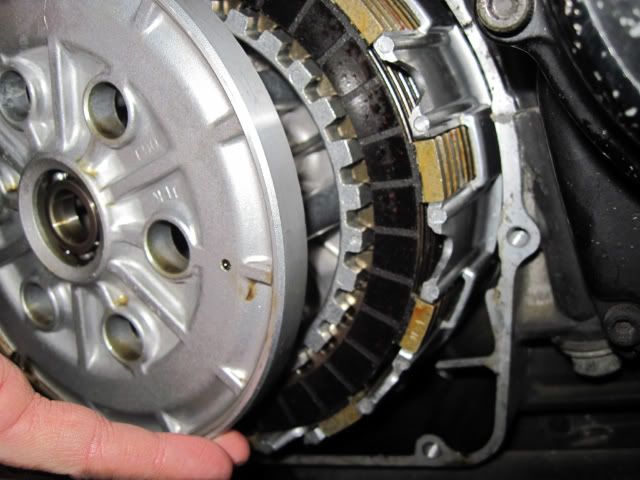
The pressure plate immediately behind these can also slide out:
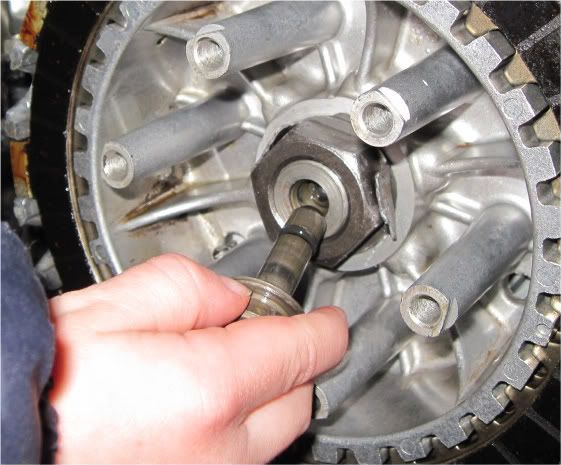
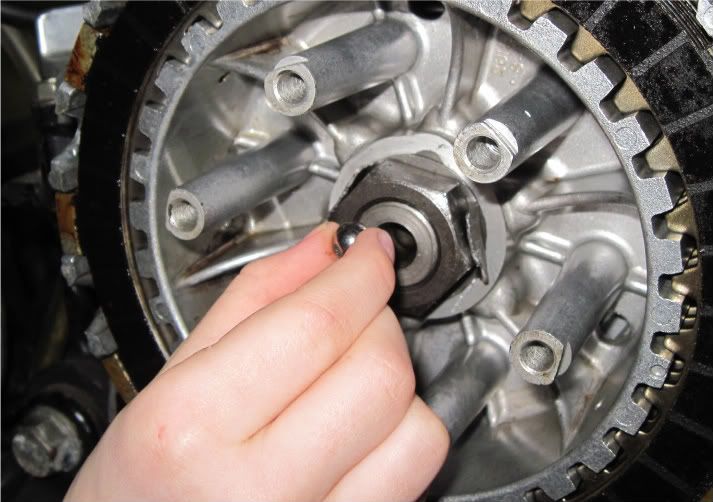
Now you can pull out the pushrod in the center, and also a small steal ball right behind it. I had to use a small magnet to grab the ball:
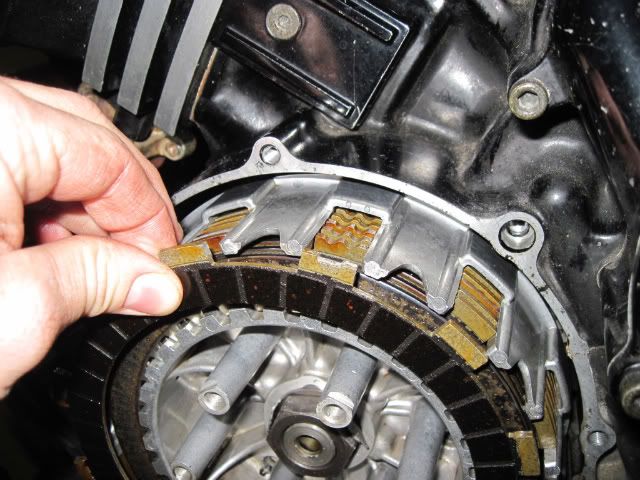
All of the clutch plates can now be removed. Make sure that you keep them in the same order - the outermost one in particular is different from the rest and must be put back in the same place. Also note their alignment. I replaced them according to the Haynes manual, which says to align the ridged tooth on each friction plate with the two dots on the outer housing, and then to align the wide gap on the outermost plate in the same place (refer back to this pic on re-install if needed):
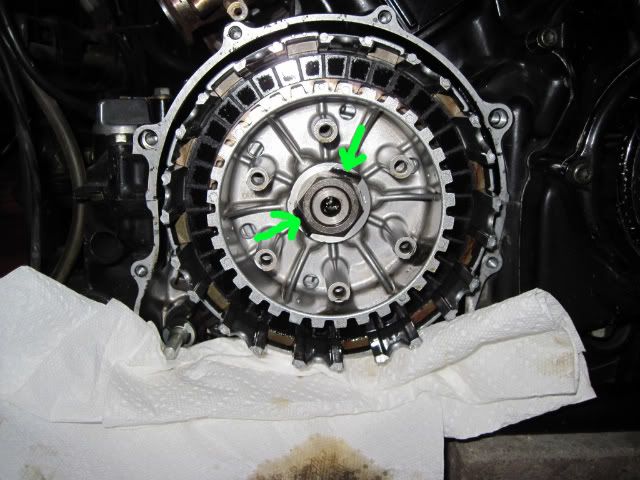
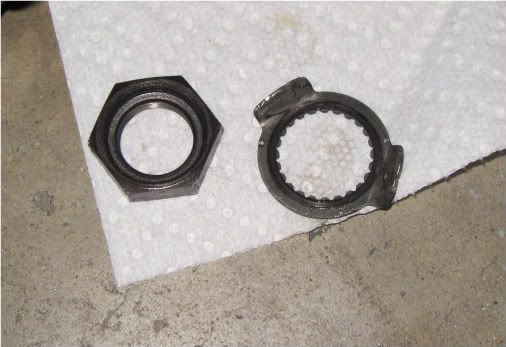
There is a large nut in the center that need to be removed. First, bend back the tabs on the lockwasher:
Now you need that big 1 3/16ths socket. Easiest way to get it seems to be just by pulsing it with an impact gun. I have a cordless electric impact and it worked fine. Alternately, you can find something to hold the inner housing with so that it doesn't move when you turn the nut (maybe an oil filter wrench?). Remove both the nut and the lockwasher:
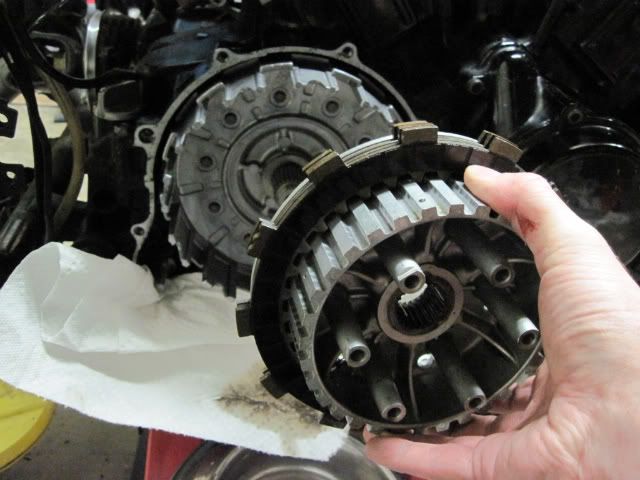
Slide off the clutch center and the washer behind it (I still had a few plates on it but yours should all be off and together):
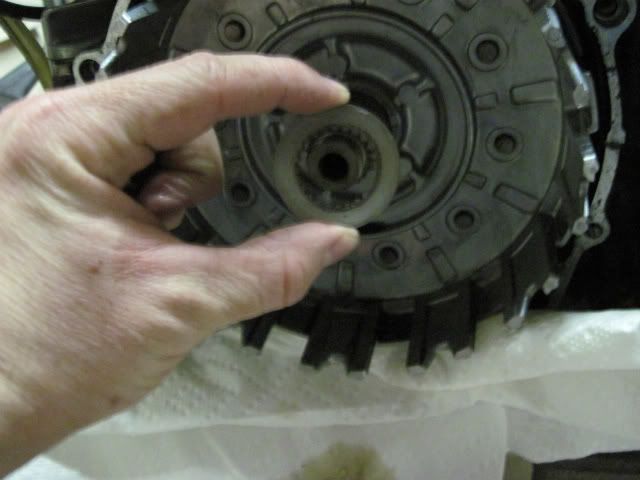
And now you can slide off the final outer housing:
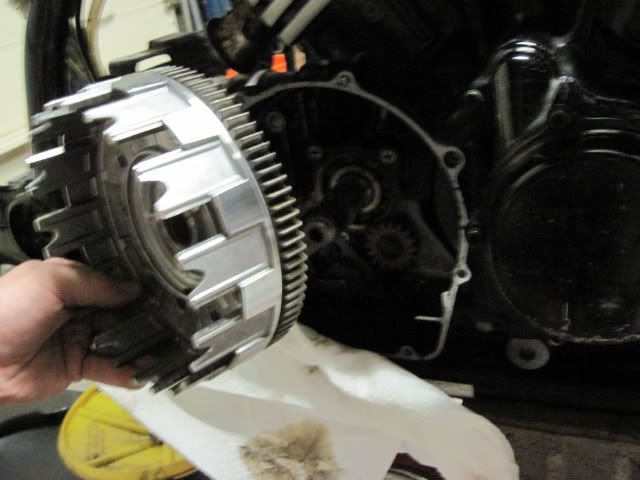
Should look like this:
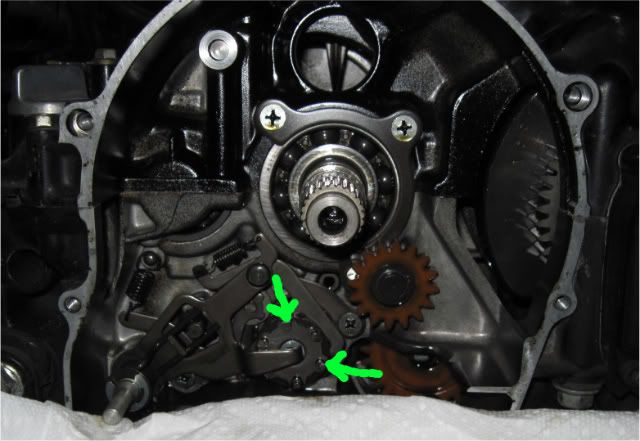
Note the 6 tabs on the segment (I arrowed two of them). If your segment has failed these tabs may already be pressed outward, and one or more of the pins behind the tabs may have fallen out. Make sure they are all accounted for. Before you can remove the old segment, you need to bring the shift shaft forward to make room. In order to do this, remove the clamp bolt on the other side of the bike where the shift lever connects to the crankcase:
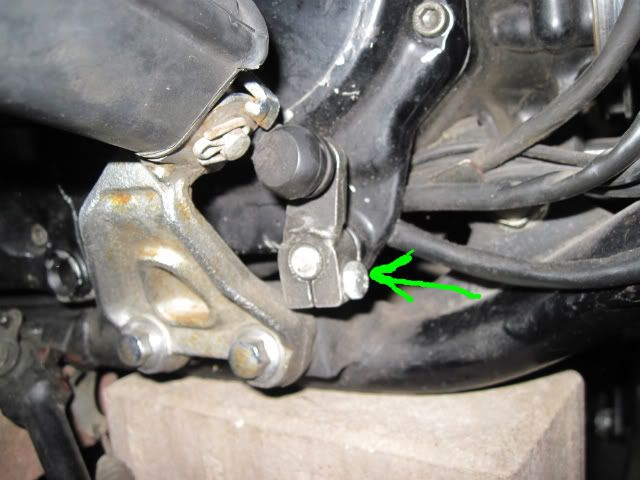
With that bolt removed, you should be able to loosen the "fingers" from the shift segment and bring the entire shift shaft forward to make room. I also released the spring but I'm not sure that was necessary (note that I already have the new segment installed in this pic):
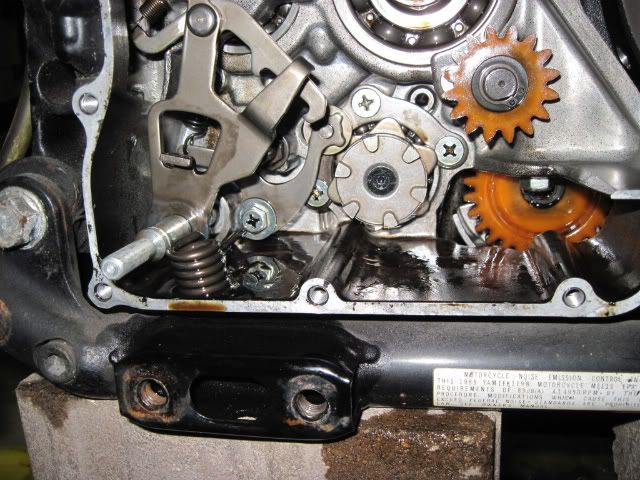
CAREFULLY remove the torx bolt holding on the old segment. The head is pretty soft and it is in there tight, so I guess it is easy to strip it. I got lucky, but I could feel it slipping a little.
With the bolt removed, pull out the old segment along with the star behind it, being careful not to let it fall apart. Now you need to assemble the new segment. You will need the smallest rod from the old unit, the five new short rods, and the one new long rod. Fortunately, it looked to me like there is really only one way to make this thing go together, so I don't think you can get it wrong. Here's what it should look like:
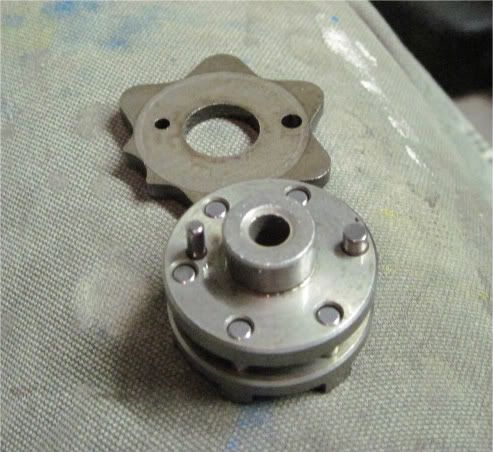
The star, then, sits on top. You can place the new unit back in, resting the small circle "finger" into the odd shaped groove of the star:
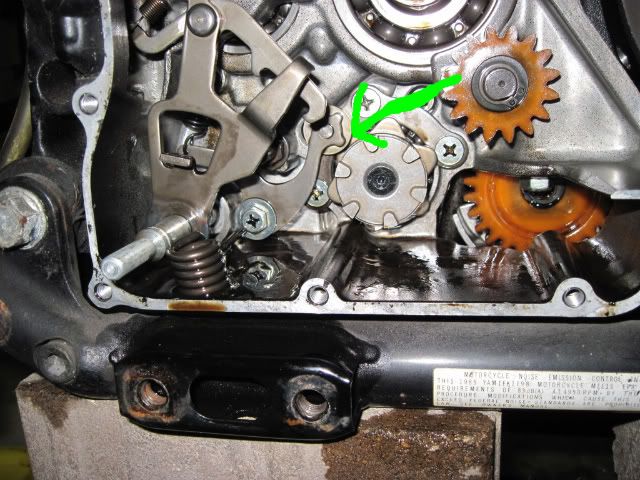
And that's it. Everything goes back in reverse order. Remember the order and alignment of the clutch plates: you put a friction plate in first (the ones with the large outer "teeth", aligning the double-notched tooth with the two dots on the outer housing. Follow this with a plain plate, and then another friction plate, aligned the same way. Continue this until you finish with the outer friction plate, aligning the wide grooved tooth with the other double-notched teeth.
At least, this is how Haynes describes the order and alignment. If there is another way to do it, or if it really matters, I'd sure like to know.
You're done - go crack a cold one, you deserve it!
I was pretty intimidated by the thought of pulling the clutch in order to do this one myself, but it really wasn't so bad. For tools you will need:
-5mm allen key
-T30 torx
-10mm socket
-12mm socket
-1 3/16ths socket (that's one [inch AND 3/16ths] socket, not one 3/16ths socket)
For parts you will need:
4NK-18185-00-00 SEGMENT Qty: 1
93604-12037-00 PIN, DOWEL Qty: 5
93604-16092-00 PIN, DOWEL Qty: 1
3JP-15462-00-00 gasket crankcase cover Qty: 1
and maybe a 90151-06013-00 torx bolt to replace the one you're gonna take out (it is prone to stripping)
Drain the oil before starting!
Start by removing the cover screws, in a criss-cross pattern. Before doing this, you'll need to remove the footrest and rear brake assembly:

Be prepared to catch some more oil when you remove the cover. Remove the old gasket (I had to scrape parts of it off with a knife), and take note of the two small dowels in the 10:00 and 2:00 holes. Now remove the diaphragm spring retainer plate by slowly loosening the bolts, again in criss-cross pattern:

Once the bolts are out you will remove the retainer plate, the diaphragm spring, and a large ring spring seat:

The pressure plate immediately behind these can also slide out:

Now you can pull out the pushrod in the center, and also a small steal ball right behind it. I had to use a small magnet to grab the ball:


All of the clutch plates can now be removed. Make sure that you keep them in the same order - the outermost one in particular is different from the rest and must be put back in the same place. Also note their alignment. I replaced them according to the Haynes manual, which says to align the ridged tooth on each friction plate with the two dots on the outer housing, and then to align the wide gap on the outermost plate in the same place (refer back to this pic on re-install if needed):

There is a large nut in the center that need to be removed. First, bend back the tabs on the lockwasher:

Now you need that big 1 3/16ths socket. Easiest way to get it seems to be just by pulsing it with an impact gun. I have a cordless electric impact and it worked fine. Alternately, you can find something to hold the inner housing with so that it doesn't move when you turn the nut (maybe an oil filter wrench?). Remove both the nut and the lockwasher:

Slide off the clutch center and the washer behind it (I still had a few plates on it but yours should all be off and together):


And now you can slide off the final outer housing:

Should look like this:

Note the 6 tabs on the segment (I arrowed two of them). If your segment has failed these tabs may already be pressed outward, and one or more of the pins behind the tabs may have fallen out. Make sure they are all accounted for. Before you can remove the old segment, you need to bring the shift shaft forward to make room. In order to do this, remove the clamp bolt on the other side of the bike where the shift lever connects to the crankcase:

With that bolt removed, you should be able to loosen the "fingers" from the shift segment and bring the entire shift shaft forward to make room. I also released the spring but I'm not sure that was necessary (note that I already have the new segment installed in this pic):

CAREFULLY remove the torx bolt holding on the old segment. The head is pretty soft and it is in there tight, so I guess it is easy to strip it. I got lucky, but I could feel it slipping a little.
With the bolt removed, pull out the old segment along with the star behind it, being careful not to let it fall apart. Now you need to assemble the new segment. You will need the smallest rod from the old unit, the five new short rods, and the one new long rod. Fortunately, it looked to me like there is really only one way to make this thing go together, so I don't think you can get it wrong. Here's what it should look like:

The star, then, sits on top. You can place the new unit back in, resting the small circle "finger" into the odd shaped groove of the star:

And that's it. Everything goes back in reverse order. Remember the order and alignment of the clutch plates: you put a friction plate in first (the ones with the large outer "teeth", aligning the double-notched tooth with the two dots on the outer housing. Follow this with a plain plate, and then another friction plate, aligned the same way. Continue this until you finish with the outer friction plate, aligning the wide grooved tooth with the other double-notched teeth.
At least, this is how Haynes describes the order and alignment. If there is another way to do it, or if it really matters, I'd sure like to know.
You're done - go crack a cold one, you deserve it!


