hijacker
Well-Known Member
Step by Step instructions to install a Raptor Shift Light on a 1st Gen.
It's much easier than I anticipated...
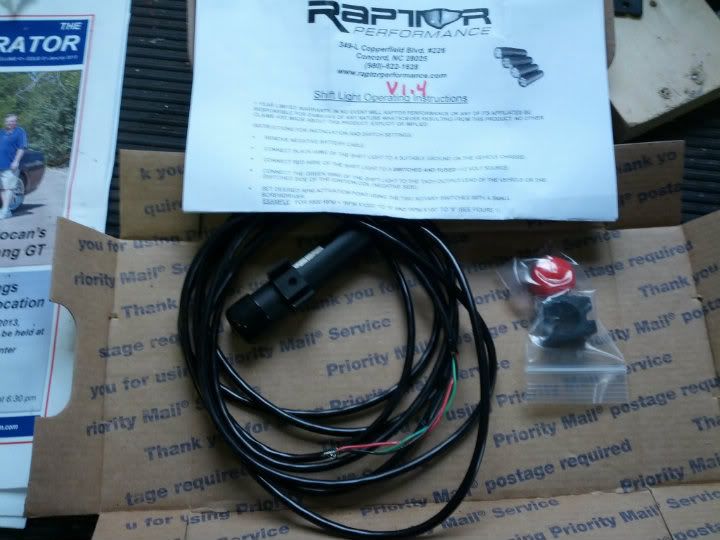
1. Remove seat, faux tank cover and disconnect negative battery cable.
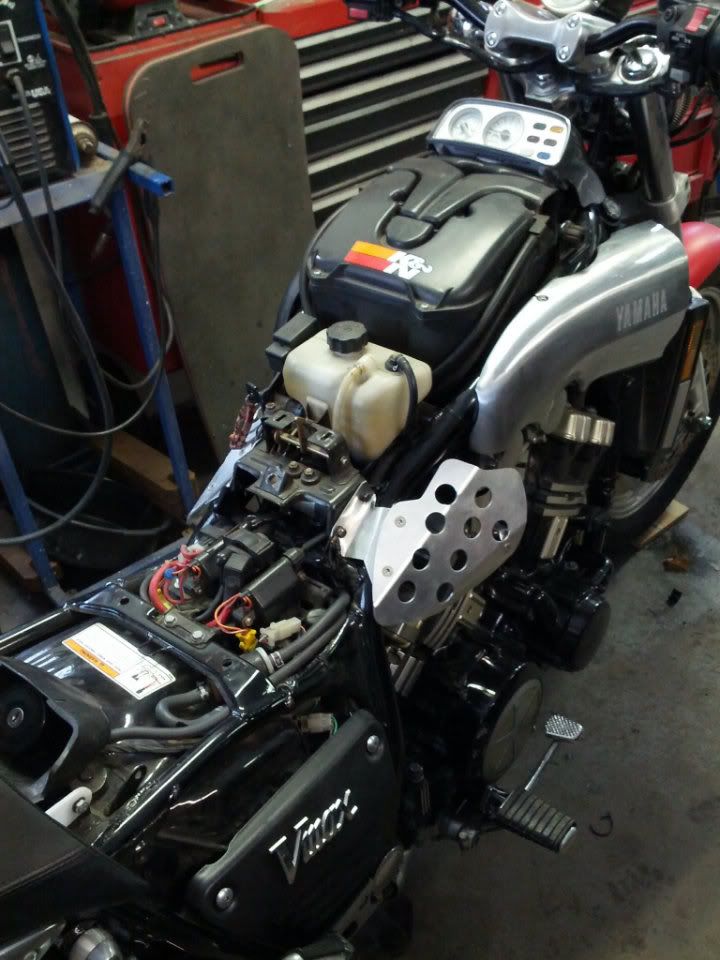
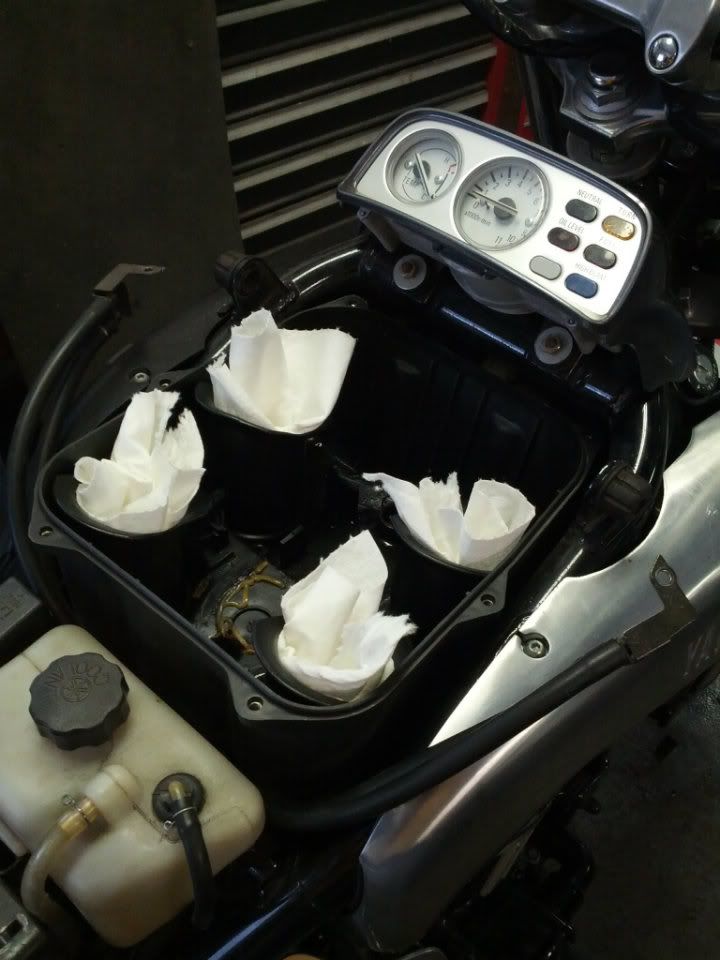
2. Remove the air filter cover and air filter. You may want to stuff some towels into the carb intakes just in case you drop a nut or washer.
3. Remove the two nuts that mount the instrument panel.
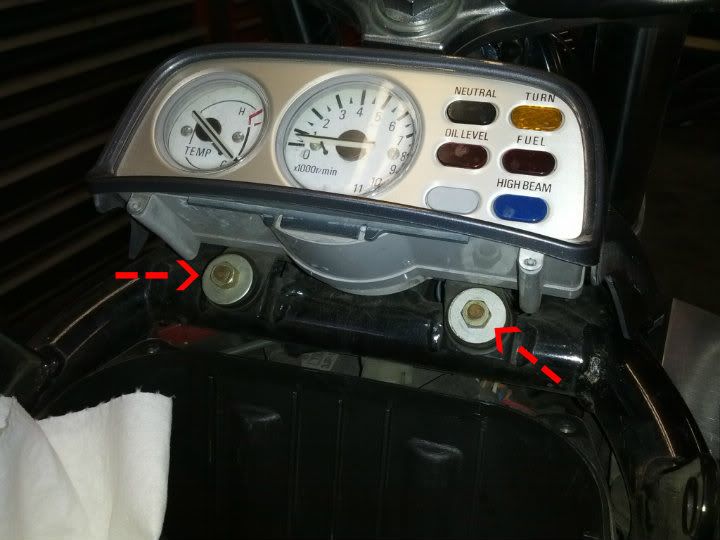
4. Remove the instrument panel mounting bracket from the bottom of the instrument panel, it will be in your way for the next steps.
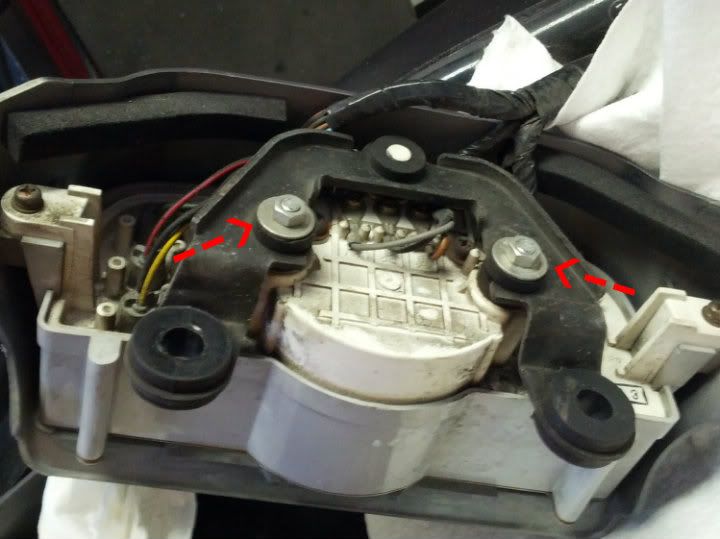
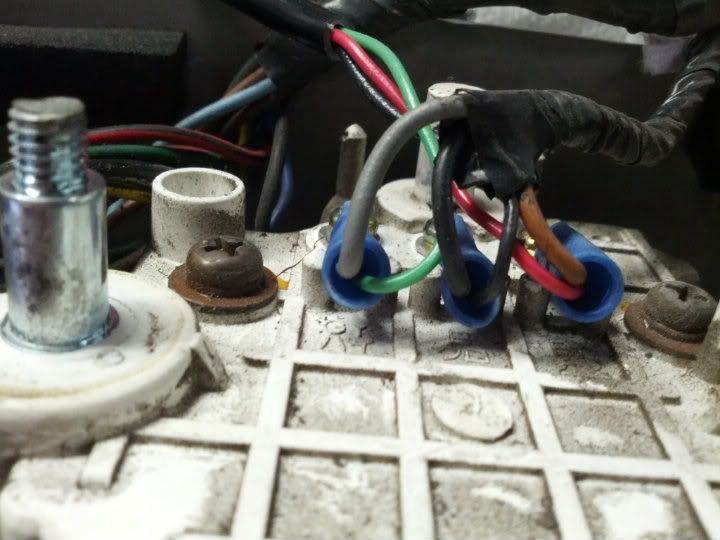
5. Wired into the back of the tach are three wires: Gray, Black & Brown.
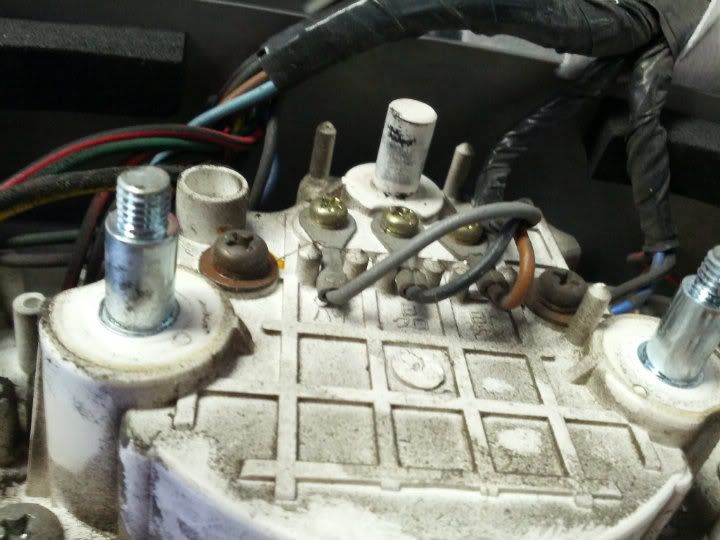
6. Take a break and enjoy a tasty snack and refreshing beverage of your choice.

7. Feed the wire from the shift light behind the speedo and behind the left side neck cover then up into the space under instrument panel. The shift light comes with about 8 feet of wire, you'll remove most of it but remember to leave enough slack to allow the handlebars to turn without pulling the wires too tight.
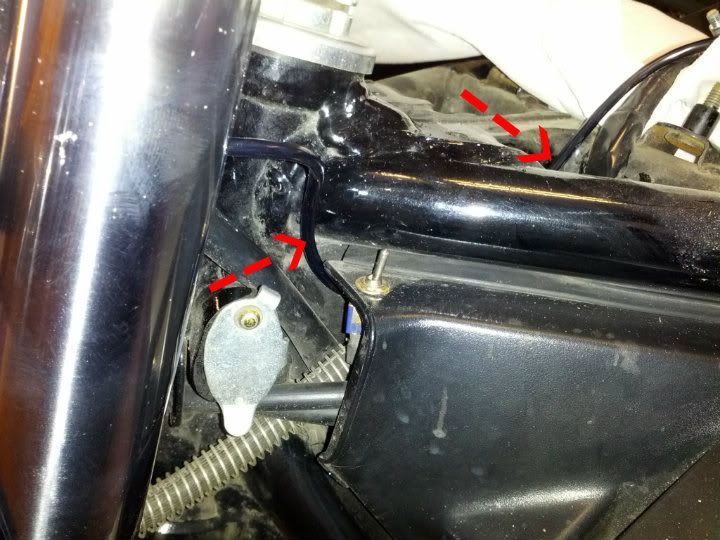
8. One at a time, remove the screw securing the wires to the back of the tach, cut the wires, twist them together with the appropriate shift light wire, crimp them into a new connector and secure it back onto the back of the tach with the original screw.
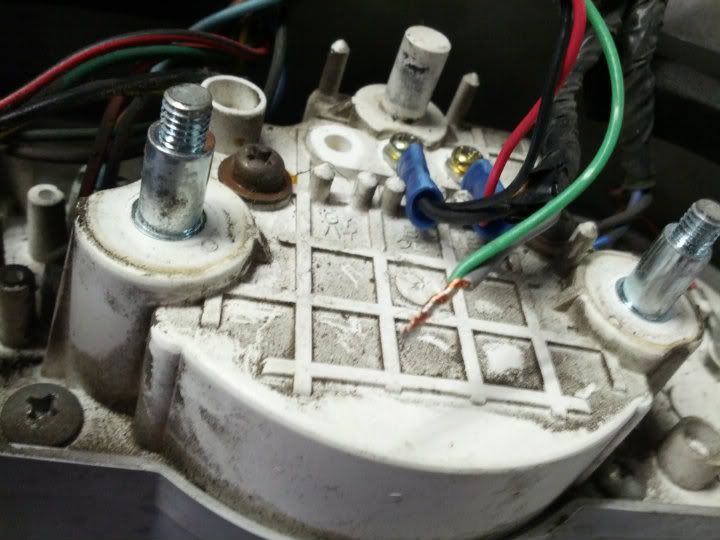
The wiring combination is: Gray to Green; Black to Black; Brown to Red.
9. Program the shift light for 2 cylinder mode and desired RPM. In the picture below I have it set for 2 cylinder mode and to light at 9000 rpm.
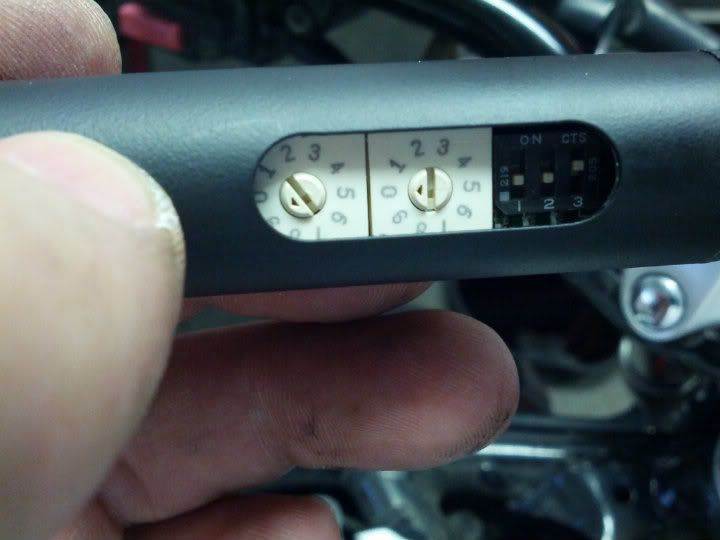
The first time you turn on the ignition the shift light will flash once for each 1000 rpms, pause then once for each 100 rpms, pause then flash twice for 2 cylinder mode.
In my case, set at 9000 rpms it flashed 9 times, paused, no flashes for the x100 rpms stage, pause and flash 2 times for 2 cylinder mode.
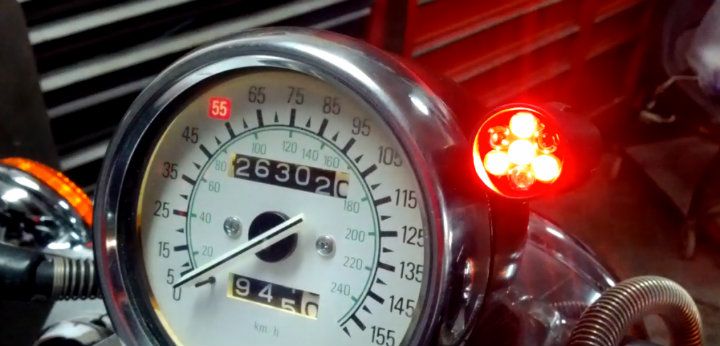
From that point forward each time you turn on the ignition the led's will cycle in a circle. If you reprogram the shift light it will run the test pattern again.
http://www.youtube.com/watch?v=jI-e07KQ1do&feature=youtu.be
Button everything back up and you are done! unk:
unk:
It's much easier than I anticipated...

1. Remove seat, faux tank cover and disconnect negative battery cable.

2. Remove the air filter cover and air filter. You may want to stuff some towels into the carb intakes just in case you drop a nut or washer.

3. Remove the two nuts that mount the instrument panel.

4. Remove the instrument panel mounting bracket from the bottom of the instrument panel, it will be in your way for the next steps.

5. Wired into the back of the tach are three wires: Gray, Black & Brown.

6. Take a break and enjoy a tasty snack and refreshing beverage of your choice.

7. Feed the wire from the shift light behind the speedo and behind the left side neck cover then up into the space under instrument panel. The shift light comes with about 8 feet of wire, you'll remove most of it but remember to leave enough slack to allow the handlebars to turn without pulling the wires too tight.

8. One at a time, remove the screw securing the wires to the back of the tach, cut the wires, twist them together with the appropriate shift light wire, crimp them into a new connector and secure it back onto the back of the tach with the original screw.

The wiring combination is: Gray to Green; Black to Black; Brown to Red.

9. Program the shift light for 2 cylinder mode and desired RPM. In the picture below I have it set for 2 cylinder mode and to light at 9000 rpm.

The first time you turn on the ignition the shift light will flash once for each 1000 rpms, pause then once for each 100 rpms, pause then flash twice for 2 cylinder mode.
In my case, set at 9000 rpms it flashed 9 times, paused, no flashes for the x100 rpms stage, pause and flash 2 times for 2 cylinder mode.

From that point forward each time you turn on the ignition the led's will cycle in a circle. If you reprogram the shift light it will run the test pattern again.
http://www.youtube.com/watch?v=jI-e07KQ1do&feature=youtu.be
Button everything back up and you are done!


![JOYROOM Motorcycle Phone Mount, [1s Auto Lock][100mph Military Anti-Shake] Bike Phone Holder for Bicycle, [10s Quick Install] Handlebar Phone Mount, Compatible with iPhone, Samsung, All Cell Phone](https://m.media-amazon.com/images/I/5113ZNM8R8L._SL500_.jpg)


![Bovemanx Motorcycle Phone Mount Holder, [150mph Wind Anti-Shake][7.2inch Big Phone Friendly] Bike Phone Holder, Motorcycle Handlebar Cell Phone Clamp, Compatible with iPhone 16 Pro Max Smartphones](https://m.media-amazon.com/images/I/51F+1sontPL._SL500_.jpg)


