Regular Guy
Well-Known Member
I didn't want to hijack Shawn's thread about Starter relay relocating and his install of his R/R so I decided to make my own thread.
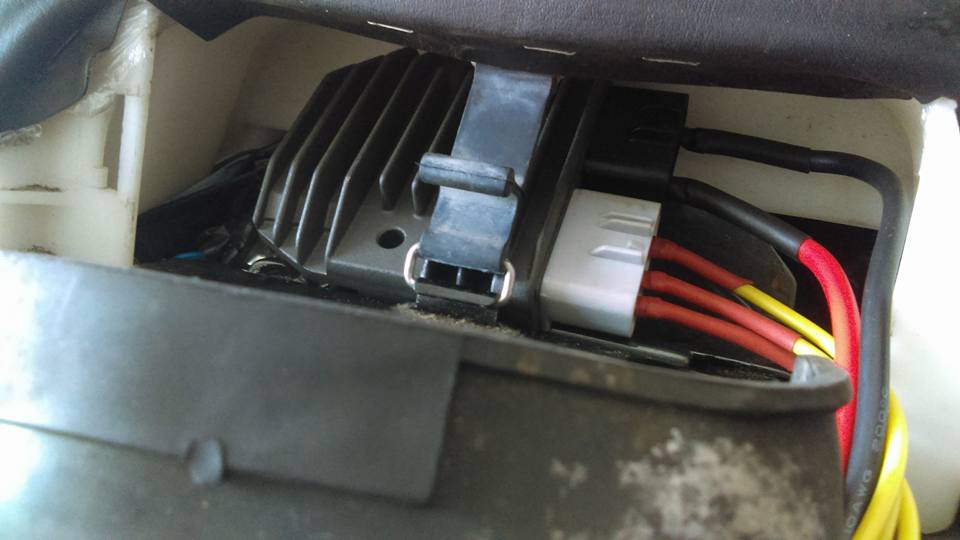
I opted to press the easy button and just put my new R/R under the back part of the seat where the little tool pouch would go if I had one. I just seemed easier for me to do it that way.
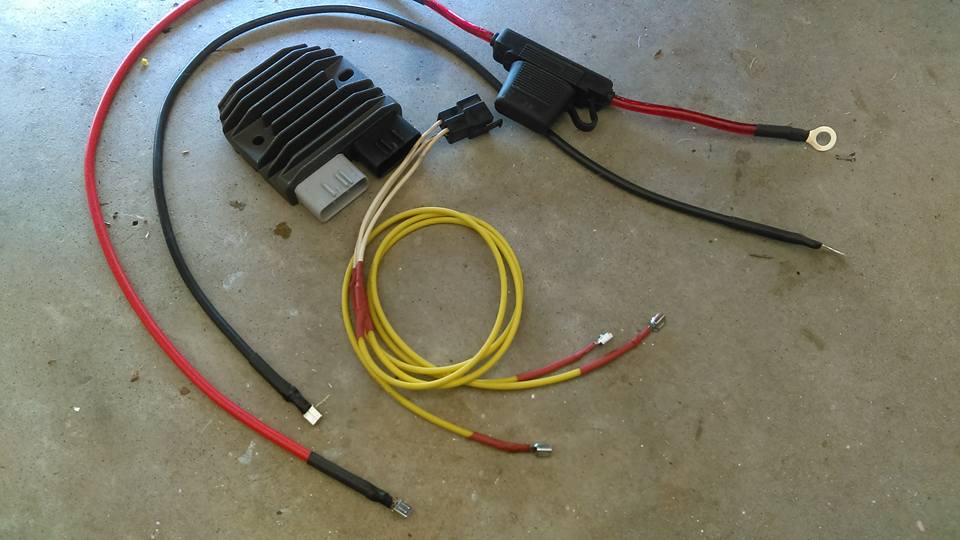
I disconnected the battery from both posts and unplugged the 3 stock wiring harnesses for the R/R (a 3 white wire one going to the stator, a positive and a negative. Rather than remove the old R/R, I just cut the cords from it and left it there. I then crimped and soldered 14 awg wire (yellow) to the other side of the stock wiring harness for the stator and covered with heat shrink tubing. I did the same for the spade connectors. For the +/- I crimped and soldered 10 awg wiring to ring terminal connections and the spade connectors and again covered with heat shrink tubing. I ran an inline fuse for the + side and ran the ground straight to the battery.
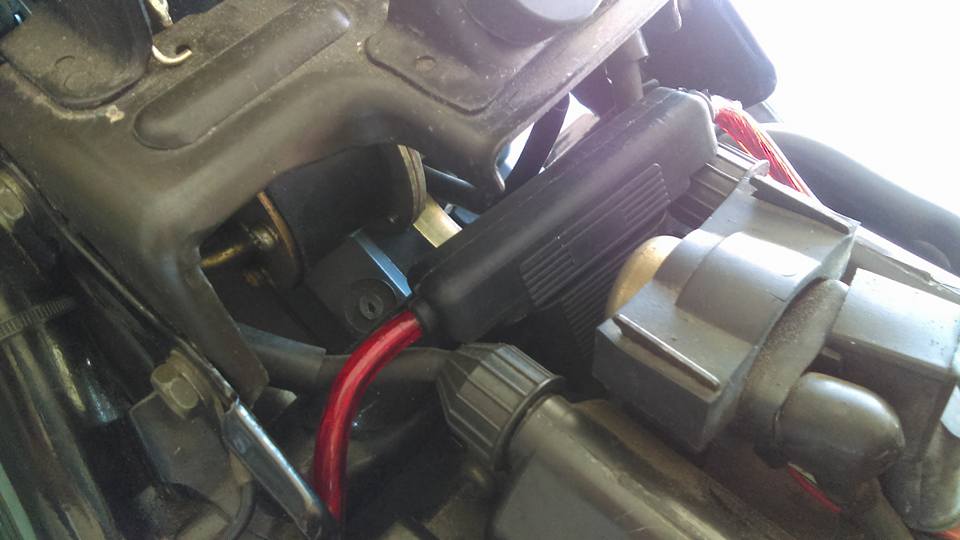
I put some protective tubing in key spots and taped others for a little more protection. The fuse was able to tuck nicely out of the way and the R/R fits in its new home nice and snug and easy to access if I ever need to.
Here is my wiring all made up and ready to go
Here's the inline fuse tucked away
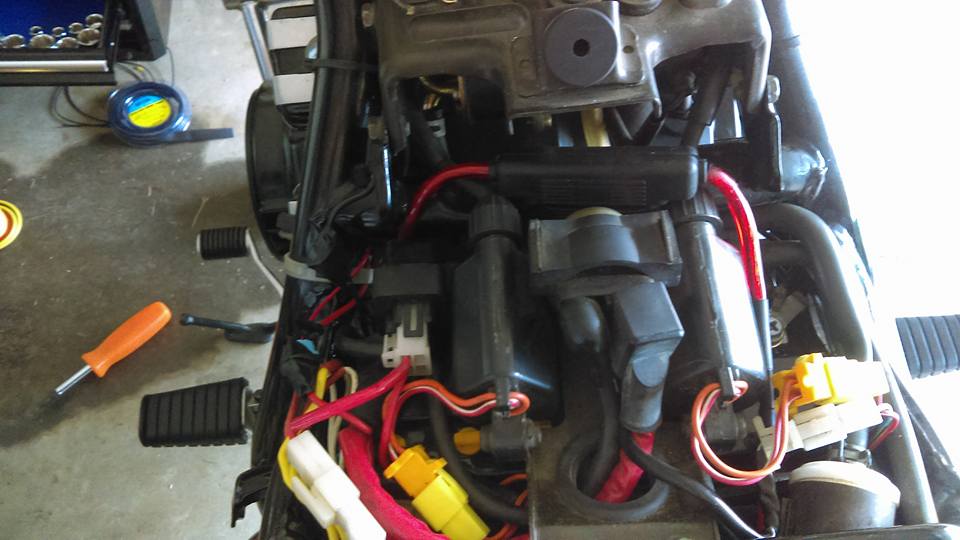
Here's the wiring on its way to the new R/R
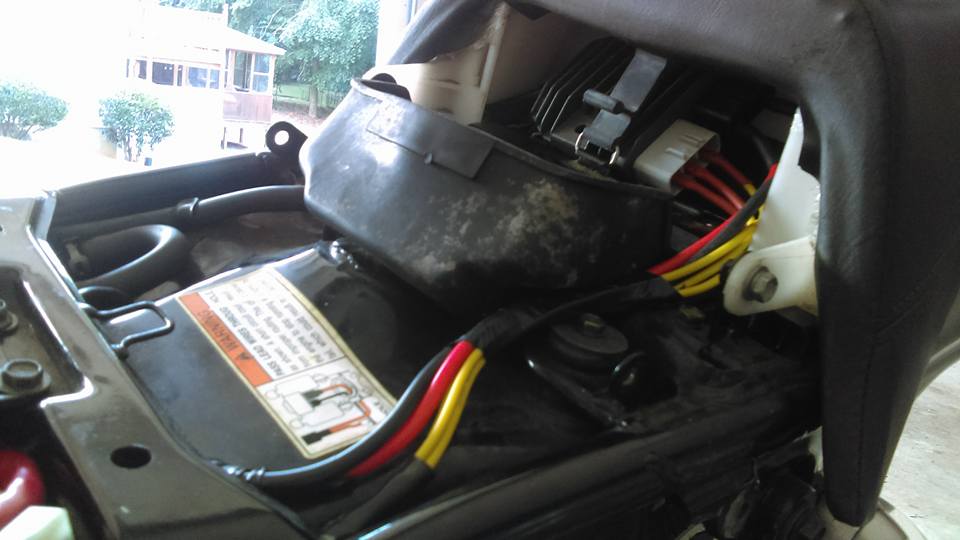
And....here's the star of the show
Now that I've done this and know of the paths I used to run the wire, I think I can do this in about 15 minutes time, minus time to solder the wires of course, add about 20 minutes or so. All in all, it was pretty simple. Thanks to those that have offered up so much help! As usual, I'd be pretty damn lost without ya!
Just as I got it done I fired it up and can tell that it started easier but didn't get the chance to see if it remedied my tail light flickering issue or not. I had to go make 4 pizzas outside real quick and then jump in the shower to take my wife to see "The Mummy" for our date night. So.....more on this tomorrow!
I opted to press the easy button and just put my new R/R under the back part of the seat where the little tool pouch would go if I had one. I just seemed easier for me to do it that way.
I disconnected the battery from both posts and unplugged the 3 stock wiring harnesses for the R/R (a 3 white wire one going to the stator, a positive and a negative. Rather than remove the old R/R, I just cut the cords from it and left it there. I then crimped and soldered 14 awg wire (yellow) to the other side of the stock wiring harness for the stator and covered with heat shrink tubing. I did the same for the spade connectors. For the +/- I crimped and soldered 10 awg wiring to ring terminal connections and the spade connectors and again covered with heat shrink tubing. I ran an inline fuse for the + side and ran the ground straight to the battery.
I put some protective tubing in key spots and taped others for a little more protection. The fuse was able to tuck nicely out of the way and the R/R fits in its new home nice and snug and easy to access if I ever need to.
Here is my wiring all made up and ready to go

Here's the inline fuse tucked away


Here's the wiring on its way to the new R/R

And....here's the star of the show

Now that I've done this and know of the paths I used to run the wire, I think I can do this in about 15 minutes time, minus time to solder the wires of course, add about 20 minutes or so. All in all, it was pretty simple. Thanks to those that have offered up so much help! As usual, I'd be pretty damn lost without ya!
Just as I got it done I fired it up and can tell that it started easier but didn't get the chance to see if it remedied my tail light flickering issue or not. I had to go make 4 pizzas outside real quick and then jump in the shower to take my wife to see "The Mummy" for our date night. So.....more on this tomorrow!


