1st Post - Barn Find 85 VMAX

VMAX  Forum

Help Support VMAX Forum:

This site may earn a commission from merchant affiliate links, including eBay, Amazon, and others.
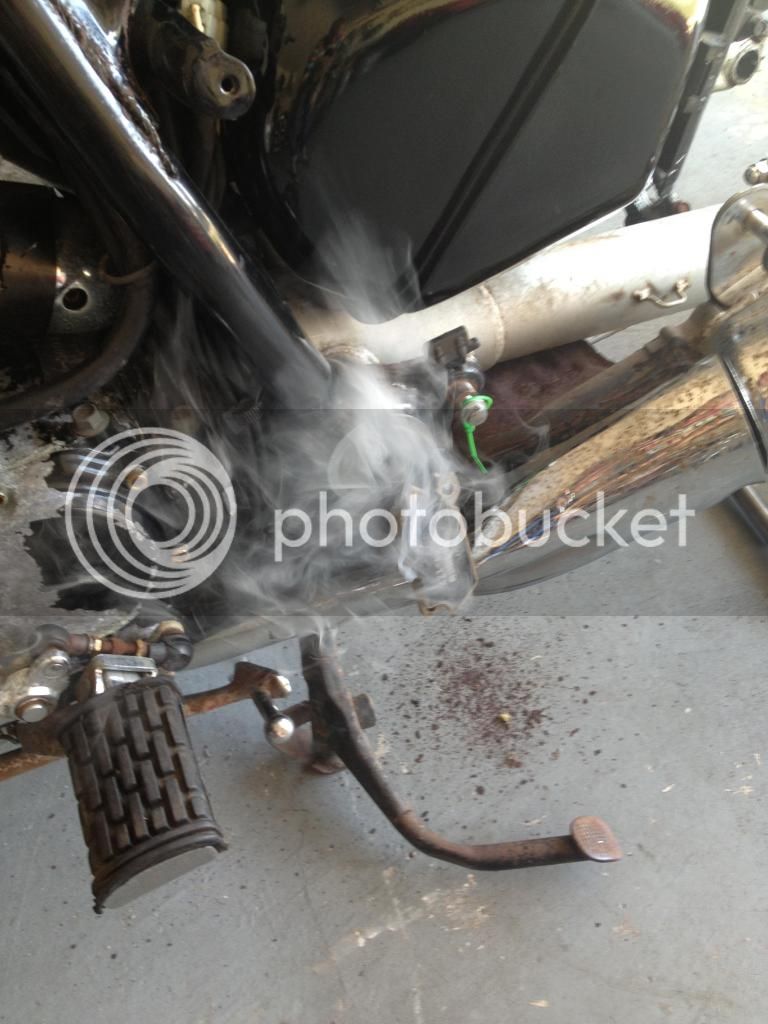
I dunno if you fellows have pulled the engine, but it isn't that-hard. Probably the toughest part was getting the stock exhaust re-installed. I made a thread about my process for that. Once I worked out the method, I was able to do it solo.

I estimate it took me three+ hours to yank the engine the first time. Now I know the procedure, it's quicker. If you take pictures and label things, you should be able to do it apart and back-together w/no hair-pulling, vexing, "where does this go?" issues. I have a factory manual and consult it before I do something. I'll go as-far as copying the pages and inserting them into plastic three-ring binder sheet covers, so the pages don't get greasy, and you can look at both sides of the page, easily. Kyle was kind-enough to give me a whole manual already copied into loose-leaf three-ring format, so I don't have to worry about splitting the spline og my factory manual I bought twenty years-ago, when I purchased my bike. That was part of the deal when I bought the bike from the dealer, a factory service manual, new, to-go w/the bike.

Sandblasting thoroughly removes nearly-all the dirt, grease, and other contaminants. Then you use a few scrapers and pointed awls & such to get the last bit of crud out of hard-to-access crevices. Then maybe another short session w/the sandblaster to target those areas. When you're done, you have great 'tooth' (ability to bind) on the engine surfaces, for the paint. A good soap & water session, maybe some narrow scrubbers to get into small areas, let it thoroughly-dry, and you're ready for paint. You don't need a spray-gun for a good engine job, just go to your local auto-body shop and get some good-quality paint cans, and take your time to 'mist' the coats, not too-heavy, you don't want to get full-color coverage in one pass. A couple of coats should make the color even and prevent puddling and runs. I am not a pro painter, but I can make it work for my uses for something not-critical like the engine surfaces. The body panels, I would leave to a pro. I have painted bikes when I was going to sell them instead of spending $$$ for a pro job, and they turned-out OK, but if it was something I was gonna hold-onto or something I was trying to get $$$ for, I'd let a pro do the body. But the engine, I would do it again, in a heartbeat. You can too, and it's not that hard to remove, blast, paint, and re-install the engine. If you were really motivated, you could take part of a day for each step, and have it done in < a week. You wouldn't even be working a full day for any part of it either. You just have to make the commitment, have the tools, equipment, supplies, and time, and then undertake it. To paraphrase one of my grandsons, "come-on Grandpa, you can do it!":biglaugh:

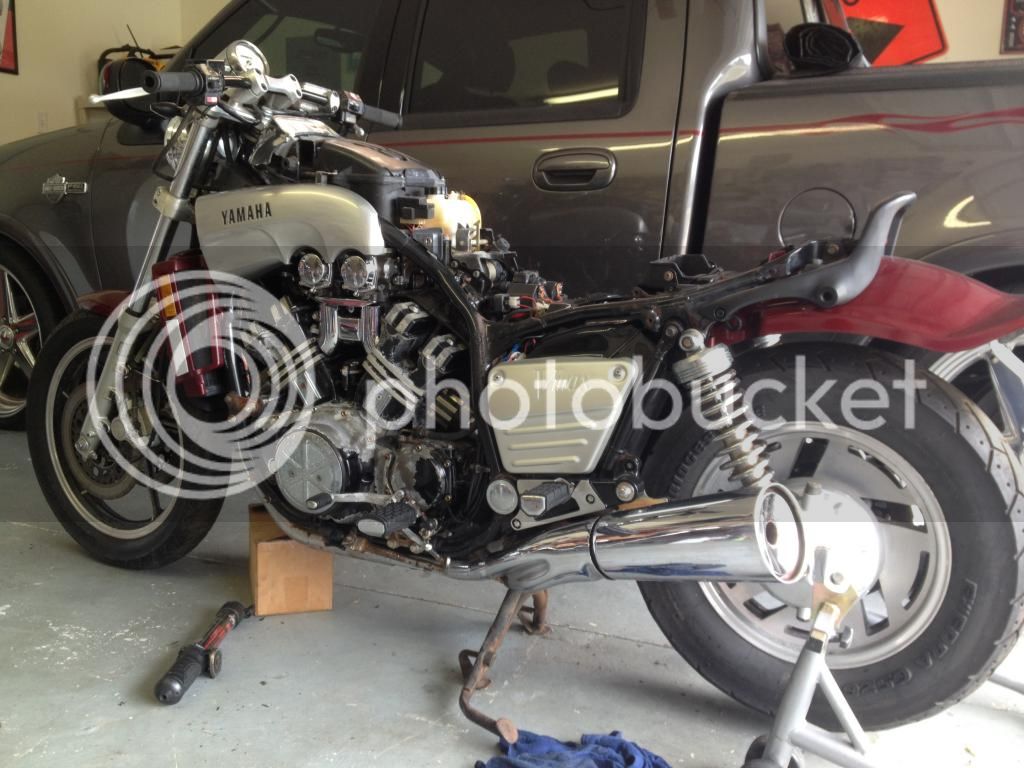
The last pic is what my bike looked-like when I pulled it out of storage, two & a half years-ago, and began to resurrect the thing. I've owned it twenty years, I bought it from the original dealer, barely a year-old, 1700 mi on the odometer. It still needs the frame and swingarm re-done, but we're in the midst of planning a big house remodel, "one project at-a-time!"
 

Attachments

  • 2013 summer solstice VMax.jpg
    2013 summer solstice VMax.jpg
    122.5 KB · Views: 41
  • VMax engine out.JPG
    VMax engine out.JPG
    134.8 KB · Views: 40
  • 12-28-11.jpg
    12-28-11.jpg
    150.9 KB · Views: 43
Looks like you are getting some progress!

Here is some inspiration: removing the engine is easy, if you have a place to work on it-you do, the garage. I can remove & replace the engine myself w/the use of a large floor jack. Now seal it up, and blast it. I used a fine grade kiln-dried silica sand and a Harbor Freight sandblaster. A bit messy, put it onto one of those HFT caster platforms, and rotate the engine on it as needed. You will come out w/a great surface for painting. I had powdercoated the insert on the left engine case side cover & the valve covers.

FYI, the gravity-feed media blasting gun HFT sells is able to use baking soda media to blast your chrome parts. The gun goes on-sale for $10. Buy the baking soda in 13 lb bags at Costco. That's the cheapest source I found, even cheaper than the pool supply stores. The use of the baking soda is almost like time-spend polishing, it will get into small crevices on a chromed part and the results are very positive, at-least they have been for me. My stock mufflers, I was going to replace them, but a good session using the baking soda, and they came-out clean, smooth, and lustrous, much-better than what I expected. I did the same w/a Kerker 4/1 that had a lot of corrosion, and while not 'new-appearance,' it was much-better than it was to begin.

Thanks for the tips. I was wondering how the horrible freight blasters worked. They are definitely priced right. Pulling the engine and blasting it and the frame and respraying are in order right after I get the thing running.
 
Since I don't do big projects, the smaller pressure can I got for sand is the right size for me, and the gravity-feed hopper-gun which I use for the baking soda blasting does take multiple fills to do anything big, but it saves you the cost of the specific soda blaster they sell. The legs on that small sand reservoir (I think it's a 20-lb) are a bit loose and fragile, I braced them by drilling and tapping the mounting holes for through-bolts and nylock nuts to make it more-substantial. You could also weld the legs in-place, and use some flat strapping to reinforce the legs down-towards the floor pads, too. Please be sure and have NO PRESSURE on the can if you do any welding or brazing on the thing.:punk:
 
UPDATE!!!!
It's been a long 3 weeks with work, family, vacations, and such but I've managed to get through them. Along the way, I've been making steady progress on the bike.

I managed to get the carbs off and sent to Dannymax for a rebuild. I tell you, if you need your carbs done, he's the man to call. I couldn't believe how good these things looked when they came back from him. Thanks again Dan.

Yesterday, I got them reinstalled and done a few odds and ends. Today, I ran new fuel line, plugged everything in, and gave it a whirl. After 15 years, this thing LIVES AGAIN!!!!!! Upon startup, it launched 13 rat-holed pecans out of the tailpipes. Still 2 in there I got to figure out how to get out....... Thanks goes out to Sean Morley, Dannymax, and everyone on this forum who offered advice on the progress. There's still a long road ahead.

http://www.youtube.com/watch?v=wxZqCUUOiMA


The bad news..... After I let it run for 10 minutes, I shut it off. Immediately after shutting it off, the rectifier started smoking. The key was off and pulled out of the ignition. I figured a short and it would just stop smoking on it's on, but nada. It got WORSE. It got to the point where it was glowing red. It was grounded to the frame with a zip-tie holding the two together, but could that have been the problem? Not a good enough ground? I finally had to cut the wires and let it fall to the floor to stop it from smoking. I was afraid the thing was going to catch on fire and ruin the vmax and my truck.

What can I do? Did I do something wrong or just a defective part?

I obviously need another rectifier. Upgrade or go with a replacement? Any advice is welcome.

IMG_04431.jpg
 
Fires are right-up my alley! Good move on cutting it loose. Time for the How-To MOSFET regulator/rectifier. http://www.vmaxforum.net/showthread.php?t=2463

I would have dragged that sucker out of the garage if needed, despite no rear wheel. Just have someone hold the handlebars straight, pick it up at the swingarm, and back it-out. Oh yeah, it's in-gear, that would make it hard-to-move! :rofl_200::ummm::confused2::hmmm::eusa_liar:

One of these day's, it will be done, and then you will be ridin' pretty! Pics, please, lots of pics, tearing into it, parts awaiting refurbishment, parts ordered awaiting installation, parts in-place. We like to see things wrong, it's part of our collective database, "see what he found wrong!"

You can always remove the exhaust and use compressed air to remove the acorns, if simply inverting the pipes won't get them out.

Actually, I think part of your problem was that if it wasn't grounded solidly to the frame, there was no heat-sink capability, and it just overheated itself. The frame is the ground/heatsink!

BTW, the engine sounds pretty-good for such a long layoff. A few heat/cool cycles, and your motor may even stop smoking. Did you squirt any oil into the cylinders before firing it up?
 
More pictures to come. The R/R never caught fire, and I knew if it was smoking, it was done anyway. So I just cut it off. Lesson learned if my ground was the issue. I was hoping just the frame contact was enough.

Things awaiting repair: All the master cylinders and brake calipers. They are nothing but dust inside and froze up. I'm having an internal struggle whether to buy good used ones or rebuild mine.

My advice is to first try for the cheap-shot. Disassemble the calipers, and the f/r masters. Do you have a Dremel? They are very helpful for cleaning small bores, square cut pockets for the caliper O-rings, using a small cut-off wheel for slotting the master cyl. screws to be-able to remove them, and more. Don't worry-about cosmetics here, just see what you have. It's entirely-possible all you need to do is disassemble everything, clean them really-well, using compressed air to make-sure they are truly blockage-free, and then re-assemble them using fresh brake fluid to lube the master cyl pistons & caliper O-rings. If that doesn't do it, then to replace the pistons/seals for the masters and the O-rings & dust seals for the calipers is pretty-cheap.

Just get it back together so you can see how it will run, and worry-about the cosmetics later. I guess that if you want, no-harm in shooting the stuff w/some cans, since it's all-apart. I would suggest you are better-off getting the bike to where it can reliably and safely operate, to see what-all-else it may need, and then making a list of the things to do. In the meantime, you find-out what needs to be done. I have spent a couple years resurrecting mine from a similar slumber, and had probably more trouble than you will encounter, but I have left the major cosmetics (engine-out, strip & paint the frame & swingarm, & misc. brackets) until last, and now that I can run the bike hard, and (I hope!) it is now mechanically-reliable, I am ready to do the cosmetics. I wouldn't spend a great deal on replacement parts for your front-end. I would swap-on an entire triple-tree, downtubes, sliders, and calipers from a 1993+ VMax before I spent anything approaching $100+ on yours. Three MM greater downtube size, four-piston (two pair-opposed) brakes w/much-larger rotors, it's just a bolt-on, and you can use the same handlebar/headlight/turnsignal/speedo assembly, and front wheel/axle as you have now. Also, there are more choices for optional calipers (FZR1000/YZF1000/R1, four or six piston) at cheap prices for the 1993+ VMax front end, which uses a 100 mm o.c. mounting spacing as-compared to yours. I did it to my '92, and it was easy, relatively-cheap, and the results were very-noticeable compared-to the stock 40 mm downtubes and single-piston brakes.
 

Attachments

  • hlight.9 forkbrace.JPG
    hlight.9 forkbrace.JPG
    102.3 KB · Views: 12
  • Hlight.10 frontview.JPG
    Hlight.10 frontview.JPG
    145.2 KB · Views: 12
  • IMG_0061.jpg
    IMG_0061.jpg
    65.8 KB · Views: 13
My regulator/rectifier went the same way, frightened the life out of me because it was so close to the fuel tank
It somehow shorted out and the battery dumped all the power it could into it, that's the problem with a direct connection to the battery

attachment.php


attachment.php
 
My regulator/rectifier went the same way, frightened the life out of me because it was so close to the fuel tank
It somehow shorted out and the battery dumped all the power it could into it, that's the problem with a direct connection to the battery

That looks familiar. Scared the crap out of me too. Hence me cutting the thing off.

Regarding the rectifier, looking at all the threads that pop up with a search. Options look like 04-06 R1 rectifier. What about the earlier, slimmer ones? Also what about a replacement in stock location like the Electrosport ESR280?
 
I tried a few, from stock replacement to heavy duty upgrade but the shunt type always ended up failing

I finally got a mosfet from an R1 and no problems since, the earlier one (FH011AA) has more cooling fins than the later models (FH012AA)

%255BUNSET%255D.jpg
 
Long time, no update. But the bike has come along nicely since the previous one. I got a the CBR tail light installed and fabbed a tag bracket and got all that on as well.

IMG_0476.jpg


IMG_0486.jpg


I rebuilt all the calipers and also the slave cylinder. All that works like brand new.

IMG_0491.jpg


I had the chrome stripped off the side scoops and proceeded to get them cleaned up. I had them acid dipped here locally which turned them a black color. Fortunately that cleaned up easily and I got to work removing scratches starting with an orbital sander with 180, 400, then wet sanded to a brushed finish with 600 grit paper. Then cleared them. Turned out pretty nice.

IMG_0500.jpg


IMG_0502.jpg


After rebleeding all the brakes to make sure everthing was ok and all air was out, I buttoned everything up and it was time for it to come out of the garage. Here she is on a maiden voyage to check everything out. It rode extremely well and smooth for not moving an inch under it's own power for 15 years. Not one hiccup and not one rattle or tap.

IMG_0507.jpg


IMG_0547.jpg


IMG_0528.jpg


Since then, I have rode it to work once and it performed great. Of course taking it easy on the old tires. I have new ones on their way.

I have also tore off all the front end accessories - handle bar holders, headlight mount, etc to give them the same brushed finish treatment and clear coat. More pictures to come. Next project is getting the front end triple tree corrosion cleaned up some paint on the engine. Going to do a simple spray can treatment just to get me by for awhile.

More pictures to come....
 
Welcome to the forum. http://www.vmaxforum.net/forumdisplay.php?f=31&order=desc is a good place to read about a vmax. Also Ryan has a great write up for new vmax owners.
That is an awesome find. A lot of us would love to have that baby. I have an 85 but it's been hacked up,numbers don't match ect.. I want to put it on the road though. My dream is to get what you appear to have found and have it restored, and kept it bone stock. A virgin. Those will be the most collectable in the future. There have to be a few more out there somewhere.
Steve
 
Great progress. Keep it up, and keep us informed. Looking better and better.
 
Nice work! I see you have all the necessary tools for the job in your garage... tools being a fridge for the beer and stool to sit enjoy said beer while you stare at VMax and imagine the possibilities. :)
 
Great job so far....steady work will getter done. Love the tailight!
 
Does the cbr tail light have a white license plate light in it?

Sent from my Galaxy Nexus using Tapatalk 4
 

Latest posts

Back
Top