


RaWarrior
Well-Known Member
Here's the latest mod for my Max...scoop mount directional "rings". I came up with this as I was cruising the Custom Dynamics page, looking at all the shiny bits and gadgets, when I saw amber LED strips. I had recently noticed that the small, super short stalk turn signals the P/O of the bike put on were pretty difficult to distinguish from the headlight, being so close. It "clicked" and I decided to supplement the front turn signals to get a bit more visibility by running an amber strip around the inside lip of the scoop, effectively creating an amber ring in the shape of the scoop that would flash with the turn signals.
Here's the strips I ordered. $11 shipped for two 12" strips.
Okay, here's the how-to with pictures. Excuse the crappy quality, cell phone cam.
You will need:
4, 5mm allen keys
Solvent/cleaner(I used carb cleaner) and a rag
Splice/butt connectors and something to crimp with(I use channel locks)
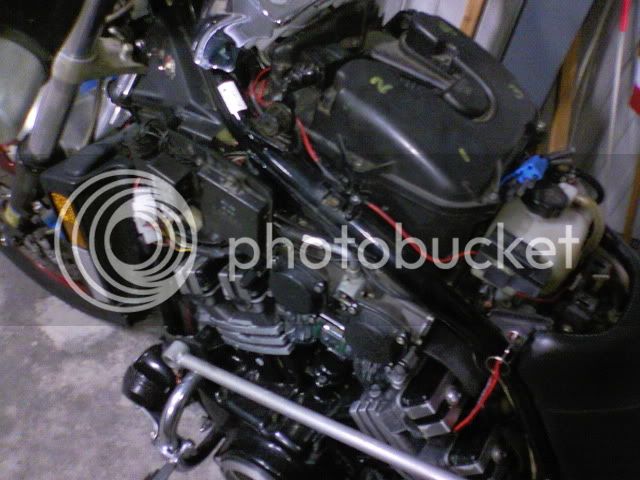
Start by removing the airbox lid and both scoops. Set the lid aside, but keep the scoops handy. The scoops take a 5mm allen key to remove.
Now as is the case with LED's, polarity matters and they won't light if you hook them up backwards. My strips had two identical wires with no labeling, so I tried it on a battery first to determine which was positive. If your strips aren't labeled, find this out first to avoid hassle later.
Now, use whatever cleaner you like and prep the area where the strips will go on the inside edge of the scoops, just in front of the grate. I put some carb cleaner on a rag and ran it around to get any grime/bug residue off and help the strips backing stick better.
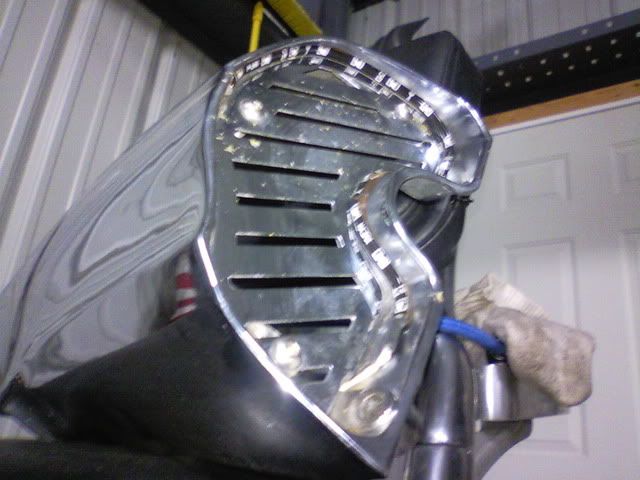
NOTE #1: As you can see, the 12" strip is not long enough to go all the way around the scoop. For future modders, you may want to try and get one that's 15 or 16" long.
To make the look as clean as possible, I put the wire-end of the strip in the bottom corner closest to the bike, so the wires can tuck behind the grate almost immediately.
Once the strip is stuck on, use the 4mm key to loosen the bottom screw that holds the grate on the scoop. Once it's loose, pry it up a little and shove the wire through it, but don't re-tighten it yet. Take the determined negative wire, cut it short, then strip a fair amount off the end. Tuck it between the grate and scoop, around the bottom grate screw, then tighten it back down to pinch it in....that's your ground.
Mine looked like this:
Now, set the scoops back on the bike, but just loosely put the top screw in for now.
Remove the headlight bucket, disconnect the headlight bulb, then set the bucket aside. Also in there, you'll see two wires with bullet style connectors... one is brown(chocolate in the manual), and the other is green(dark green in the manual). The brown wire is the "flash" power for the left, and the green is for the right. The wires attached to these strips were so thin, I just pulled the bullet connector apart, slipped the strip's wire in there, then put it back together. They're grounded to the scoop(bolted to the frame), so wiring is done.
NOTE #2: If you have to remove the scoop and set it aside, you will now have to pop the headlight out and separate the factory bullet connectors and get the wire out. I rarely ever have to remove the scoops, so this isn't that big of a deal for me. If that isn't kosher with you, I'm sure you could rig up a harness quick connect that would live behind the scoop to make disconnecting it faster.
Now, turn the key on and turn on a blinker. If everything is right, the strips will flash with the lights. The additional load from these is so small and insignificant it will cause no change in the speed of the flashing. Put your headlight back in, bolt the scoops back up all the way, and admire your HAWT new look.
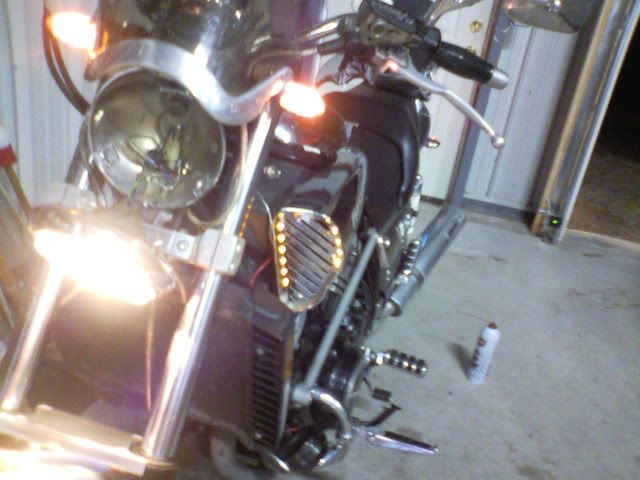
If it doesn't look super bright, it's because it's not. These are super low profile strips and as such have really small LED's. They were also like $5 each. Still at night, they are plenty visible from a ways away and since they're not right next to a much brighter white light, a lot more "eye catching" when they blink. You can get amber LED strips from Custom Dynamics, but be prepared to pay a LOT more. I wanted to do this on the cheap.
Here's the strips I ordered. $11 shipped for two 12" strips.
Okay, here's the how-to with pictures. Excuse the crappy quality, cell phone cam.
You will need:
4, 5mm allen keys
Solvent/cleaner(I used carb cleaner) and a rag
Splice/butt connectors and something to crimp with(I use channel locks)
Start by removing the airbox lid and both scoops. Set the lid aside, but keep the scoops handy. The scoops take a 5mm allen key to remove.
Now as is the case with LED's, polarity matters and they won't light if you hook them up backwards. My strips had two identical wires with no labeling, so I tried it on a battery first to determine which was positive. If your strips aren't labeled, find this out first to avoid hassle later.
Now, use whatever cleaner you like and prep the area where the strips will go on the inside edge of the scoops, just in front of the grate. I put some carb cleaner on a rag and ran it around to get any grime/bug residue off and help the strips backing stick better.
NOTE #1: As you can see, the 12" strip is not long enough to go all the way around the scoop. For future modders, you may want to try and get one that's 15 or 16" long.
To make the look as clean as possible, I put the wire-end of the strip in the bottom corner closest to the bike, so the wires can tuck behind the grate almost immediately.
Once the strip is stuck on, use the 4mm key to loosen the bottom screw that holds the grate on the scoop. Once it's loose, pry it up a little and shove the wire through it, but don't re-tighten it yet. Take the determined negative wire, cut it short, then strip a fair amount off the end. Tuck it between the grate and scoop, around the bottom grate screw, then tighten it back down to pinch it in....that's your ground.
Mine looked like this:
Now, set the scoops back on the bike, but just loosely put the top screw in for now.
Remove the headlight bucket, disconnect the headlight bulb, then set the bucket aside. Also in there, you'll see two wires with bullet style connectors... one is brown(chocolate in the manual), and the other is green(dark green in the manual). The brown wire is the "flash" power for the left, and the green is for the right. The wires attached to these strips were so thin, I just pulled the bullet connector apart, slipped the strip's wire in there, then put it back together. They're grounded to the scoop(bolted to the frame), so wiring is done.
NOTE #2: If you have to remove the scoop and set it aside, you will now have to pop the headlight out and separate the factory bullet connectors and get the wire out. I rarely ever have to remove the scoops, so this isn't that big of a deal for me. If that isn't kosher with you, I'm sure you could rig up a harness quick connect that would live behind the scoop to make disconnecting it faster.
Now, turn the key on and turn on a blinker. If everything is right, the strips will flash with the lights. The additional load from these is so small and insignificant it will cause no change in the speed of the flashing. Put your headlight back in, bolt the scoops back up all the way, and admire your HAWT new look.
If it doesn't look super bright, it's because it's not. These are super low profile strips and as such have really small LED's. They were also like $5 each. Still at night, they are plenty visible from a ways away and since they're not right next to a much brighter white light, a lot more "eye catching" when they blink. You can get amber LED strips from Custom Dynamics, but be prepared to pay a LOT more. I wanted to do this on the cheap.


 unk:
unk: