Engine paint touch up- Who has done it?

VMAX  Forum

Help Support VMAX Forum:

This site may earn a commission from merchant affiliate links, including eBay, Amazon, and others.
Well, Finally got a chance to tackle my aged engine paint.
1st I did a standard wash with soap and water, to get the surface grime minimized.
Next I brushed and air blasted away any loose paint areas I could find.
Then I used the 1st part of that KBS Paint system called Kleen. This removes any oils and grease that may be lingering around.
After rinsing it with filtered water, I let it dry completely.
Then, the 2nd step in that kit was the Rust Blast / Etching.. I let that Etch any paint and raw metal areas for the paint to adhere.
I then covered up all my bolts with heat shrink tubing, to protect them from the paint.
I didn't want the paint to create a seal, which would break up, if I ever had to get into one of the side covers.
Finally the paining..
I was not worried about getting paint on some of the bare aluminum areas, since I still need to polish some areas up. Plan to do that next week. Also, since i was not looking for perfection, i just needed it to look better than it did.. :biglaugh:
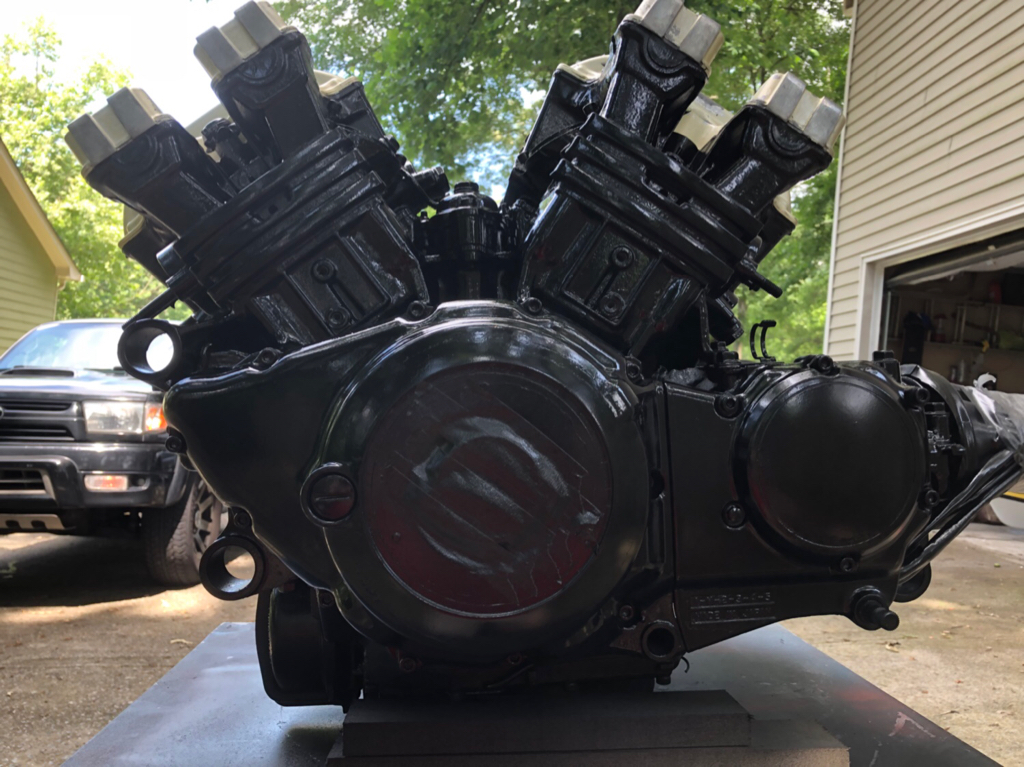
Now I'm letting the paint to fully harden, as per the instructions.. 7 days, before running the bike. I plan to clean up the round covers (tuning fork logo), maybe paint the triangles black. Also may do something with the old looking bolts..

Before:
View attachment 58291 View attachment 58292

Prep work:
View attachment 58293 View attachment 58294

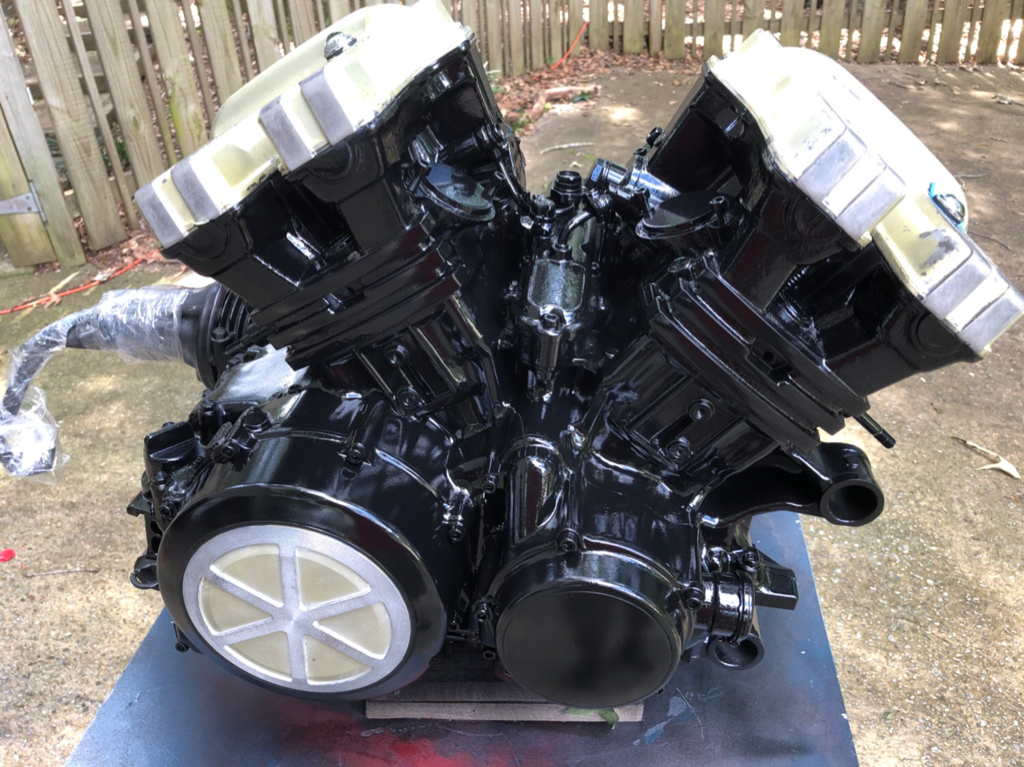
After:
View attachment 58295 View attachment 58296
Dude! Looks great. Huge difference. Let us know how it holds up

Sent from my SM-G360V using Tapatalk
 
About do do mine as well while I have the engine out , either going to use a spray gun or one of those 2part rattle cans. But first everything has to be sealed up


Sent from my iPhone using Tapatalk
 
I used this, since the kit comes with everything you need, and the reviews were great.

Before I ordered it, I asked them for a sample of colors..
The Velvet Black looked like the stock engine color and sheen, so I went with it.

Also, I was very impressed with the Tank Coating Kit, I used 5 years ago. Keeps my fuel system spotless. No more rust and junk messing up my carbs :eusa_dance:.

KBS Engine Paint Kit.jpg


I also covered my pipes under the engine with plastic bags.. I did not want the etching stage, messing with the chrome. Dont know if it would have. Just didn't want to take that chance. lol!
 
I used this, since the kit comes with everything you need, and the reviews were great.

Before I ordered it, I asked them for a sample of colors..
The Velvet Black looked like the stock engine color and sheen, so I went with it.

Also, I was very impressed with the Tank Coating Kit, I used 5 years ago. Keeps my fuel system spotless. No more rust and junk messing up my carbs :eusa_dance:.

View attachment 58299


I also covered my pipes under the engine with plastic bags.. I did not want the etching stage, messing with the chrome. Dont know if it would have. Just didn't want to take that chance. lol!


Is that a 2 part paint with catalyst ? Hold up well to gasoline contact?


Sent from my iPhone using Tapatalk
 
May try that, the velvet black is very close to the OEM finish? Semi-gloss.
Hard to find... Matt, satin and high gloss seem to be the only options by a lot of manufacturers
Honestly, I had to take several close-up looks, to see if missed painting under the cylinders, because it blended in with the original paint. Very hard to tell any difference..

If I had the tools to air brush my engine, I would not be able to tell if it was factory or DIY.

Since I had to use a brush, you can see little brush lines on some areas.. Again, I was not looking for perfection, because my entire bike needs work. So a perfect painted engine would look totally out of place.. lol.
 
Just finished painting mine. Gone to give it a day before I sand through and polish up the accent fins on the side of the cylinders.
Came out pretty good for not taking it all the way down to bare aluminum. Scrubbed, degreaser, and scuffed up existing paint.
Used 2 part auto paint, like the durability and gasoline / solvent proof because of the catalyst.
Not sure what to do in the valve covers yet. Some of the masking tape pulled even more of the valve cove paint off.

96796910fa92e6f75205f487d0228e3f.jpg

29718169d10a60c16a6665cc1791ef58.jpg


Sent from my iPhone using Tapatalk
 
Looks great.. Need some before shots, to really appreciate the work..

Tackled my messed up looking wheels today.. Again, was not looking for perfection by no means.. Just trying to make them look a little better than they were.

1 - Before - Wheels - small.jpg 2 - After - Wheels - small.jpg
 
Your motor looks good Ga2wheels and Im sure it was much easier to paint out of the bike. Nice job on the wheels as well D-max2012. I painted my motor in the bike which took a lot of time a patience. I spent a day degreesing, sanding bad areas smooth and cleaning. My neighbors must have thought I was on drugs. I sanded with a sponge sanding block, cut into small odd shapes to fit in tight areas. I scrubbed every nook and cranny with Dawn dish soap, toothbrushes, pipe cleaners and anything else I could use to reach any spots that were accessible. I spent another day masking everything off and to paint. I used engine primer and paint with ceramic. A couple of light to med coats of primer. Then 2-3 thin coats and 2 heavier coats of paint. Im happy with the results so far but time will tell if it all holds up. Here is a before and after pic.
 

Attachments

  • 20180304_133544.jpg
    20180304_133544.jpg
    78.9 KB
  • 20180523_185146.jpg
    20180523_185146.jpg
    76 KB
Osiris, I also painted my engine while mounted in the bike.. Yes it takes a LOT of time on the prep work. You did a nice job there - looks nice and smooth..
That two tone mat and high gloss looks nice on the heads.

My wheels were messed up.
For some reason, the previous owner removed part of the rims edge of paint, on one side of each tire (weird). He did not clear coat them, and the aluminum started to pit and oxidize badly.
I got Shinkos front and back 3 years ago. Tire date creation was 2015 and 2014
Since I usually ride on the weekends, not hard on speed. I still have a few good riding seasons to go. I needed to pretty them up a just a little bit since they're going to be on the bike for a couple more seasons. :biglaugh:
 
View attachment 58347


View attachment 58348


Not one gasket/bolt has been painted over all pieces are individual painted prior to assembly.


Very nice, if I do a complete rebuild that is how I prefer to paint a motor.
I like the black on the valve covers, may have to do the same. Still have plenty of black left over after painting my engine and don’t feel like matching the gold color.


Sent from my iPhone using Tapatalk
 
Very nice, if I do a complete rebuild that is how I prefer to paint a motor.
Agreed.. Very nice..
I would rather pull the motor if I had a garage. Now off to re-mount the wheels and clean up a little on the oil filter cap and coolant pipe..
 
After reading your thread I figured, hey why not, and decided to paint my engine. I just bought this 85 model and the engine had the usual chips on the engine--so I bought some P1 spray paint, did some taping, a little greasing, and away I went. Turned out pretty good I think.
 

Attachments

  • engine paint right .jpg
    engine paint right .jpg
    66.5 KB
  • engine paint left.jpg
    engine paint left.jpg
    81.8 KB
Turned out pretty good I think.

I'd say it came out pretty great!!!

Today I remounted the tires and touched up behind the front tire.. There was a lot of surface rust.

1 Rusty front before.jpg 2 Rusty front after.jpg


Now after the tires are re-mounted, I now have to attack the cracked up paint on the calipers.. It never ends.. lol!!

3 Tires remounted.jpg 4 Front Wheel after.jpg 5 Rear Wheel after.jpg
 
Last edited:
I learned a trick from another guy--if you put some grease on your finger and wipe it across the fins BEFORE you paint, you don't have to tape everything--just wipe grease over the spots you don't want paint--then paint--and just wipe off the spots as the grease won't let the paint attach. Much easier than taping all day!!

And thanks for the compliment--I am happy. Now if I can just get that dang small dent out of the muffler!!
 
Now if I can just get that dang small dent out of the muffler!!

Yes, I know what you mean..
The cans can look messed up with a dents in them, and because of the double wall, you can't knock them out.:bang head:
 

Latest posts

Back
Top