Kozy's Engine Removal thread

VMAX  Forum

Help Support VMAX Forum:

This site may earn a commission from merchant affiliate links, including eBay, Amazon, and others.
I'm also want to get the 4 outer crankcase covers powdercoated, are there any issues involved with putting these through the heating process with P/Cing?

Nah there wouldn't be any issues with powdercoating those covers. There aren't any gaskets or rubber parts that are on those side covers that you would need to be concerned about.
 
Yep, as noted. Strip the covers down and they will coat just fine. If they forget and coat the backside that's ok too but the dowel pin holes will fill in with paint and the gasket sealing surface may not be as flat.

Sean
 
Does this stuff come in a spray can or can it be used in a spray gun?

It comes in a rattle can, I get it at the local auto parts. It's very durable stuff.

Plastic parts I shoot with Krylon Fusion, it bonds with plastic and gives a nice tough finish. I shot the plastic water pump elbow 2K miles ago and there isn't a chip or nick in it....and I live on dirt/gravel roads.
 
So...if I use a spray can to paint the engine (after I have it beadblasted and have sprayed it with a primer of course) I only need to put a few coats on and call it a day...right?
Or do I have to sand the **** out of it and then respray it? That engine doesn't seem like it would be fun to have to sand by hand.
 
Do you then use a finishing coat, a clear coat, or something like that? Or is the last Plastikote it?

I've never put any clear on it G, the paint itself seems to work fine.

I use it on everything metal that I paint, lower fork tubes, side covers, scoops, whatever. I just don't know how well it holds up over time cause everything I've painted was on Sallymax...which I've only had since spring.

But it's good so far.
 
Sounds like a viable option if I don't have my buddy spray it. Probably will shoot the S/A and pumpkin too whilst I have it apart. Should be a fun winter!:eusa_dance:
 
Got a new update......

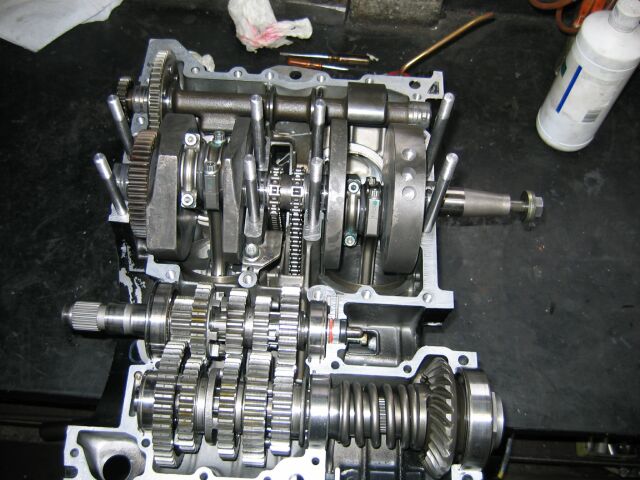
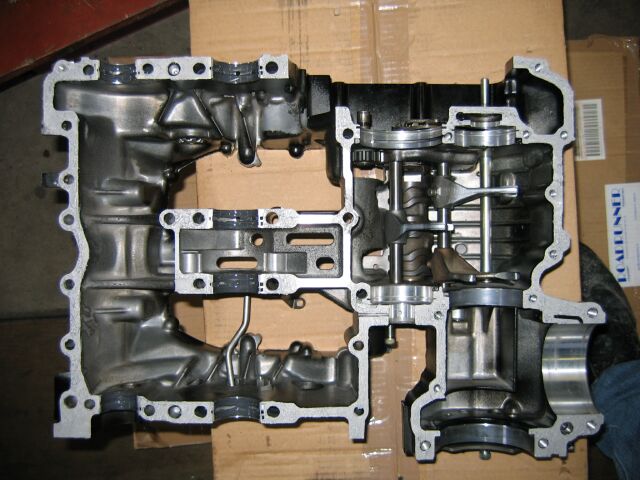
I got the rest of the parts in the mail on Friday. After doing a bit of reading about issues with the oiling system on our bikes, I opted to go with Sean's HD oiling kit thingy. I put the new shift drum, shift forks, and shift shafts in it today. I was going to start putting everything back together, but with family from Germany still here, time is very limited. I'm wanting to spend as much time as possible with them, so the bike got put on the backburner. I'm going to wake up SUPER early on Wednesday and try to get the engine put back together completely in the morning. I do only have 2 questions though...

1. How should the shift forks be aligned? There are 2 forks on one shaft and a 3rd fork on the other shaft. Does that lonely fork line up between the other two? Or is it set off to one or the other side as compared to the other 2 forks?

2. Where do the forks connect with the trans gears? I forgot to take a picture of it tonight to use as a reference for someone to help me out. Hopefully someone has a picture that shows where the forks slip onto the trans assembly thingymajiger.

Those are the only questions I still have....I think. I may come up with other questions later on. Who knows.

My dad has offered to paint the engine for me (or at least attempt to) while we're on our honeymoon. Hopefully I come back from Costa Rica to a freshly painted engine! I'm going to use Dupli-Color Black Ceramic paint for the job. A friend of mine did that to his engine, and it looks damn nice and shiny. Hopefully my dad has the same results! If not, I'll be doing some extra work after the honeymoon.
 
1 - Yes, the fork nr 3 szould be beteween forks nr 1 and 2.
2- Theres only one place for each specific fork. When you put the forks into shift cam you will see.

This should help ya(nitromax site):

VMPRBlokin8.jpg

VMPRBlokin9.jpg
 
So if I'm correct, the shift forks will set into these tracks?
 

Attachments

  • VMPRBlokin8.jpg
    VMPRBlokin8.jpg
    61.8 KB
Updating again.....

I got everything transmission-wise put back into the bike today. It took something like 6 or 7 tries to finally get everything lined up correctly though. I also got most of the bolts on the bottom of the engine tightened up. Oil accessories put back in place. Oil pan put back on with a new gasket. Shifted it through all five gears, neutral included, to make sure I didn't screw anything up. That would be a bitch if I screwed something up and didn't realize it until the first test ride! I put the clutch, water pump, and middle gear covers back on, but left all the internals out. Did this just so the engine can be painted. I didn't pay much attention to what I was doing when I took the middle gear cover off, so I'm not sure in which location each allen bolt went. I'm sure I'll figure it out eventually. I'm almost tempted to paint the oil pan black as well so it matched the rest of the engine.

As I'm sitting here trying to think if there was anything I was curious about, I'm drawing a blank. I'm sure a question about something engine-related will pop into my head at some point in time....and then I will post it on here! lol
 
Thanks for all your questions and insight into this process as it makes it much easier for somebody looking to tackle this task. :thumbs up:
And I want to express from all of us here congratulations on your upcoming marriage!
May it be as good as your experiance with your Vmax! It takes a little work to keep her going but when you do everything right she will repond for you in ways you could have only hoped for! :punk:
Be well Kozy!:worthy:
 
+1 to what redbone said. i' also leave the oil pan as is. it'd look way better black, but this way u can tell if u have any sepage easily. plus ur belly pan covers it!
 
Thanks for all your questions and insight into this process as it makes it much easier for somebody looking to tackle this task. :thumbs up:
And I want to express from all of us here congratulations on your upcoming marriage!
May it be as good as your experiance with your Vmax! It takes a little work to keep her going but when you do everything right she will repond for you in ways you could have only hoped for! :punk:
Be well Kozy!:worthy:
You referring to the bike or his fiance? :rofl_200:
 
LOL Thanks guys....and zippo, I think he was referring to the idea of marriage when Redbone said "as it makes it much easier for somebody looking to tackle this task" HAHAHAHA

Garrett, I never thought of that. Maybe the seepage reason is why the oilpan was painted a contrasting color. Way to be on your toes, as I obviously am not!

I told Karen about the comparison of a marriage and the Vmax. She laughed, and said that it was typical of guys to compare a marriage to THAT. It's true though! I'm in the process of tearing the WHOLE bike apart to fix it. And once I'm done, barring any roadblocks, she'll run better than she ever did before!
 
yea. i'd love to paint mine. u could also just not paint like a 1/2" strip on the top, that the frame/exhaust/bellypan covers anyways to check, and it would look better from the bottom.
 
I'M BACK!
After 2 weeks off of work, one of those being spent in Costa Rica, I'm finally back to the "real" world. It sucks :(

Anywhoozers, my dad was going to graciously paint my engine/swingarm for me while I was gone. He didn't. Claims that the majority of the engine won't even be visible while it's in the bike, so he didn't want to paint the WHOLE thing. So now I'm gonna have to tackle it myself. I'm contemplating just repainting 2 certain sections instead of the whole thing. That will fix the blemishes that are currently visible. I'm gonna tackle it this weekend. I got a can of caliper paint (supposedly good to I THINK 500 Fahrenheit but don't quote me on it) and that should do the trick. I'm going to hit the swingarm with the stuff as well.

Re-installation should be NEXT weekend. I've got a wedding and a birthday party this weekend, and I'm not being allowed to skip either of them to work on the bike.

If anyone wants to come to northwestern Indiana next weekend to help, I've got free cold beer!
 
Back
Top