What did you do to your Vmax today? Part 2

VMAX  Forum

Help Support VMAX Forum:

This site may earn a commission from merchant affiliate links, including eBay, Amazon, and others.
Will order the Bullitt fairing today:eusa_dance:

Yesterday I machined a billet fork clamp. Three more to go. Once I get the fairing I'll fab up some struts and I have the only Memphis Shades Bullitt fairing on a V-Max in the country????
Lew
 
Just cleaned up and coated the inner fender.
Got to try out the matt black I've had sitting there. I like it! :biglaugh:
And I decided to use the original cloth wrapped Ford wires. he he he
 

Attachments

  • 20120226_003.jpg
    20120226_003.jpg
    48.9 KB
after 2 paint jobs (one i paid for) on my headlight bucket, the brake lines, throttle lines etc all still had rubbed the paint off. tried something new. roughed up the existing paint and cleaned it well. then tried spray on truck bed liner. we'll see how it holds up.
 
after 2 paint jobs (one i paid for) on my headlight bucket, the brake lines, throttle lines etc all still had rubbed the paint off. tried something new. roughed up the existing paint and cleaned it well. then tried spray on truck bed liner. we'll see how it holds up.

That will give you a post-apocalyptic look! Easy to touch-up! Post it up when you get it done.
 
Rather than 'What I did today' more a case of 'Over the last few months'

I decided that after I took the bike off the road for the winter I would get me head down, sharpen a chisel and polish the hammer and get all of the jobs I wanted to do on the bike out of the way before spring.

This is what I've been up to.

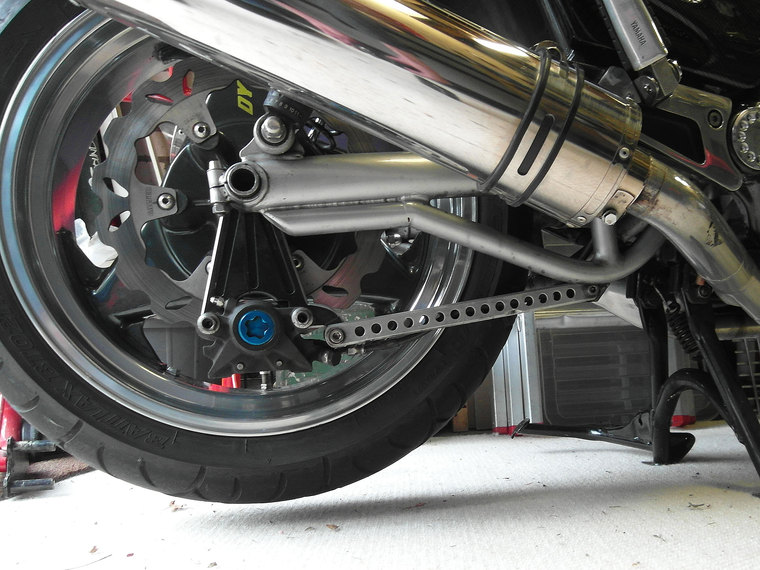
Changed the torque arm from this:

1a2260d23a109d7262de0ca08df2ba76a1f1616f.jpg

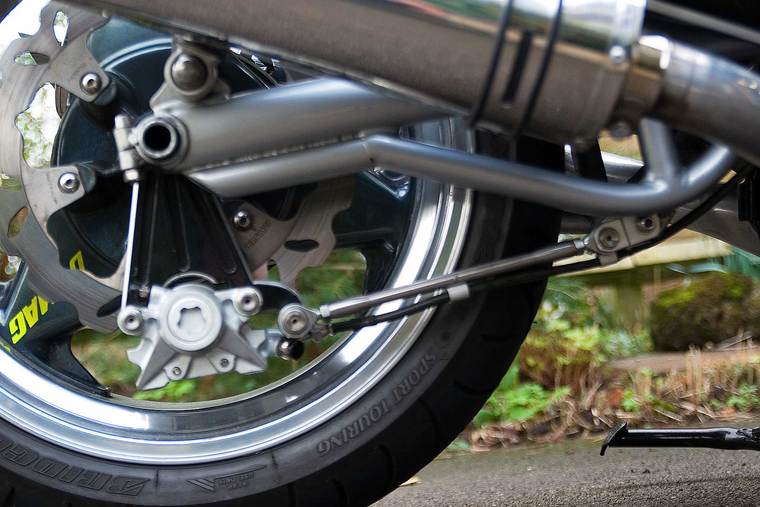
To this one I made. Also painted the rear caliper and had the centre star anodised.

985161211fd66feca759fd0a72cb7323e0333b03.jpg


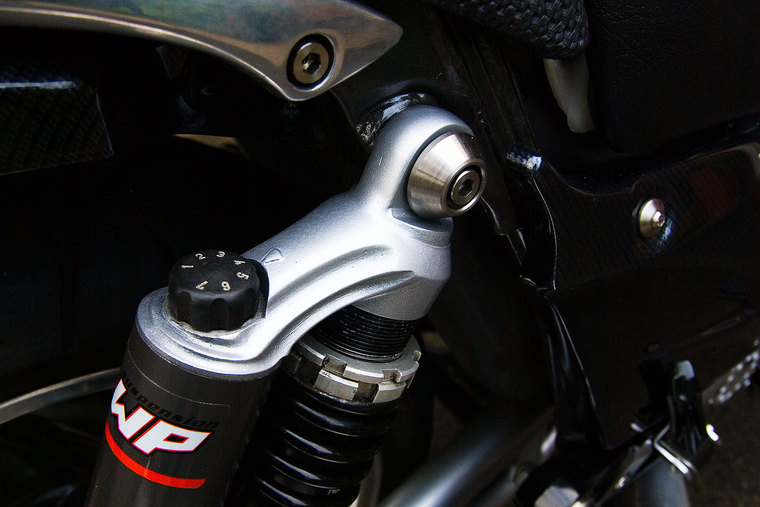
Tided up and re-painted the shocker tops; made new stainless top mount surrounds; made new side panel retainers.

072369f523ff187bd708652fef3ea21c0b41ef94.jpg


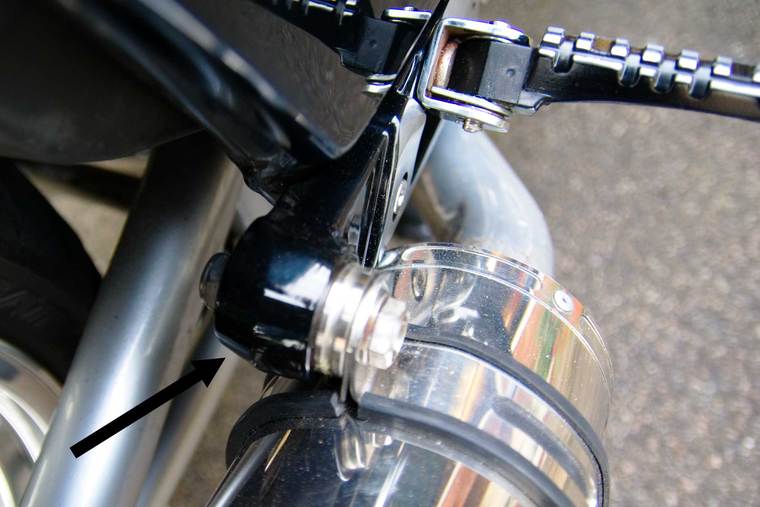
Re-profiled the exhaust mount (arrow indicates reverse chamfer added) and had them powdercoated.

ae41622b10db6ce9a0276abdca7e7eeaf235c209.jpg


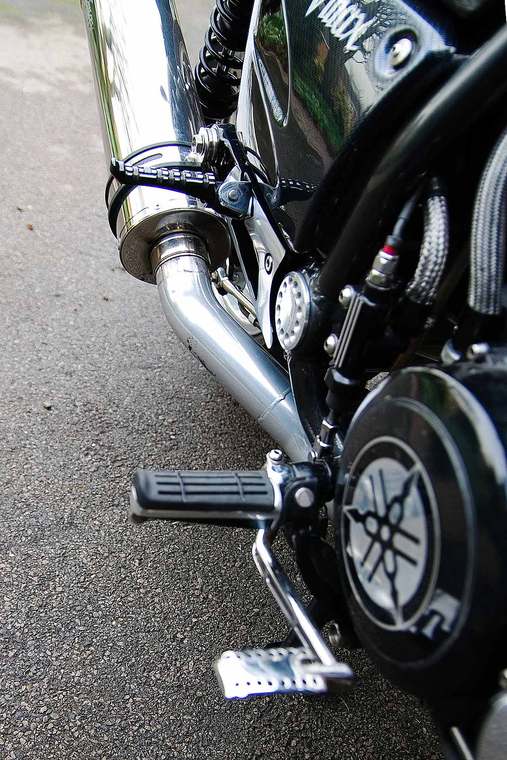
Changed the footrest for FZR ones at the front and some Yameringha dirts bike for the rear - Midified and painted by Y.T.

1eb1622c1dd26ce0af686fca66d0639a5bb93328.jpg


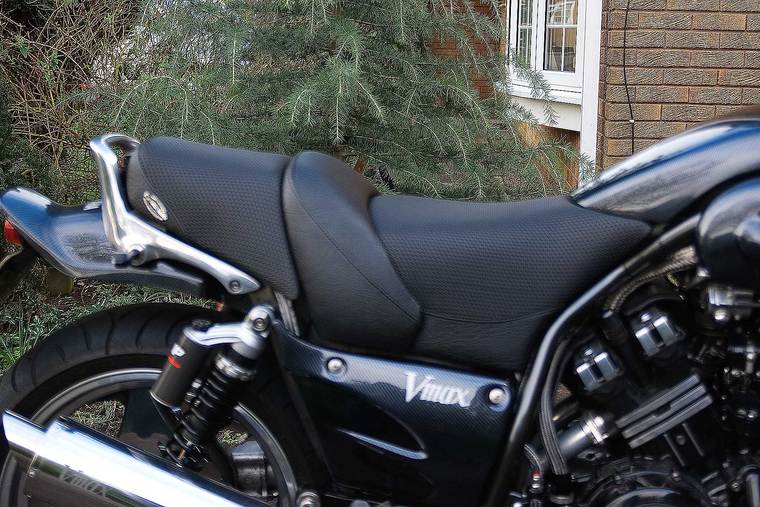
Extended the basket weave lower on the front section of the seat and 'slimmed' the middle section.

2cb3622c2dbc1527dc1e6a73e6bea297e6e9626a.jpg


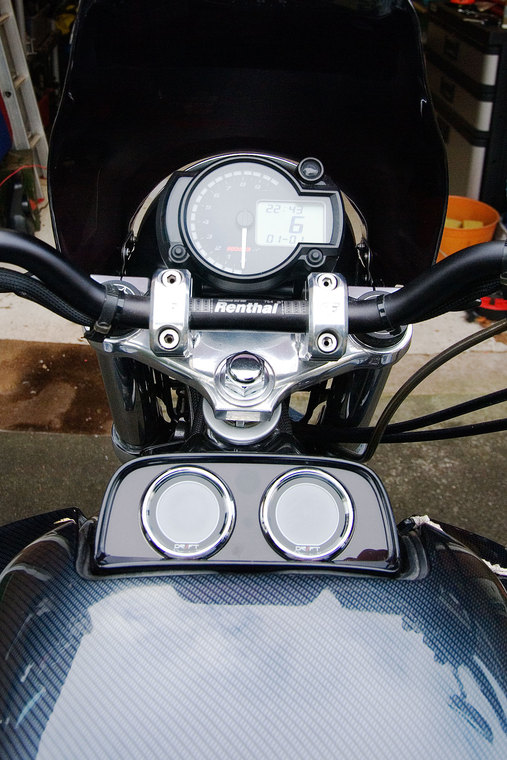
And finaly - the instrument pod.

dbd360de2b601e5cdd366fb2e261ad10f1d89447.jpg


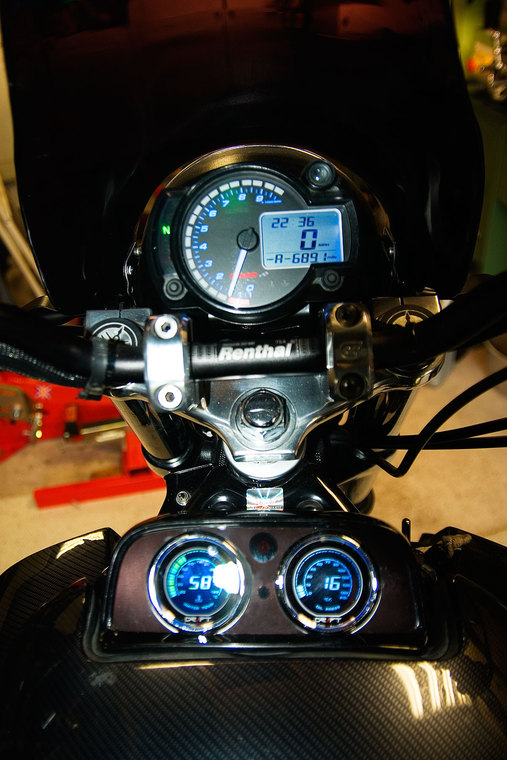
Illuminated - it has a smoked perspex front and the ***** lights shine through.

ed93693f2bd11b1ad4836e90e974a3dc71b18dcc.jpg


All that's left to do now is to modify a belly pan....what could go wrong?
 
Beautiful instrument pod!
Ditto to that! Really gives your bike that "jetfighter cockpit" look. The mostly analog display blends in well with the classic 80's styling of the Max, while upgrading it to state of the art technology.
All your work is outstanding... it's obvious you uphold that fine British tradition of attention to detail.
And an added bonus - I'm a big Peter Sellers fan. You can do no wrong in my books, Mr. Midnight! :punk:
Cheers!
 
sweet set up man,
what was all involved in putting that tach/speedo set up? where did you get it?

:punk:
Rather than 'What I did today' more a case of 'Over the last few months'

I decided that after I took the bike off the road for the winter I would get me head down, sharpen a chisel and polish the hammer and get all of the jobs I wanted to do on the bike out of the way before spring.

This is what I've been up to.

Changed the torque arm from this:

1a2260d23a109d7262de0ca08df2ba76a1f1616f.jpg

To this one I made. Also painted the rear caliper and had the centre star anodised.

985161211fd66feca759fd0a72cb7323e0333b03.jpg


Tided up and re-painted the shocker tops; made new stainless top mount surrounds; made new side panel retainers.

072369f523ff187bd708652fef3ea21c0b41ef94.jpg


Re-profiled the exhaust mount (arrow indicates reverse chamfer added) and had them powdercoated.

ae41622b10db6ce9a0276abdca7e7eeaf235c209.jpg


Changed the footrest for FZR ones at the front and some Yameringha dirts bike for the rear - Midified and painted by Y.T.

1eb1622c1dd26ce0af686fca66d0639a5bb93328.jpg


Extended the basket weave lower on the front section of the seat and 'slimmed' the middle section.

2cb3622c2dbc1527dc1e6a73e6bea297e6e9626a.jpg


And finaly - the instrument pod.

dbd360de2b601e5cdd366fb2e261ad10f1d89447.jpg


Illuminated - it has a smoked perspex front and the ***** lights shine through.

ed93693f2bd11b1ad4836e90e974a3dc71b18dcc.jpg


All that's left to do now is to modify a belly pan....what could go wrong?
 
Beautiful instrument pod! Can't make out the brand from the picture, info please - thanks!

They are Drift Iridium's which were supplied by Digital Speedos (as was the RX2n). Very easy to wire up - a switched feed and an earth for the gouges; the senders use go/ nogo connectors. That's all that is needed.

sweet set up man,
what was all involved in putting that tach/speedo set up? where did you get it?

Supplied by Digital Speedo's.
Provided you get it clear in your mind as to what goes where and and concentrate on one circuit at a time it is quite straightforward.
I used one half of another pair of Hitachi type connectors so that where possible the wiring for the Koso went to the appropriate connection on the Max loom.

For the speedo I used one of the adapters which uses the OE speedo drive so no messing with magnets and the like.
In its original incarnation the tacho was fed from the OE tacho feed which worked fine.
I did have an issue when I went to CoP's when the tacho would intermittently double read.
This seems to have been overcome by using one of the RPM Signal Adapters also sold by Digital Speedo's. I won't be able to confirm this for certain until I take the bike out onto the road.
Indicators needed a pair of diode's and also a ballast resistor.

I've always had a separate water temperature gauge and low fuel warning light so can't comment on what's involved there.

The mounting bracket that come with the RX2n is OK and would probably suit most folk but I make my own, mainly because I could!

Miles - thanks for you kind words - very perceptive.
I've tried bring the look of the bike more up to date whilst keeping what, IMHO, make the Max special...and I share you sentiments about Sellers.
 
Max,

Great stuff, I actually JUST ordered their speedo right before I read this thread, I love what you have done with the cluster under the speedo, I have been thinking of ways to update/change that.

So yeah that's what I did, ordered the Rx2n+ and their Street fighter headlight
 
Installed new shocks.
 

Attachments

  • 2012-02-26 16.01.21.jpg
    2012-02-26 16.01.21.jpg
    64.6 KB
  • 2012-02-26 16.01.44.jpg
    2012-02-26 16.01.44.jpg
    80.3 KB
  • 2012-02-26 16.02.10.jpg
    2012-02-26 16.02.10.jpg
    69.2 KB
Installed new shocks.

Oh, my godge, those are so-cool! They look heavy-duty! Whose are they? They look expensive! :biglaugh:

Looks like you have to fab a new midpipe to get clearance for the new shocks. How do they feel from sitting in the seat & bouncing on them?

The tire looks like a track-day slick. Did you embarass any literbikes?
 
Back
Top