bikedave99
Well-Known Member
This writeup details how I reworked my seat over the weekend. It was really not that difficult a process as long as you
take your time and work carefully. As you will see, I even reused the original seat cover without modifying it whatsoever.
This mod is for those of you who, like me, no matter how hard you try, just can't manipulate your budget enough to justify
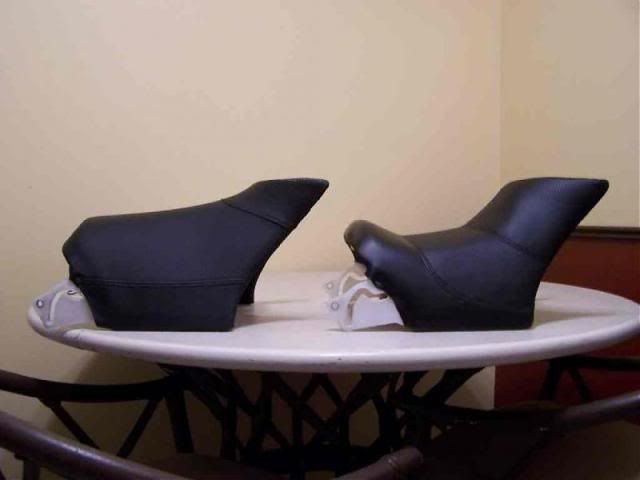
an awesome seat from Morley or UFO or whoever. I will start with a picture I found on the boards which gave me a
little bit of guidance as to what to shoot for shapewise:
First off, of course, is to remove the seat from the bike. Once you pop the middle section back, there are four bolts which
you must remove in order to allow you to lift and slide the seat back. I'm sorry I don't have a picture of this but I think
you can figure it out. The middle section of the seat will come with the front so you will have to remove these nuts and
bolts to separate them:
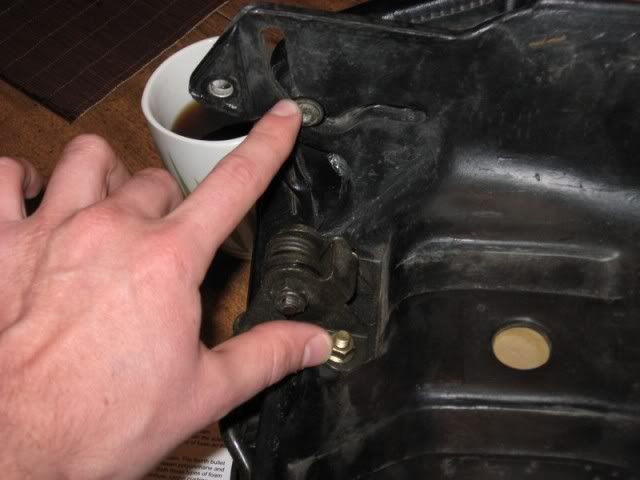
Ok, here it is:
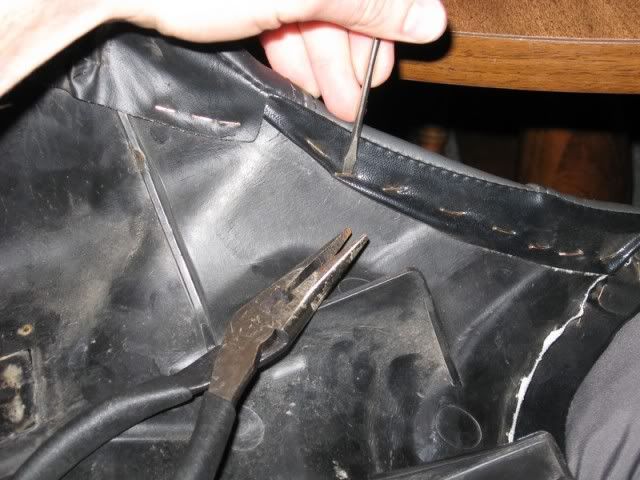
Flip the seat over, and using a special staple puller or just a tiny flathead screwdriver like me, start to very carefully pry up
the staples just far enough to get your needle nose pliers onto them and pull them the rest of the way out. You want to be
careful here because any damage to the vinyl will make it weaker when you restaple it on:
This next picture shows how many staples I initially removed, but I actually went further. I went 3-4 more inches up the
neck. I figured it prudent to leave the top portion of the seat stapled as it would give me something to pull against when reattaching. Plus it
would already be lined up:
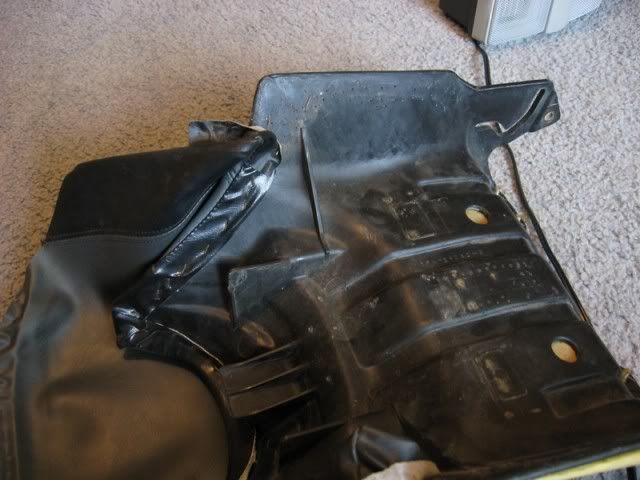
Now at this point I reattached the middle section finger tight and placed the seat back on the bike, just without bolting it
down. Flip the middle section down and lock it in place:
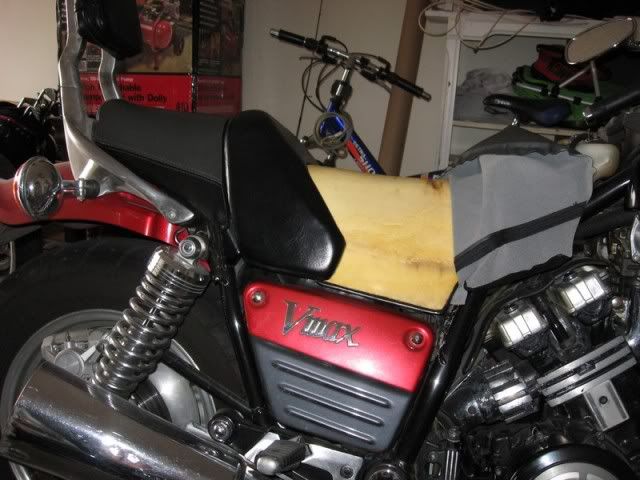
Then I took a sharpie and traced along the foam where the front and middle sections of the seat come together. I want to
maintain this line and not carve it down there so that it doesn't create a gap:
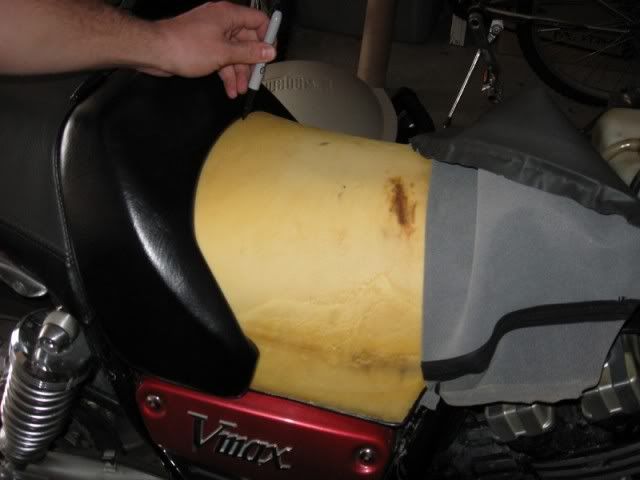
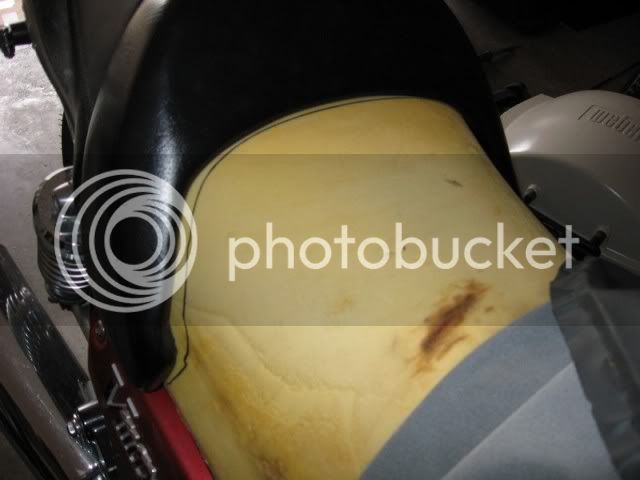
Pull the middle section back off and you have this:
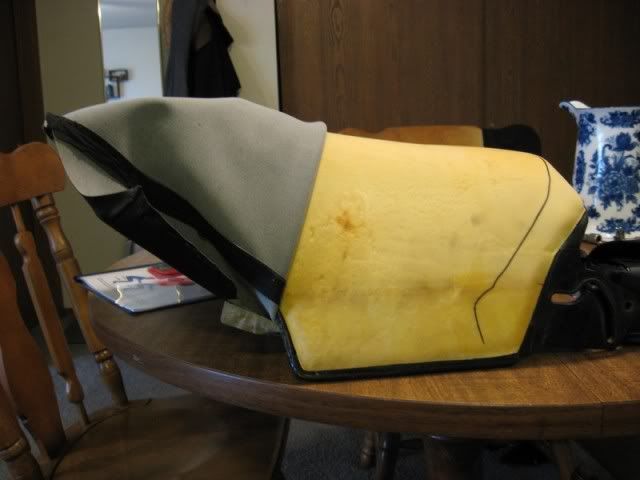
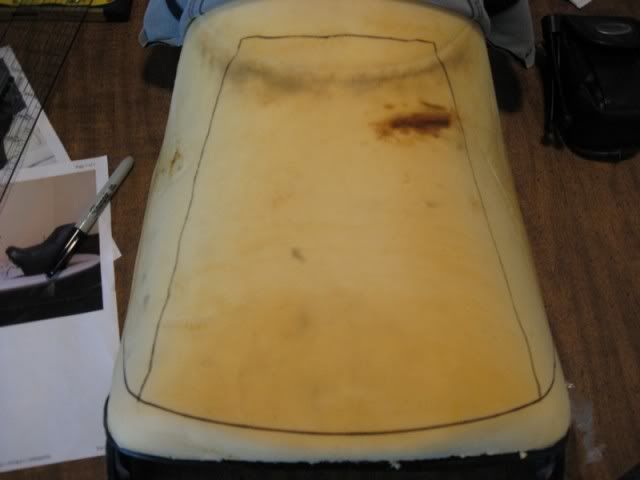
I then freehanded this shape on the seat, the lines on the sides are down about 1" from the original height. These are not
strict guidelines for cutting, they just serve to make sure everything is staying symmetrical and to give a frame of reference,
which is very important:
Now, out to the garage to begin carving armed with my reference pictures:
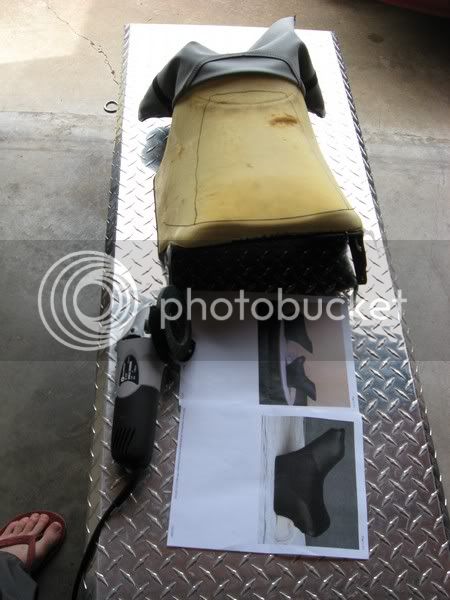
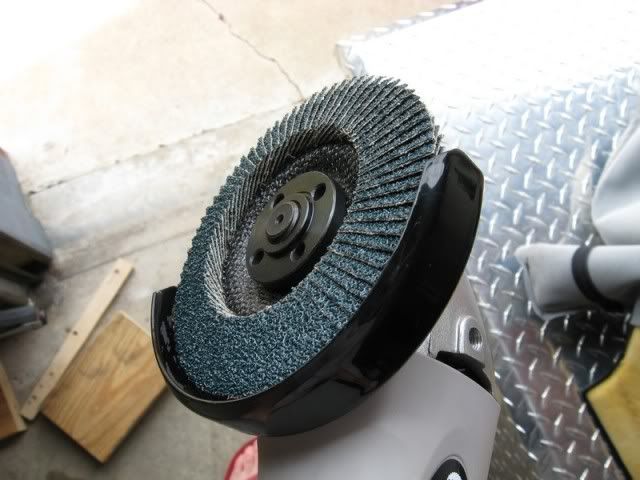
This is the primary tool: 4 1/2 inch angle grinder with a 40grit sanding disc attached. I took the handle off, it would just get
in the way:
This is where you start to get really nervous because everything after this is pretty much permanent! Put on your safety
glasses, respirator, and ear plugs and find a good way to anchor the seat while you grind on it. For me, the best system I
found was to sit on the ground with the seat turned sideways and pinched between my legs. This process creates foam
dust which sticks to everything so it is good to do it in a contained area. Go *very, very* slowly. The sanding disc will dig
in, and pull itself deeper so, you must go very carefully. This website give some good techiques:
(http://www.diymotorcycleseat.com/modify_3.htm). My first cut gouged deep and thats where I learned to be careful. I
was able to get it out however. So, after a little while of grinding I had this:
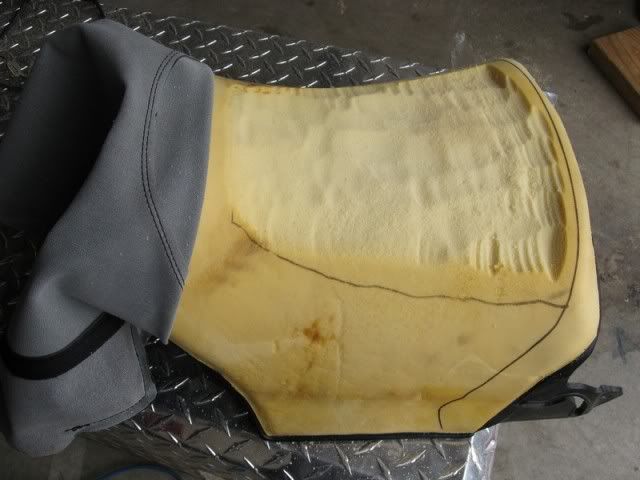
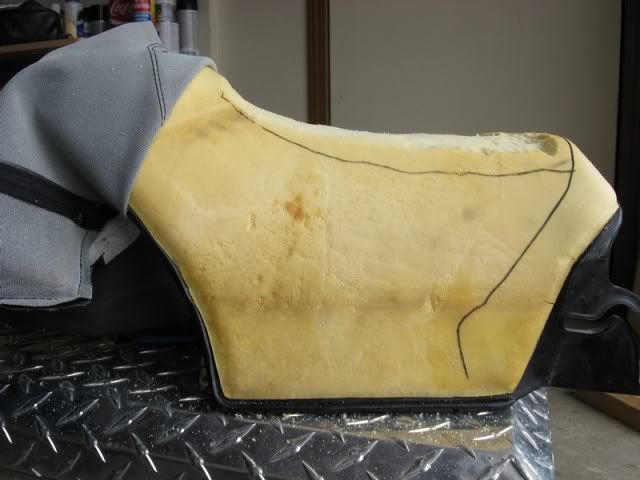
Not far enough, but getting there, after a little while later:
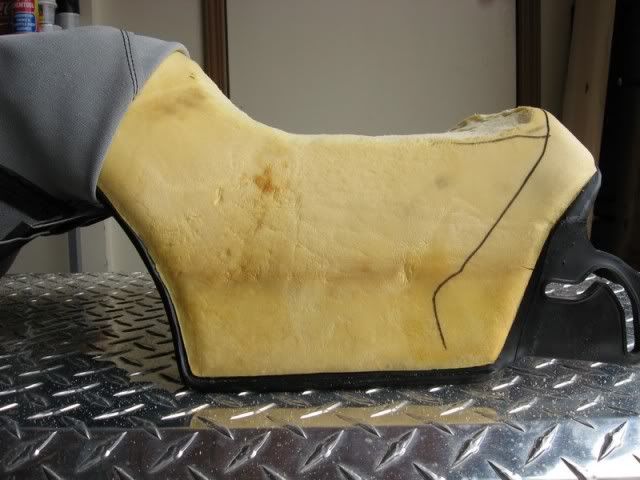
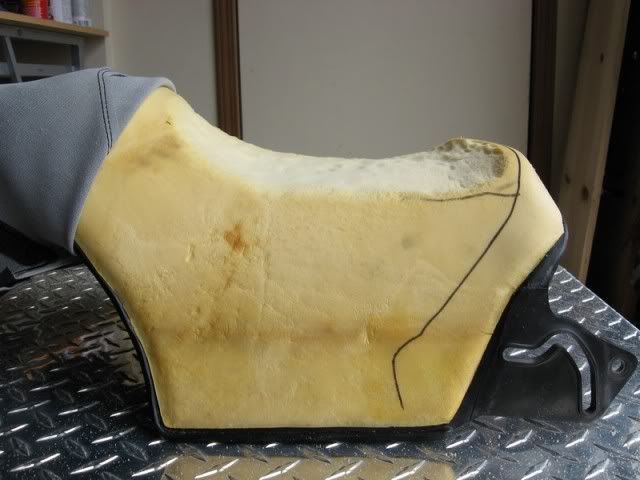
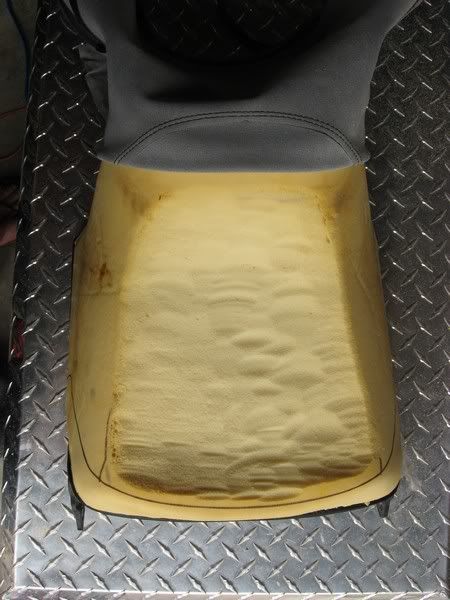
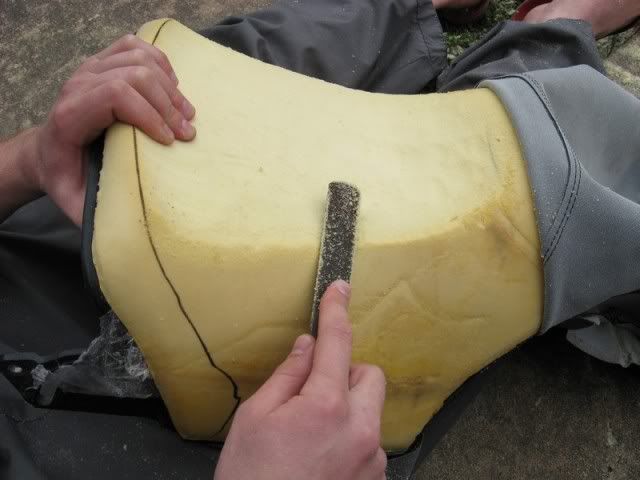
Now we are getting closer to the final shape. Once again, use surgical precision with the grinder and you can get the most
of the ridges knocked down and the edges round over. It is possible. Next, get a rasp, a nice coarse wood rasp and file
away at the ridges and corners. This will smooth it all out, which is important because any imperfection in the foam will
"print" through the vinyl cover:
Once again, I loosely put the seat back together and placed it on the bike to see how it lined up and sat:
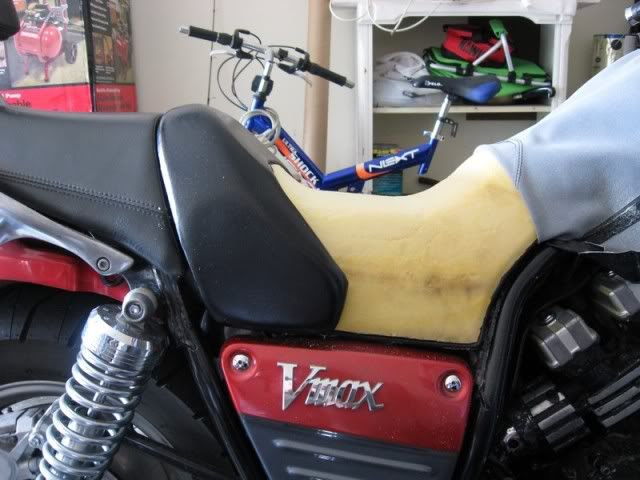
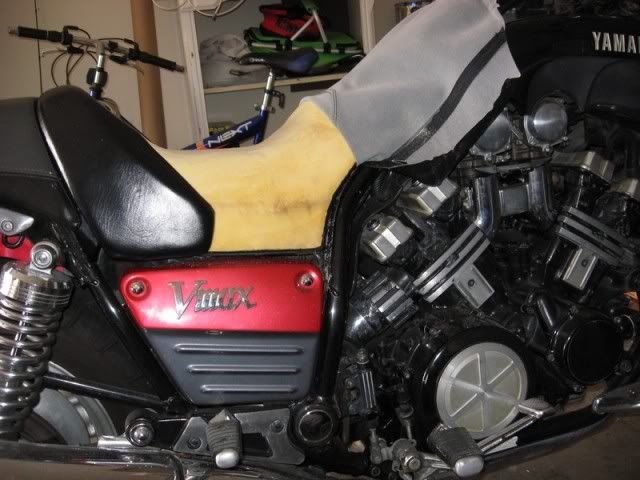
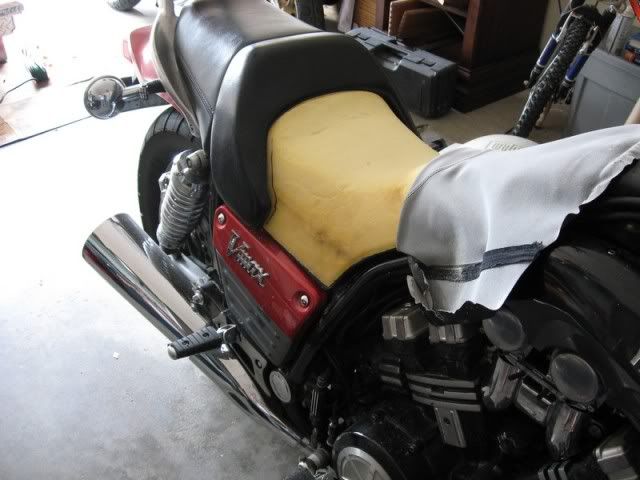
I like it! So, back off with the seat, and off with the middle section again and now to getting the seatcover back on. Here
are the tools of my choice (make sure you are using 1/4" or shorter staples:
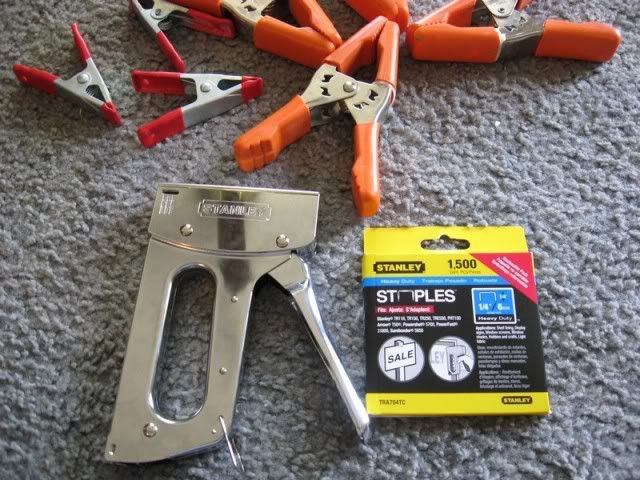
Now, use the clamps for your mock-ups. This is critical. Don't just start stretching and stapling you will end up with folds,
creases, and ridges. Stretch one section and then clamp it, then another and clamp it. Then go back and readjust where
you started. Repeat this until you like the way it looks. This took me probably 45minutes before I started stapling:
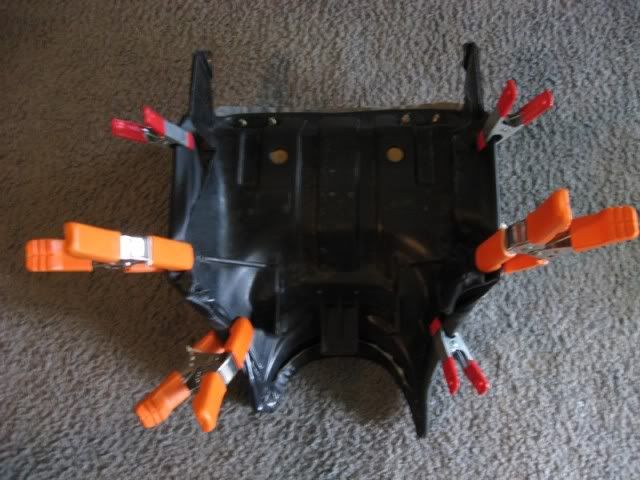
Now that you like the way it is clamped, pull one clamp off, pull the vinyl in that area tight, brace seat against your leg and
staple it. You must have very firm pressure on the stapler as well as a solid backing, otherwise the staple won't go deep
enough, will not hold the vinyl securely, and may tear out. Go to the opposite clamp an do the same. Keep working your
way around the seat until it is done. You may have to go back and pull some staples and restretch and staple an area, its
ok to do that.
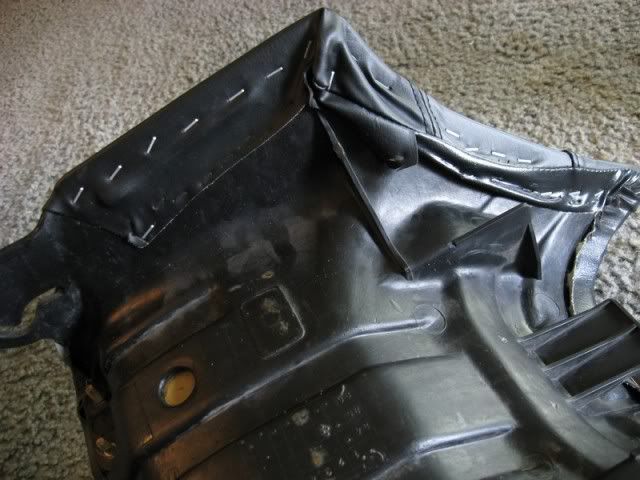
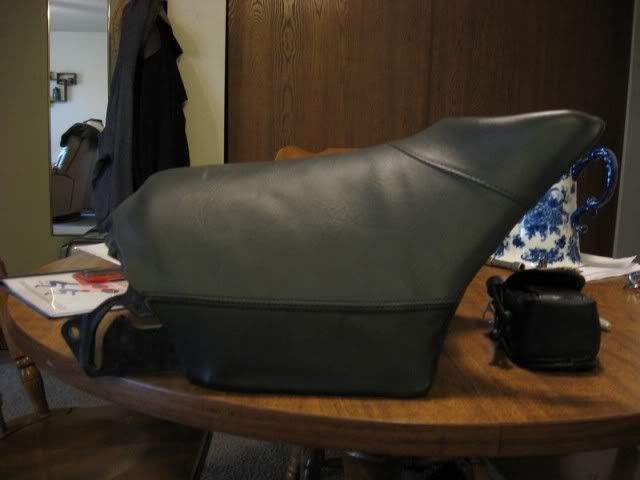
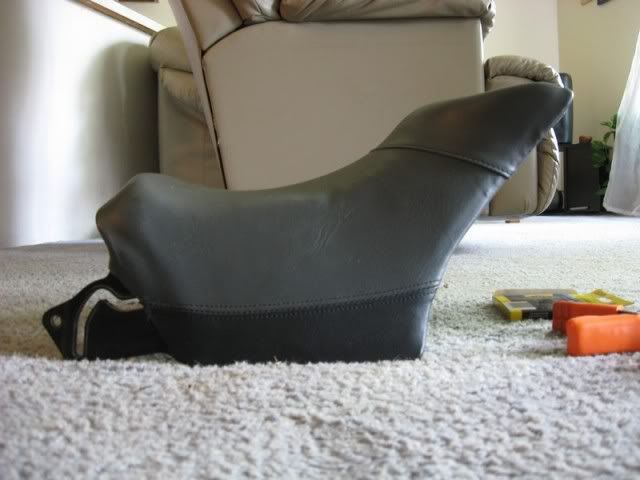
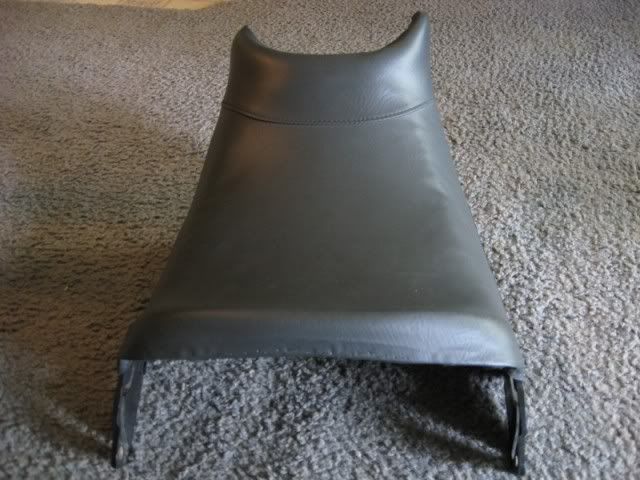
And, the finished product:
Bolt it back together and back on the bike:
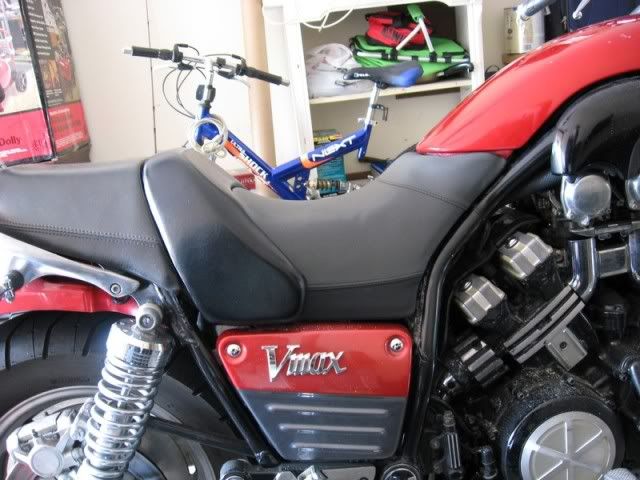
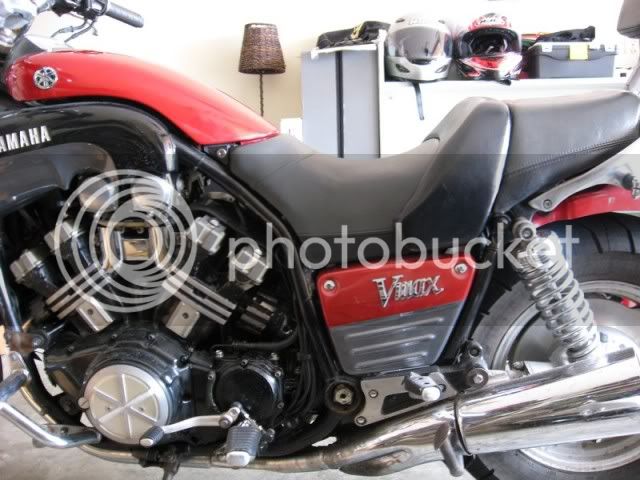
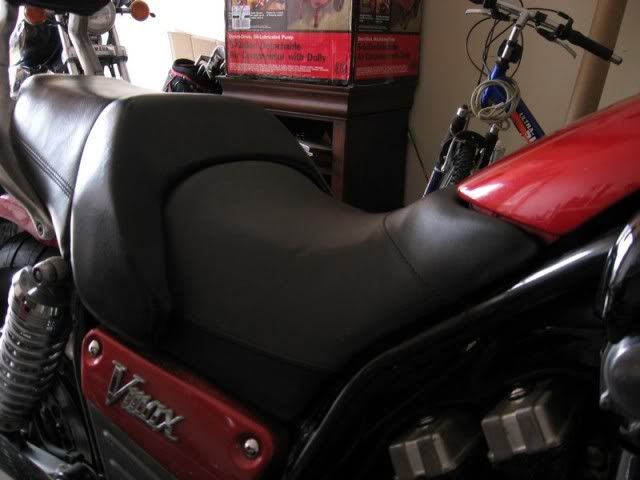
Now, get out there and try it out!
As a disclaimer, for me this is a work in progress. It is much better than it was, however, I believe I can mod it a little
more and get it better. The shape it is now is not the final product, find something that works for you. This may be a bit of
a process but it will go much quicker next time. All told, this probably took me 4 hours start to finish. If you have any
questions or comments, please feel free!
take your time and work carefully. As you will see, I even reused the original seat cover without modifying it whatsoever.
This mod is for those of you who, like me, no matter how hard you try, just can't manipulate your budget enough to justify
an awesome seat from Morley or UFO or whoever. I will start with a picture I found on the boards which gave me a
little bit of guidance as to what to shoot for shapewise:

First off, of course, is to remove the seat from the bike. Once you pop the middle section back, there are four bolts which
you must remove in order to allow you to lift and slide the seat back. I'm sorry I don't have a picture of this but I think
you can figure it out. The middle section of the seat will come with the front so you will have to remove these nuts and
bolts to separate them:

Ok, here it is:

Flip the seat over, and using a special staple puller or just a tiny flathead screwdriver like me, start to very carefully pry up
the staples just far enough to get your needle nose pliers onto them and pull them the rest of the way out. You want to be
careful here because any damage to the vinyl will make it weaker when you restaple it on:

This next picture shows how many staples I initially removed, but I actually went further. I went 3-4 more inches up the
neck. I figured it prudent to leave the top portion of the seat stapled as it would give me something to pull against when reattaching. Plus it
would already be lined up:

Now at this point I reattached the middle section finger tight and placed the seat back on the bike, just without bolting it
down. Flip the middle section down and lock it in place:

Then I took a sharpie and traced along the foam where the front and middle sections of the seat come together. I want to
maintain this line and not carve it down there so that it doesn't create a gap:


Pull the middle section back off and you have this:

I then freehanded this shape on the seat, the lines on the sides are down about 1" from the original height. These are not
strict guidelines for cutting, they just serve to make sure everything is staying symmetrical and to give a frame of reference,
which is very important:

Now, out to the garage to begin carving armed with my reference pictures:

This is the primary tool: 4 1/2 inch angle grinder with a 40grit sanding disc attached. I took the handle off, it would just get
in the way:

This is where you start to get really nervous because everything after this is pretty much permanent! Put on your safety
glasses, respirator, and ear plugs and find a good way to anchor the seat while you grind on it. For me, the best system I
found was to sit on the ground with the seat turned sideways and pinched between my legs. This process creates foam
dust which sticks to everything so it is good to do it in a contained area. Go *very, very* slowly. The sanding disc will dig
in, and pull itself deeper so, you must go very carefully. This website give some good techiques:
(http://www.diymotorcycleseat.com/modify_3.htm). My first cut gouged deep and thats where I learned to be careful. I
was able to get it out however. So, after a little while of grinding I had this:


Not far enough, but getting there, after a little while later:


Now we are getting closer to the final shape. Once again, use surgical precision with the grinder and you can get the most
of the ridges knocked down and the edges round over. It is possible. Next, get a rasp, a nice coarse wood rasp and file
away at the ridges and corners. This will smooth it all out, which is important because any imperfection in the foam will
"print" through the vinyl cover:

Once again, I loosely put the seat back together and placed it on the bike to see how it lined up and sat:


I like it! So, back off with the seat, and off with the middle section again and now to getting the seatcover back on. Here
are the tools of my choice (make sure you are using 1/4" or shorter staples:

Now, use the clamps for your mock-ups. This is critical. Don't just start stretching and stapling you will end up with folds,
creases, and ridges. Stretch one section and then clamp it, then another and clamp it. Then go back and readjust where
you started. Repeat this until you like the way it looks. This took me probably 45minutes before I started stapling:

Now that you like the way it is clamped, pull one clamp off, pull the vinyl in that area tight, brace seat against your leg and
staple it. You must have very firm pressure on the stapler as well as a solid backing, otherwise the staple won't go deep
enough, will not hold the vinyl securely, and may tear out. Go to the opposite clamp an do the same. Keep working your
way around the seat until it is done. You may have to go back and pull some staples and restretch and staple an area, its
ok to do that.

And, the finished product:


Bolt it back together and back on the bike:


Now, get out there and try it out!
As a disclaimer, for me this is a work in progress. It is much better than it was, however, I believe I can mod it a little
more and get it better. The shape it is now is not the final product, find something that works for you. This may be a bit of
a process but it will go much quicker next time. All told, this probably took me 4 hours start to finish. If you have any
questions or comments, please feel free!


![Bike Phone Mount Holder, [Camera Friendly] Motorcycle Phone Mount for Electric Scooter, Mountain, Dirt Bike and Motorcycle - 360° Rotate Suitable for iPhone & Android Smartphones from 4.5-7.0 inches](https://m.media-amazon.com/images/I/51ZirRrsA+L._SL500_.jpg)

![Bovemanx Motorcycle Phone Mount Holder, [150mph Wind Anti-Shake][7.2inch Big Phone Friendly] Bike Phone Holder, Motorcycle Handlebar Cell Phone Clamp, Compatible with iPhone 16 Pro Max Smartphones](https://m.media-amazon.com/images/I/51F+1sontPL._SL500_.jpg)


![JOYROOM Motorcycle Phone Mount, [1s Auto Lock][100mph Military Anti-Shake] Bike Phone Holder for Bicycle, [10s Quick Install] Handlebar Phone Mount, Compatible with iPhone, Samsung, All Cell Phone](https://m.media-amazon.com/images/I/5113ZNM8R8L._SL500_.jpg)


