Mike's Bike

VMAX  Forum

Help Support VMAX Forum:

This site may earn a commission from merchant affiliate links, including eBay, Amazon, and others.

[email protected]

Well-Known Member
Joined
Jun 15, 2008
Messages
6,515
Reaction score
242
Location
Pittsburgh, PA
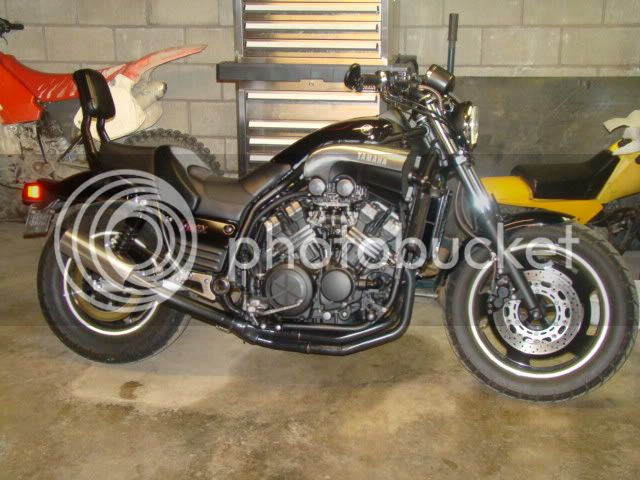
I bought my bike in July of '08. It was completely stock other then the additon of leads for a battery tender. It looked like this:
06_VMAX_blk_1.jpg


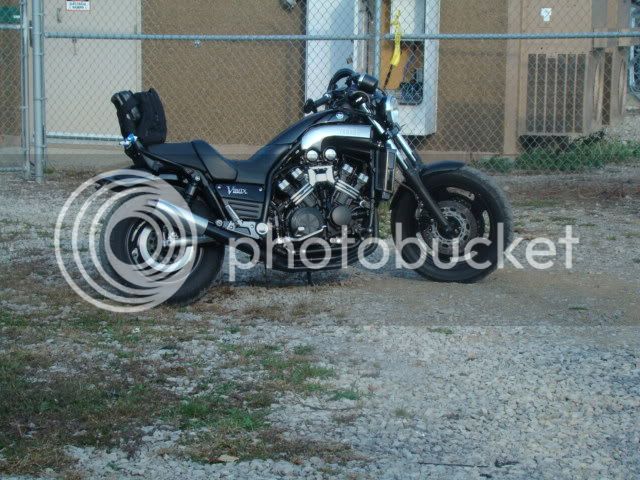
Shortly after I installed a sissybar, I blacked out the radiator accents and reflectors, put in a COO pop stopper kit, Marks exhaust, COO frame sliders, and a Muscle jet kit and muscle seat. It looked like this:
picture.php


I didn't do too much from '09-'10. I changed the shocks out to progressive 440's, added bar end mirrors, sold the marks exhaust and put on a old style hindle 4-1. Looked like this:
DSC04648.jpg


Shortly after I made my own tail light

DSC05475.jpg


This winter I decided to go for a extended, braced swingarm, USD, radials, custom triples, busa forks, etc... Pics to follow.
 
For the USD triples, I decided to contact Billet Bike Bits in the UK. I sent Roy a couple emails about what I was looking for. I am planning to use a set of USD forks from a '08 Busa for the conversion. Roy had not done a triple for these forks so we exhanged some emails regarding fork tube OD and centerline measurements. I decided to go with a set of "thug" style triples that have a built in 2" drop and I also ordered a set of 2" fork extensions.

The '08 busa forks are approx 715mm or 28.15" from the top of the fork cap to the C/L of the axle.

Vmax forks are approx 863.36mm or 34".

Having the 2" drop in the triples, plus the 2" drop from the extensions brings the fork length close to 2" less than the stock dimensions.

After receiving the triples I put the on the bike to mock everythign up and they fit great.

Here are some pics of the triples I received.
 

Attachments

  • DSC06120.jpg
    DSC06120.jpg
    26.5 KB
  • DSC06121.jpg
    DSC06121.jpg
    27.3 KB
  • DSC06122.jpg
    DSC06122.jpg
    25.5 KB
  • DSC06123.jpg
    DSC06123.jpg
    19.9 KB
  • DSC06124.jpg
    DSC06124.jpg
    19.9 KB
  • DSC06126.jpg
    DSC06126.jpg
    34 KB
  • DSC06127.jpg
    DSC06127.jpg
    33.6 KB
  • DSC06119.jpg
    DSC06119.jpg
    29.2 KB
After mocking everything up and taking a look at the parts and realizing that I do not want to have to polish the triples I decided to anodize the triples black and have the fork tubes chromed.

Sean Morley is handling the chrome. When I sent the forks out to be chromed I figured I should have them resprung and revalved for my and the bikes weight.

Lindemann engineering is handling the fork work. Ed Sorbo is now handling all the suspension work. Apparantly Jim is no longer part of the picture. Ed ended up putting 1.0 springs in the forks. He says if I need to swap I can just send the back and he will exhange them for me, no problem.

Here are a couple pics of the mockup with the triples still in raw aluminum and of the fork chrome.
 

Attachments

  • 2011-03-14_21-36-34_716.jpg
    2011-03-14_21-36-34_716.jpg
    45.3 KB
  • Baker fork.jpg
    Baker fork.jpg
    25.7 KB
I worked with Sean Morley to make me a braced, extended swingarm. He did not notch the arm though. He built the arm to be offset to the left. The thinking behind this is that when I buy an aftermarket rim it should be pretty damn close to being centered in the bike instead of offset to the right as they usually are.

I worked with Tom @ COO to build me a rear wheel to fit the swingarm. Sean sent the arm directly to COO. I mocked everything up but found an issue with the wheel. I have since sent the wheel back to Tom and he is making me a new one. The new one will hopefully come from a '08+ GSXR 600 or 750 so it matches the front a little better.

Here are a couple pics of the rear wheel/swingarm mockup.
 

Attachments

  • 2011-05-18_00-28-22_812.jpg
    2011-05-18_00-28-22_812.jpg
    39.9 KB
  • 2011-05-18_00-33-03_664.jpg
    2011-05-18_00-33-03_664.jpg
    35.7 KB
  • 2011-05-18_00-32-47_874.jpg
    2011-05-18_00-32-47_874.jpg
    39.1 KB
  • 2011-05-18_00-30-44_15.jpg
    2011-05-18_00-30-44_15.jpg
    33.8 KB
  • 2011-05-18_00-28-46_937.jpg
    2011-05-18_00-28-46_937.jpg
    31.6 KB
  • 2011-05-18_00-27-34_987.jpg
    2011-05-18_00-27-34_987.jpg
    43.6 KB
When I was getting the arm extended/braced, I talked to Sean about expanding the fuel tank. He said he had never done one before but was willing to give it a go. He discussed his plan with me and I liked the idea. He basically cut the back side off the tank, welded in a 3" extension, and welded the back side back on. Turned out pretty good. He said it should add at least 1 gallon.

I've been slacking on my bike work. Its been sitting in a box since he gave it to me. I need to get out and paint the thing.
 

Attachments

  • DSC06330.jpg
    DSC06330.jpg
    35 KB
  • DSC06331.jpg
    DSC06331.jpg
    37.3 KB
  • DSC06332.jpg
    DSC06332.jpg
    38.8 KB
  • DSC06333.jpg
    DSC06333.jpg
    43.9 KB
For the front brakes I will be using the stock busa calipers and rotors. I picked up some EBC pads, an accossato master, and galfer lines (free with purchase of the master!) from Sean.

Not sure what I'm going to do with the rear brakes. I may run a rotor adaptor and put one of my old front vmax rotors on there and use one of jedi's adaptors. If not, maybe I will use a suzuki rotor and come up with some kind of special caliper bracket.

Other than that, my next goal is to figure out what to do with the gauges. I see no possible way to make the OEM speedo drive to work on this busa wheel. I will have to go to an electric speedo. There are options out there but the one that I really like (damn you KJ) is the Stack ST700. Nice, but $$.

Still have a long way to go. Still waiting on a wheel. Still need to paint and powdercoat some parts. Hopefully it won't be too much longer but as I have recently found out: It always takes longer and costs more than anticipated.
 
Wow, you've done a lot of Cool Stuff to your bike... Really Nice...:biglaugh:
 
Mike,

I can see that fork legs are mounted "not" in the stock position?
To be specificly - does lower tripple tree is clamped around the narrowing on the leg?
At the smallest diameter of outer tube?
 
Mike,

I can see that fork legs are mounted "not" in the stock position?
To be specificly - does lower tripple tree is clamped around the narrowing on the leg?
At the smallest diameter of outer tube?

I haven't seen the forks in awhile, they are on the way back from being re-valved so I will have to answer your question from memory.

The lower triple does not clamp onto the smallest diameter of the outer tube. It clamps onto the tube just before it transitions from 55mm to 50mm. Right where the upper bushing is. Easier to show a picture than explain, see my attached drawing. Hopefully you can see what I am trying to say. I not very good at drawing :biglaugh:

Also, I have attached a picture of the OEM triple setup for reference. The OEM lower triple attached to the leg a few inches below the bushing.

I remember your post mentioning that the triple should not clamp in this area because it may distort the bushing. I am hoping that since these triples have such a large clamping surface it will spread the force out over the fork tube and not damage the bushing. I guess time will tell....
 

Attachments

  • 2011-02-04_15-54-41_536.jpg
    2011-02-04_15-54-41_536.jpg
    56.8 KB
  • Lower triple attach point.pdf
    168 KB
Looks pretty cool, can't wait to see some finished product pictures. What drove you from the Mark's to the older style Hindle. I ask because I just acquired a ceramic coated old style Hindle that I plan to get on in short order. It's rare on here, I think, to see Mark's pipes go on and them end up off.
 
Looks pretty cool, can't wait to see some finished product pictures. What drove you from the Mark's to the older style Hindle. I ask because I just acquired a ceramic coated old style Hindle that I plan to get on in short order. It's rare on here, I think, to see Mark's pipes go on and them end up off.

I got involved with this and needed money to fund the project so I sold some parts. After awhile of no news on the project I was really looking to ride and Sean helped me out with a loaner.
 
Wow, that's taking quite a while. Should be a sweet kit when it's finished. That makes sense though. How does the Hindle compare with the Mark's pipes?
 
Wow, that's taking quite a while. Should be a sweet kit when it's finished. That makes sense though. How does the Hindle compare with the Mark's pipes?

I couldn't tell a difference in performance. Sound wise, I prefer the Marks. Looks are subjective to taste. The hindle was a breeze to install. Takes a lot of springs to hold it all together. Mine didn't come with any so I just bought some SS springs in bulk, cut to length, and bent some hooks.
 
Yea, I have a feeling that I might not like the sound as much as even my open capped Super-trapps, but I am looking forward to the extra ponies. It does look to be incredibly easy to install. Stock rear heat shields are the only thing standing between me and running the Hindle already... gotta drill some impossibly stuck and stripped bolts. Somebody before me had this thing out in the salt at some point, way too much corrosion on this stuff.
 
I haven't seen the forks in awhile, they are on the way back from being re-valved so I will have to answer your question from memory.

The lower triple does not clamp onto the smallest diameter of the outer tube. It clamps onto the tube just before it transitions from 55mm to 50mm. Right where the upper bushing is. Easier to show a picture than explain, see my attached drawing. Hopefully you can see what I am trying to say. I not very good at drawing :biglaugh:

Also, I have attached a picture of the OEM triple setup for reference. The OEM lower triple attached to the leg a few inches below the bushing.

I remember your post mentioning that the triple should not clamp in this area because it may distort the bushing. I am hoping that since these triples have such a large clamping surface it will spread the force out over the fork tube and not damage the bushing. I guess time will tell....

Well, You could verify that by tourself - clamp your lower triple where it should be, on disassembled leg, without anyhing inside. Next, try to push inner tube - you should not feel any hesitation - it should go into extremally smothly.
If you will feel hesitation the result will occur with excessive wear on the bushing.

Most scooters, even big ones like Burgman runs without upper tripple - they showing how imprtant the lower tripple is.

In most KYB 43 inverted forks(all are machined very simialar) the place where lower tipple is clamped is the thickest piece of the fork leg - about 4mm thick wall. At the highest part of outer tube, where the lower tripple is clamped wall is thiner - about 2-3mm or so.
At the place where OD changes from 55mm(54mm in my case) to 50mm wall is at simillar stage - something like 2-3 mm.
Some can ask why the OD is changing? To drop some more weight as its very important in modern sport bikes.
If you will not clamp the lower tripple at the thickest part(close to the stock place) the result may suprise you. You may experiencing much more flexibility at the ouiter tubes - they may even broke in some dramatic situations.
Personally I would never run with the setup like this - but that's me.

I bealive you know what you are doing - Im just throwing my 2 cents.
 
Back
Top