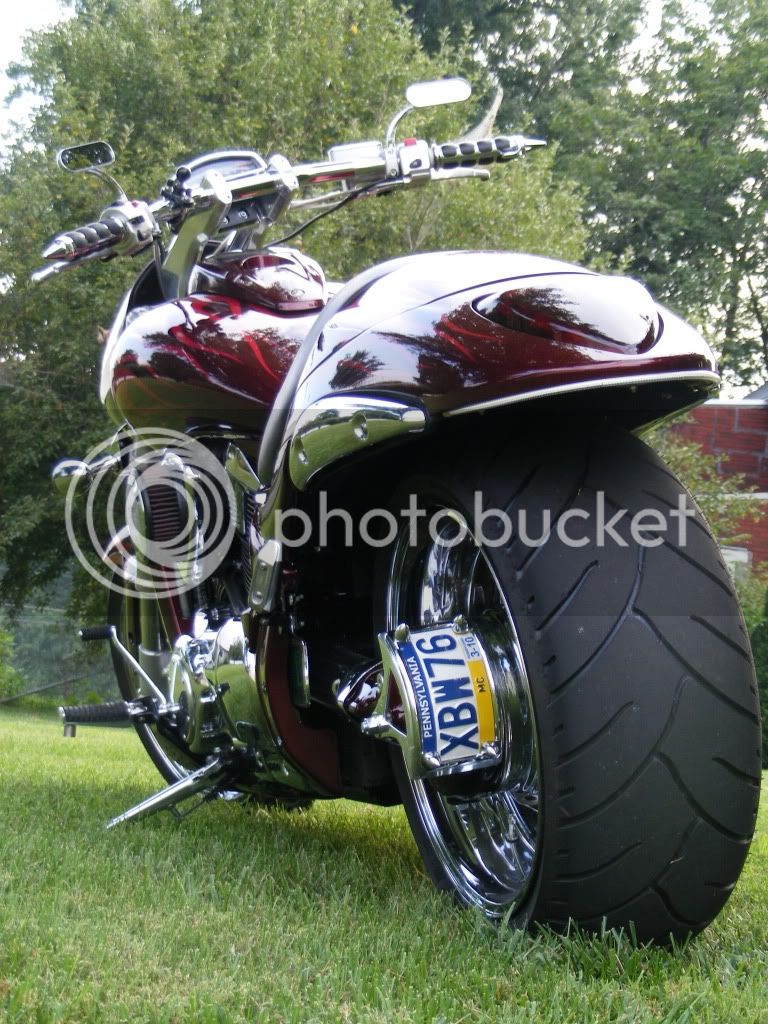
Mounting a 200/50R18 rear tire on a Gen1

VMAX  Forum

Help Support VMAX Forum:

This site may earn a commission from merchant affiliate links, including eBay, Amazon, and others.
One more tip:
Again, with lowered bikes, the front part of the fender
(the indent where the seat latches are located)
will contact the tire.
This can be resolved by trimming out the indent,
or just letting the tire do that for you...
(the plastic from the fender will not hurt the tire at all,
& the 'trimming' happens pretty quickly...)

Again, hope this helps.
 
I'm surprised as well you somehow got the tire past the pumpkin without taking it off

-garrett
 
A 200 IS work to get into a stock swingarm, particularly with lowered shocks...Requires the spacer moved from right to left side, & the fender shifted right to clear as well...

A couple of things to comment on/clear up here:

The clip on the cushdrive does NOT need to be removed to put the washer in between the wheel & the drive...& it's usually a tight fit anyway, so I can't imagine it could/would slide off when removing the wheel...
Tip: With a wide tire, I always install the rear & the wheel/tire together...Slides right in, & I use the axle-slid in from the left side-to keep everything in alignment while I'm getting it in place...

Tracking: I have had 2 diff VMAXers do 'alignments' on their MAXes, & both reported ~10mm offset to the left on a stock bike...Moving the washer (& the offset built into the wheel) brings the tracking CLOSER to 'spot-on', rather than farther out...
(BTW, Anyone who tells you their aftermarket VMAX rear wheels have no offset, either doesn't know, or is just lying...There is no 'free lunch' on this one...)
The fender, however, particularly on a lowered bike, does have to be shifted to the right to clear...There is some play in the mounting, & this 'adjustment' is not noticable when shifted...

Hope this helps
Thank you John, I don't mind tweaking things as long as it will work. As I said earlier, everything you've said so far has been spot-on and has worked perfectly, so I'm sure this will too. More photos later today as I finish this up. :biglaugh:
 
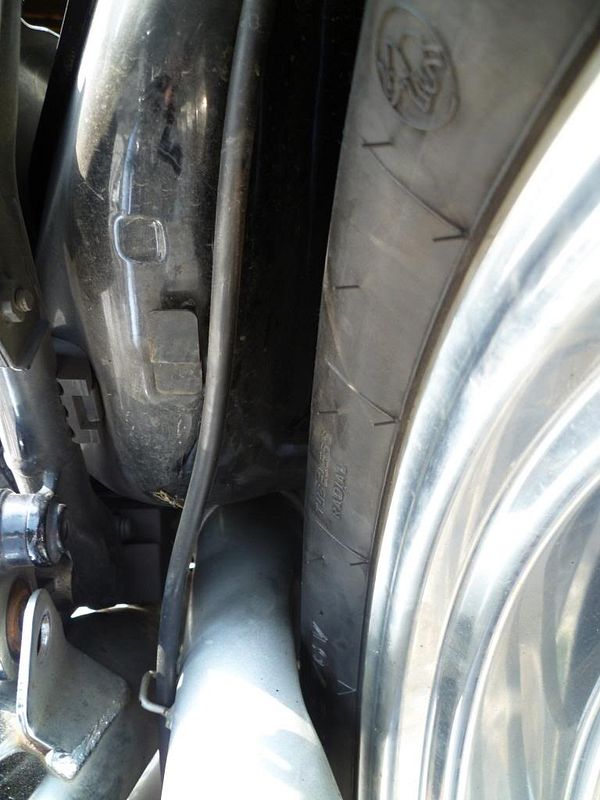
Something else I just noticed in the pics...

With a wide tire like this, & lowered as well,
I would suggest removing the plastic inner fender
(screwed/clipped to the gas tank)
I was thinking about doing this. I'll do so when I pull the wheel to add the washer on the left.

One more tip:
Again, with lowered bikes, the front part of the fender
(the indent where the seat latches are located)
will contact the tire.
This can be resolved by trimming out the indent,
or just letting the tire do that for you...
(the plastic from the fender will not hurt the tire at all,
& the 'trimming' happens pretty quickly...)


Again, hope this helps.
Yes, I saw that too and presumed that it would wear away quickly.


I'm surprised as well you somehow got the tire past the pumpkin without taking it off

-garrett
As I said, I'm also an M109R owner. There are lots of threads about mounting various tires on that bike. With a 10" rim and a 280, on that bike, one must let the air out of the tire and squeeze it past the pumpkin. It just seemed like common sense to try this on the VMax with the 200. It would never have worked with air in the tire.

Yesterday took about 3 hours in total (including a trip to Yamaha for Blue Permatex and that rotor bolt.) I don't think that's a huge amount of time/effort to do this. Yes, there have been some frustrating parts, and I have an hour or so left to get it tweaked, but overall I think this mod is not prohibitively difficult.

I will still probably return to a 180 next time, but if you are looking for the fattest look possible, I don't think this is an impossible mod. It's a lot easier than mounting a 300 on an M109R which requires a notched or aftermarket swingarm and cutting the inner fender, as well as shimming to the right.

Overall, this bike is much easier to work on. And John is a great guy and an invaluable resource.
 
OK, the battle continues.

So far, the washer swap did not work. Not nearly enough room.

There are 3 washers.

1) The washer that goes between the wheel bearing and the brake bracket. It is 8.98 MM (0.366 in)
2) The washer that used to go between the brake caliper bracket and the swingarm. It is 2.89 MM (0.114 in)
3) The washer that goes between the axle nut and the swingarm. It is 2.09 MM (0.082 in.)

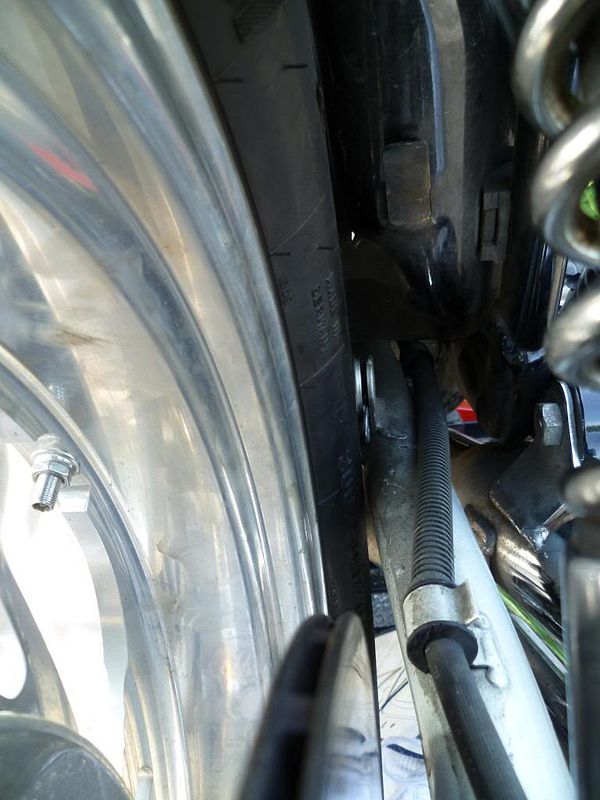
I tried washer # 2 in between the drive and the cush drive. It was still tight against the left side of the swingarm. So, I tried washer 1. Here are the photos:

There is clearance on both sides!

2013-09-08103025_zps019bfe78.jpg


2013-09-08103035_zps2baf76fa.jpg


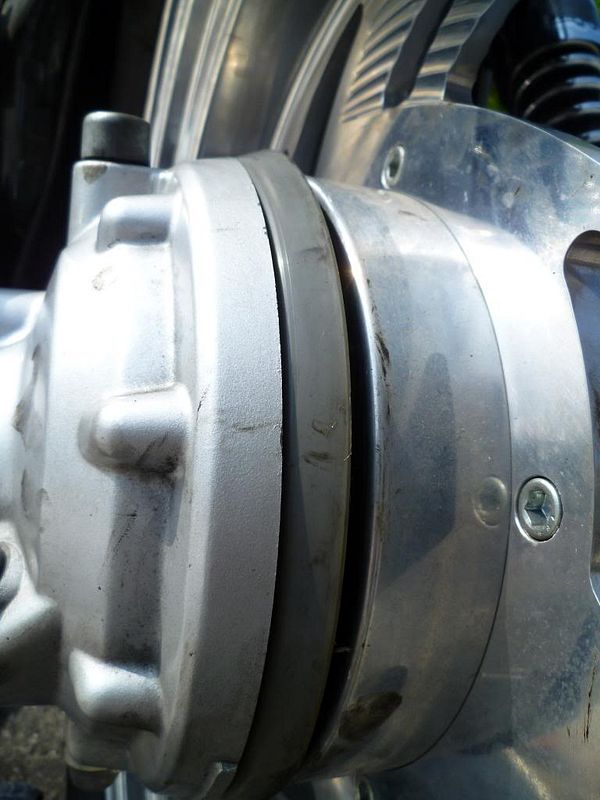
Yes, it's TIGHT! But, there's a problem...

2013-09-08103050_zpsccc2e1e3.jpg

I can't get the wheel over far enough to close the opening between the rear and the wheel. Not good.

I also tried washer #2 and #3 together, but I am still working on that configuration. I don't think it will work either.

I HAVE NOT GIVEN UP YET! If nothing else, I am STUBBORN! I believe John when he says this will work, so I am headed out to try some more.

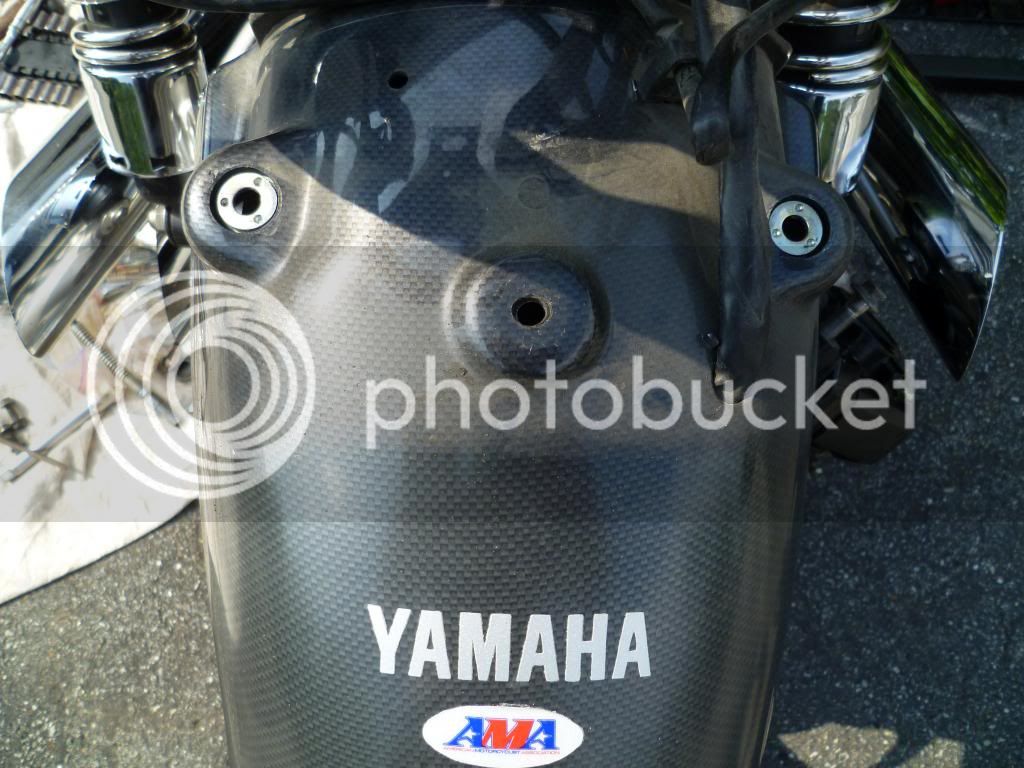
Oh, additionally, I moved the fender over to the right. I removed the 3 bolts that hold it on, and I elongated the center hole a bit since it seemed to be keeping it from sliding further to the right. Once again, I will see when I get it back together if it's enough.

2013-09-08095621_zps126f2538.jpg


I think this is the least of my worries. The front edges of the rear fender need to be moved outward I believe. More photos coming later in the day!
 
I admire your perseverance that's for sure.

My 200 would never have fit without the notched swing arm. That's with me using an RC wheel which is what your wheel appears to be as well.
 
:bang head: Well, I am close to admitting defeat. As some of you may realize, using washers 2 & 3 cannot work, because the inside diameter of Washer #3 only allows the threaded part of the axle to go through. :bang head:

If I could JUST get the wheel to seat with Washer #1 on the left side it would fit!!! But I can't. I'm hoping John makes another appearance and tells me where I am going wrong because I am about to give up on this. :frown::frown:

Just in case I decide to go that route, can someone point me to a thread or other information concerning the notched swingarm? Is there someone who does a core exchange?

Though I don't think it will work, have you tried this?
Its what I have to do to ease installation on mine.

Loosen the four pumpkin cap bolts that attach it to the swingarm, as loose as they'll go without disengaging the pumpkin or driveshaft. This lets the pumpkin move and or swing enough to squeeze it in there (For me at least)

When I do mine I let all the air out, grease the edges of anywhere its going to touch on the way in, and use a rubber mallet to beat the tire in place.

I have considered removing or trimming that plastic ring on the pumpkin but haven't done it yet....

I really like you wheels by the way...
 
Last edited:
Thanks Rusty. The problem is not getting the tire past the rear, it's getting it shimmed right enough to clear the swingarm. When I do, it leaves the splines/cush drive exposed where they will likely sling grease. See the third photo in post 26.

I think I am a reasonably good mechanic. I used to turn wrench for a living. I work on all of my bikes. I gave this more than a fair shake, including 3 hours today rather than celebrating my birthday with my girlfriend. (I'm doing something about that now!)

I have to give up and admit defeat. I have to admit that it can't be done without notching the swingarm on the left. I took it off the jack and pushed it inside. I'm asking John to trade me the 200 for a 180/60R18. I don't need it to be a fat rear - I have my M109R for that!

DSCF0085.jpg


I guess I'll be riding my "9" for a few days. I'll update this, probably in about 12 or 13 days after I get the 180 mounted (sooner if I manage to get it mounted sooner.)

Thank you to everyone who has offered advice or commented on the thread. I appreciate the camaraderie!

Pete
 
Though I don't think it will work, have you tried this; Its what i have to do to ease installation on mine.

Loosen the four pumpkin cap bolts that attach it to the swingarm, as loose as they'll go without disengaging the pumkin or driveshaft. This lets the pumpkin move and or swing enough to squeeze it in there.

When I do mine I let all the air out, grease the edges of anywhere its going to touch on the way in, and use a rubber mallet to beath the tire in place.

I have considered removing or trimming that plastic ring on the pumkin but haven't done it yet....

I really like the wheels by the way...


Rudy,what size tire are you running?
 
Cool.imgonns try the partial pumpkin drop later today. I can not get my 190/50-17 past the pumpkin or out far enough for the splines to clear with it fully bolted.

I hope you can get your stuff figured out,Pete.
 
Did you put a 200 on a 6" or 5.5" rim?

On a 5.5 I decided to go for 180/55 instead of 190/50 despite that the clearance offered by the modified swingarm I have.

The 190 is good on 6" but is at the limit of recommended tires for 5.5".

Sent from my GT-I9100 using Tapatalk 2
 
After checking on Google, it looks like RC wheels are usually 5.5" for the rear and 3.5" for the front but I could be wrong.
 
Back
Top