bikedave99
Well-Known Member
Alright, this will be a little pictorial in how I tore down the front end of my 1989 Vmax and removed and replaced the steering head bearing. Now, I didn't have any of the typical high and low speed wobbles that I could tell. This could be because my bearings were so bad that they kind of sat in a groove at dead center and didn't want to leave. Once I got the front wheel off of the ground i realized how bad it really was. I have the front wheel off already:
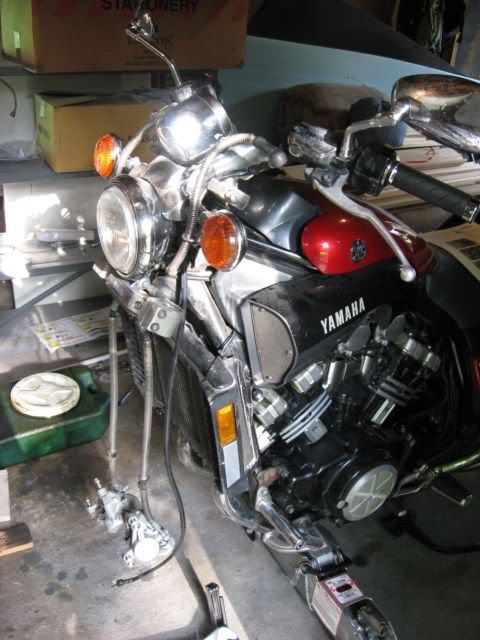
First remove the headlight lens and housing, just two screws on the sides, pull the bottom out and down:
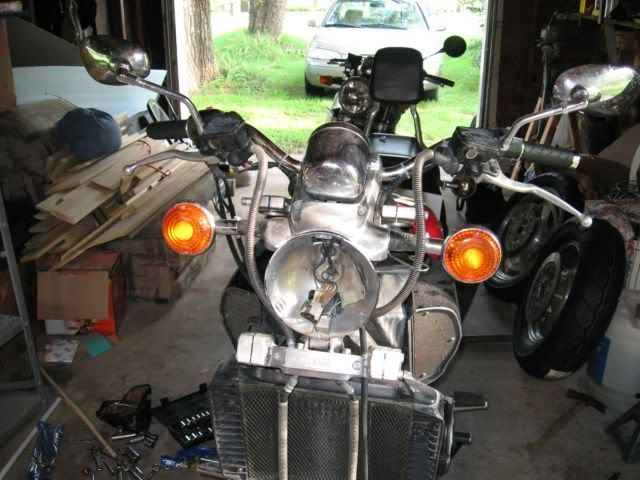
Then pull out the headlight bucket after pulling all the wire disconnects and pushing the wires through the holes in the back of the bucket:
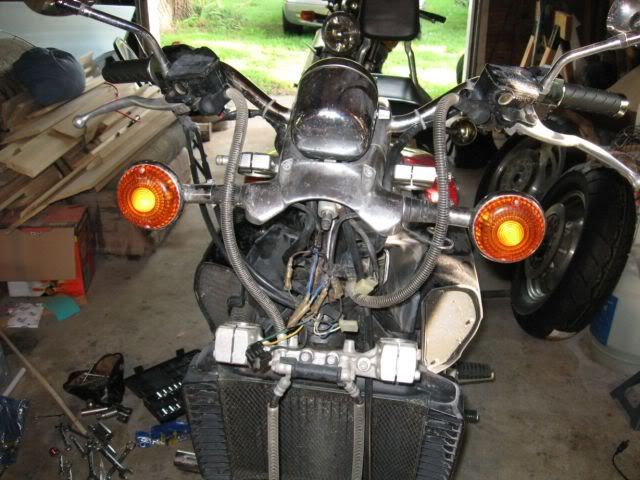
Unbolt the turn signal bracket and pull that off:
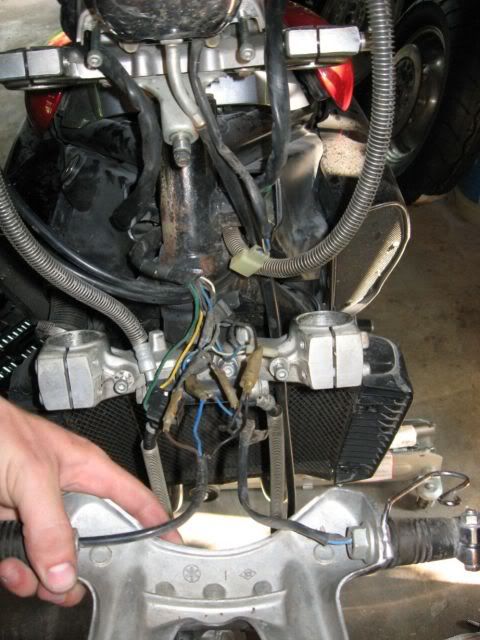
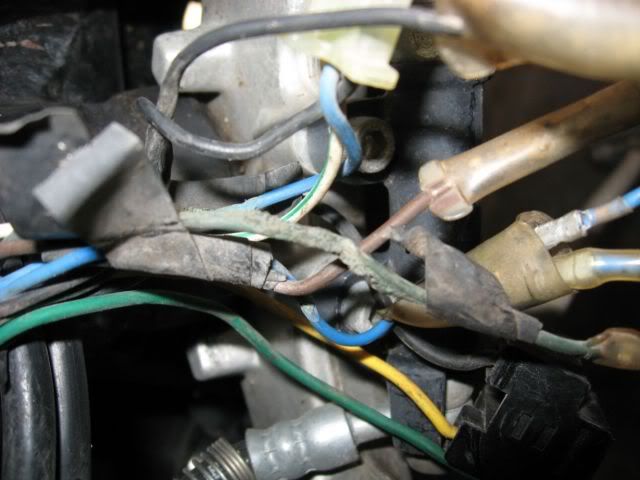
Inspect your wiring, you might find what I did need to make some repairs:
Here is what she looks like now from the front:
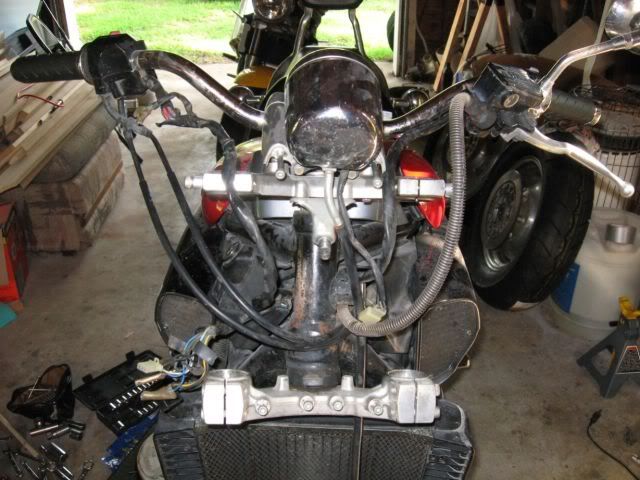
Next pull the controls off of the handlebars and drape them back over the "tank" and seat. The entire front brake system can be pulled off and set out of the way. Unbolt the handlebar bracket from the bottom and pull of the handlebars. You may have to do this first actually in order to wiggle all the controls off the ends of the bars. There is no need to actually remove the bars from the bracket. And you are left with this:
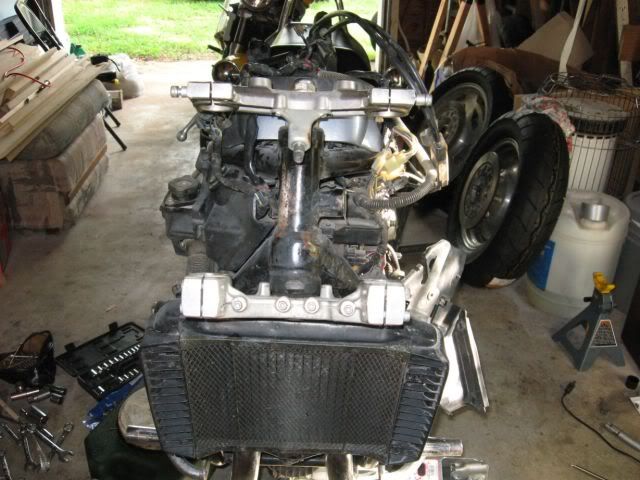
and this:
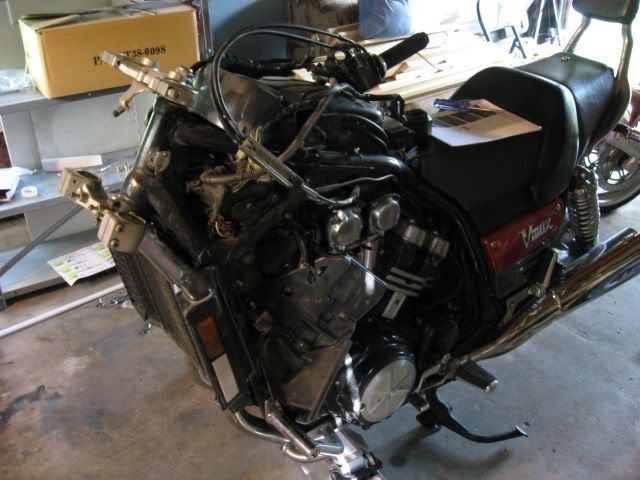
Ok, now its time to get deeper, crack loose that big nut on top of the upper triple tree and remove it and the washer beneath it. Always remember to keep track of the order you remove things, take pictures if you can. Sometime the most frustrating thing is trying to figure out where you are supposed to route that darn hydraulic line, or the throttle cable: Here is the nut off:
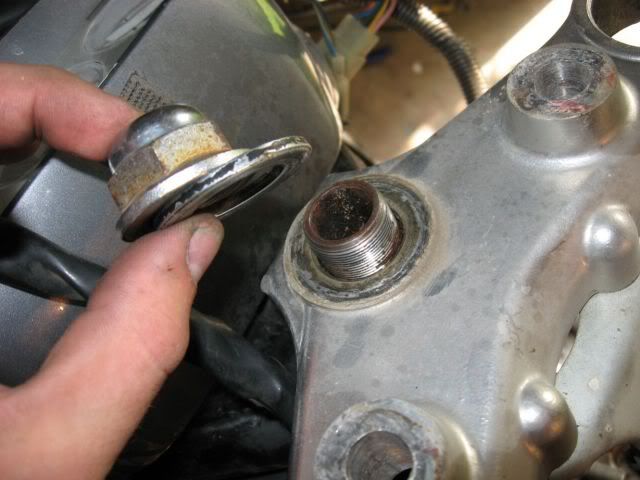
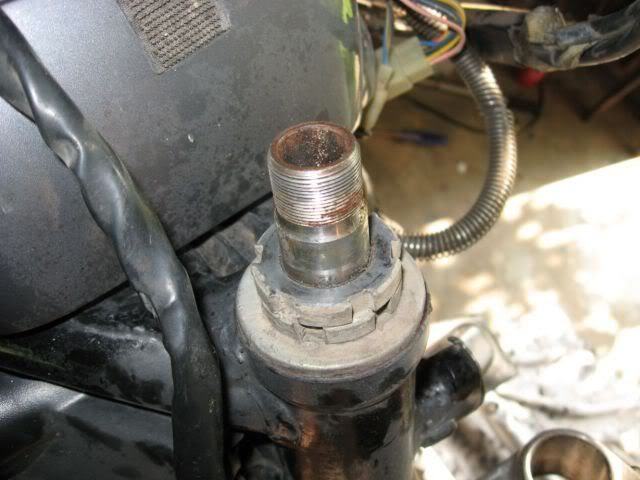
The upper triple tree will just lift off now exposing a little more of the stem, the alignment washer, another washer, and those two round, notched nuts. Unfortunately for me I got this far and realized someone before me decided that the alignment washer and other washer weren't necessary and took them off. Maybe that is why my steering head bearings were shot and my steering head was so notchy! Here it is:
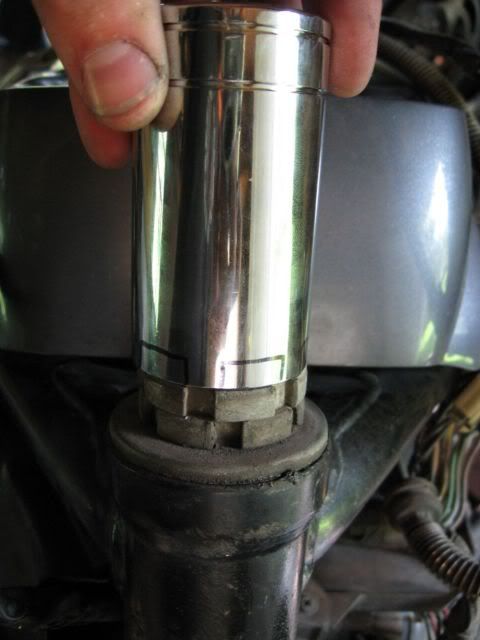
Now how are we going to get those nuts off? Easy! With a channel locks! Not really though, getting off is easy, its getting them back on to the correct torque which is more demanding of special tooling. You can either plan ahead and buy the tool from Yamaha for who knows how much money, or you can do like I did. Go out and buy a cheap deepwell socket with an exterior diameter of 1-9/16", and a inside depth clearance of 2". (I got mine at atwoods for $5) Then set it on top of those nuts, and mark it with a sharpie like so:
I then bolted it to a short piece of unistrut that I had sitting around because I don't have a vice to clamp it in:
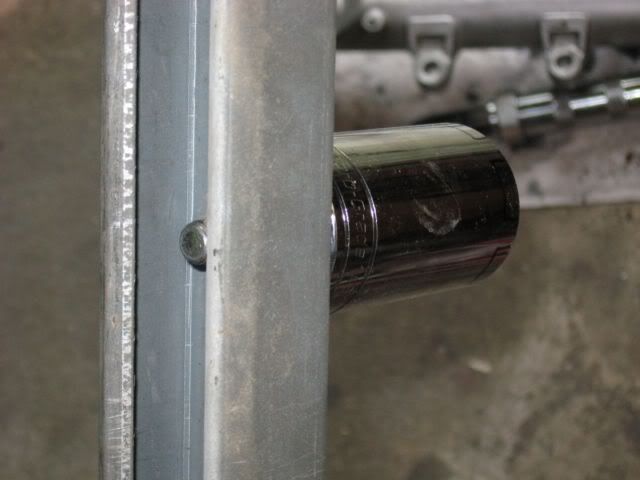
Now I could stand on the unistrut and grind away to my hearts content. BTW, I didn't have an angle grinder so while at Autozone I grabbed this little 4" dude. Pretty tough little grinder, came with a wheel and extra brushes to rebuild it! All for the Milwaukee price of $9.99 plus tax. Not bad, so I made the tool for $15 and got an angle grinder out of it, not bad. Oh, and not a word about the steel toes, I've got safety glasses on.
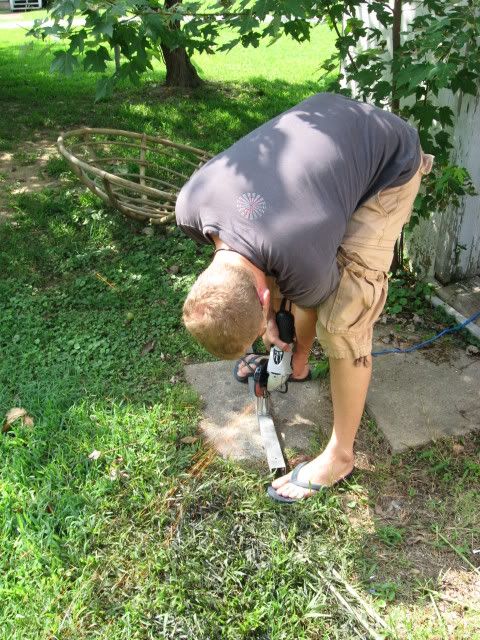
Here she is, about to pull off those two top nuts. Be sure to support the bottom when you get the last nut as it may fall out:
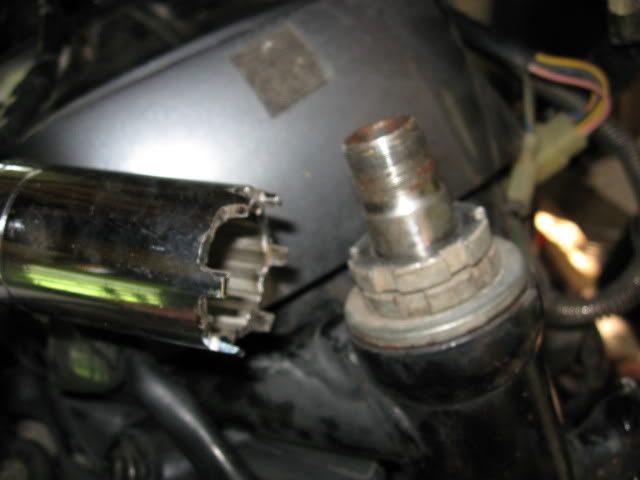
This is what will drop out the bottom:
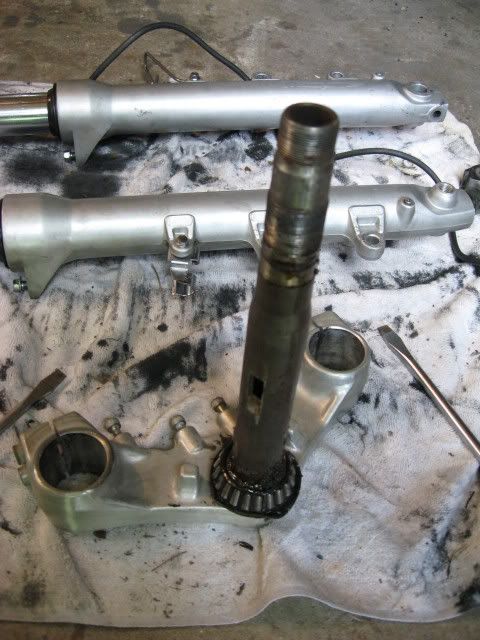
And this is what you will see on top (well, hopefully not this bad):
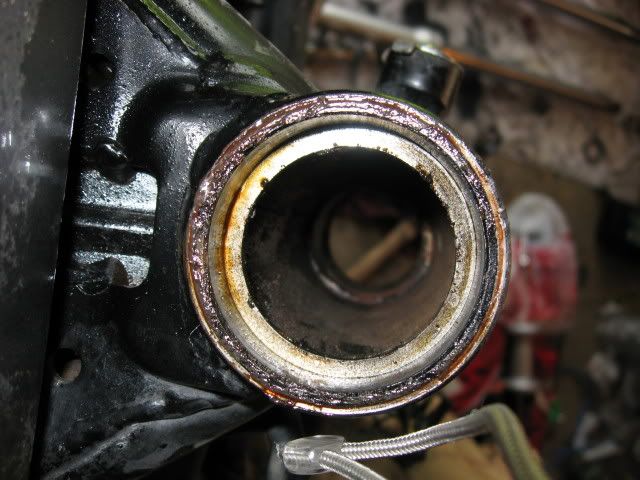
As you can see the bearings come out easy but the races stay in there nicely. For the top race, i sprayed some PB Blaster on it and let that soak in. Then I pounded it out with a punch from the bottom, working my way around the race in a circular manner until it came free. Not too bad I thought. Check my bearings and races, don't let yours get this far. Disclaimer: bike is new to me!
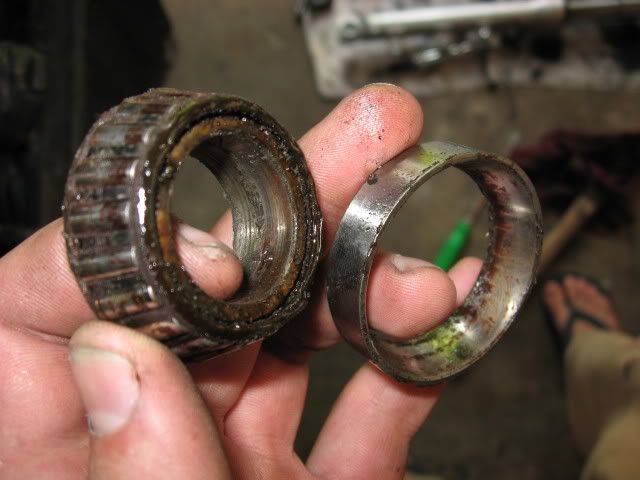
The bottom race is a different story. It refused to come out using the punch method. So, I decided go ahead with the Dremel. Now, I read where someone used a diamond cutting wheel. I was going to run to Lowes and get some when I figured I would try the little grinding wheels that I had. Worked pretty good:
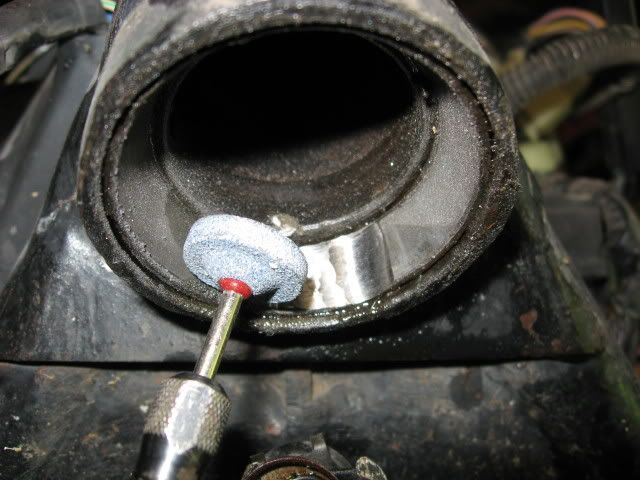
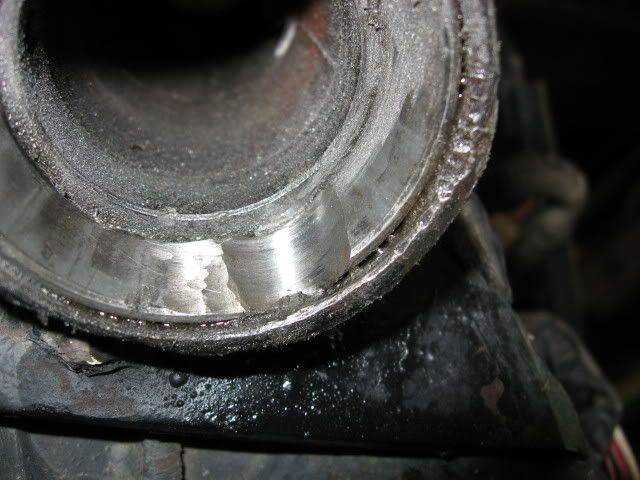
Once I had ground it down far enough I could pry on it with a screwdriver and it broke and dropped out. More frustrating however, was the inner race stuffed onto the stem. The first idea I had was to heat up the stem and bearing with my heat gun and then dip the stem into ice water so that the contraction would loosen it up:
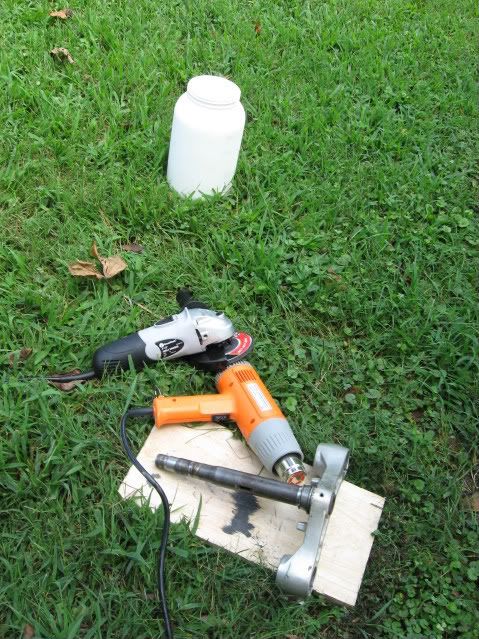
As you can see I had already managed to rip off the rollers and the outer band of the bearing. The method above didn't actually work, so I just took to pounding on it with a punch and hammer and eventually it did work itself free and I got it off.
Everything went back on in the reverse order. I didn't have a bearing installation tool to use for putting the bearing back in, which is almost as big as a pain. I don't know what the best method is but I cleaned up the bearing recesses, greased them lightly, then pressed in new bearing races using a block of wood and light hammer blows in a circular pattern to make sure it was going in straight. Once I got the races installed, I installed the bearing on the stem by tapping it down slowing and gently. Everything seated nicely when I did the 36lb torque on the notched nuts. When I backed them back off to 2lbs it was silky smooth and nice and light.

First remove the headlight lens and housing, just two screws on the sides, pull the bottom out and down:

Then pull out the headlight bucket after pulling all the wire disconnects and pushing the wires through the holes in the back of the bucket:

Unbolt the turn signal bracket and pull that off:

Inspect your wiring, you might find what I did need to make some repairs:

Here is what she looks like now from the front:

Next pull the controls off of the handlebars and drape them back over the "tank" and seat. The entire front brake system can be pulled off and set out of the way. Unbolt the handlebar bracket from the bottom and pull of the handlebars. You may have to do this first actually in order to wiggle all the controls off the ends of the bars. There is no need to actually remove the bars from the bracket. And you are left with this:

and this:

Ok, now its time to get deeper, crack loose that big nut on top of the upper triple tree and remove it and the washer beneath it. Always remember to keep track of the order you remove things, take pictures if you can. Sometime the most frustrating thing is trying to figure out where you are supposed to route that darn hydraulic line, or the throttle cable: Here is the nut off:

The upper triple tree will just lift off now exposing a little more of the stem, the alignment washer, another washer, and those two round, notched nuts. Unfortunately for me I got this far and realized someone before me decided that the alignment washer and other washer weren't necessary and took them off. Maybe that is why my steering head bearings were shot and my steering head was so notchy! Here it is:

Now how are we going to get those nuts off? Easy! With a channel locks! Not really though, getting off is easy, its getting them back on to the correct torque which is more demanding of special tooling. You can either plan ahead and buy the tool from Yamaha for who knows how much money, or you can do like I did. Go out and buy a cheap deepwell socket with an exterior diameter of 1-9/16", and a inside depth clearance of 2". (I got mine at atwoods for $5) Then set it on top of those nuts, and mark it with a sharpie like so:

I then bolted it to a short piece of unistrut that I had sitting around because I don't have a vice to clamp it in:

Now I could stand on the unistrut and grind away to my hearts content. BTW, I didn't have an angle grinder so while at Autozone I grabbed this little 4" dude. Pretty tough little grinder, came with a wheel and extra brushes to rebuild it! All for the Milwaukee price of $9.99 plus tax. Not bad, so I made the tool for $15 and got an angle grinder out of it, not bad. Oh, and not a word about the steel toes, I've got safety glasses on.

Here she is, about to pull off those two top nuts. Be sure to support the bottom when you get the last nut as it may fall out:

This is what will drop out the bottom:

And this is what you will see on top (well, hopefully not this bad):

As you can see the bearings come out easy but the races stay in there nicely. For the top race, i sprayed some PB Blaster on it and let that soak in. Then I pounded it out with a punch from the bottom, working my way around the race in a circular manner until it came free. Not too bad I thought. Check my bearings and races, don't let yours get this far. Disclaimer: bike is new to me!

The bottom race is a different story. It refused to come out using the punch method. So, I decided go ahead with the Dremel. Now, I read where someone used a diamond cutting wheel. I was going to run to Lowes and get some when I figured I would try the little grinding wheels that I had. Worked pretty good:


Once I had ground it down far enough I could pry on it with a screwdriver and it broke and dropped out. More frustrating however, was the inner race stuffed onto the stem. The first idea I had was to heat up the stem and bearing with my heat gun and then dip the stem into ice water so that the contraction would loosen it up:

As you can see I had already managed to rip off the rollers and the outer band of the bearing. The method above didn't actually work, so I just took to pounding on it with a punch and hammer and eventually it did work itself free and I got it off.
Everything went back on in the reverse order. I didn't have a bearing installation tool to use for putting the bearing back in, which is almost as big as a pain. I don't know what the best method is but I cleaned up the bearing recesses, greased them lightly, then pressed in new bearing races using a block of wood and light hammer blows in a circular pattern to make sure it was going in straight. Once I got the races installed, I installed the bearing on the stem by tapping it down slowing and gently. Everything seated nicely when I did the 36lb torque on the notched nuts. When I backed them back off to 2lbs it was silky smooth and nice and light.


![Bovemanx Motorcycle Phone Mount Holder, [150mph Wind Anti-Shake][7.2inch Big Phone Friendly] Bike Phone Holder, Motorcycle Handlebar Cell Phone Clamp, Compatible with iPhone 16 Pro Max Smartphones](https://m.media-amazon.com/images/I/51F+1sontPL._SL500_.jpg)


![JOYROOM Motorcycle Phone Mount, [1s Auto Lock][100mph Military Anti-Shake] Bike Phone Holder for Bicycle, [10s Quick Install] Handlebar Phone Mount, Compatible with iPhone, Samsung, All Cell Phone](https://m.media-amazon.com/images/I/5113ZNM8R8L._SL500_.jpg)


![Bike Phone Mount Holder, [Camera Friendly] Motorcycle Phone Mount for Electric Scooter, Mountain, Dirt Bike and Motorcycle - 360° Rotate Suitable for iPhone & Android Smartphones from 4.5-7.0 inches](https://m.media-amazon.com/images/I/51ZirRrsA+L._SL500_.jpg)


